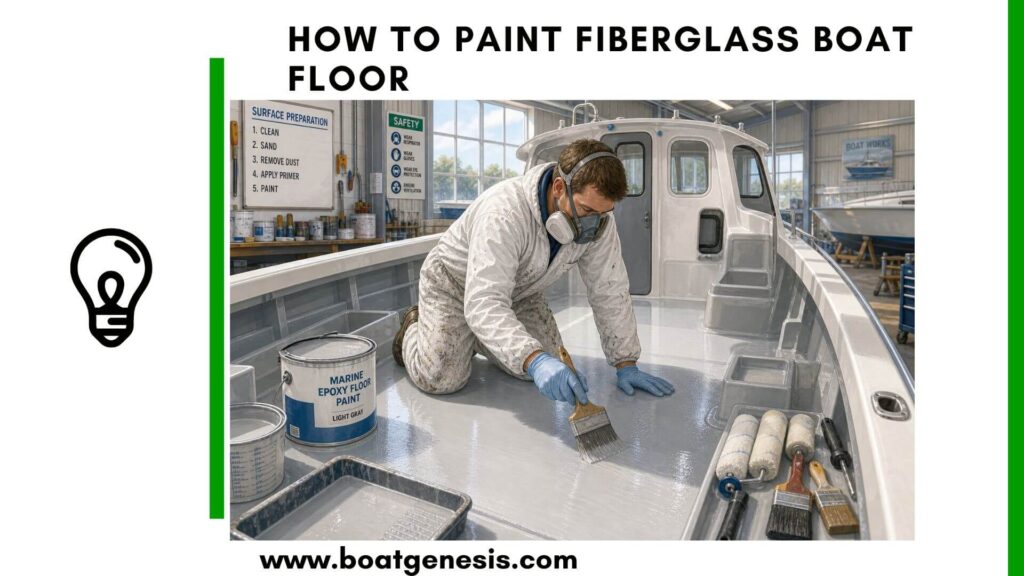
Learning how to paint a fiberglass boat floor is one of the best ways to refresh your boat’s appearance and improve its durability.
Your boat’s fiberglass floor really takes a beating. Between constant foot traffic, water, and harsh sunlight, it’s no wonder the finish fades, cracks, or turns slippery after a while.
Painting a fiberglass boat floor gives you a chance to restore both the look and safety of your vessel.
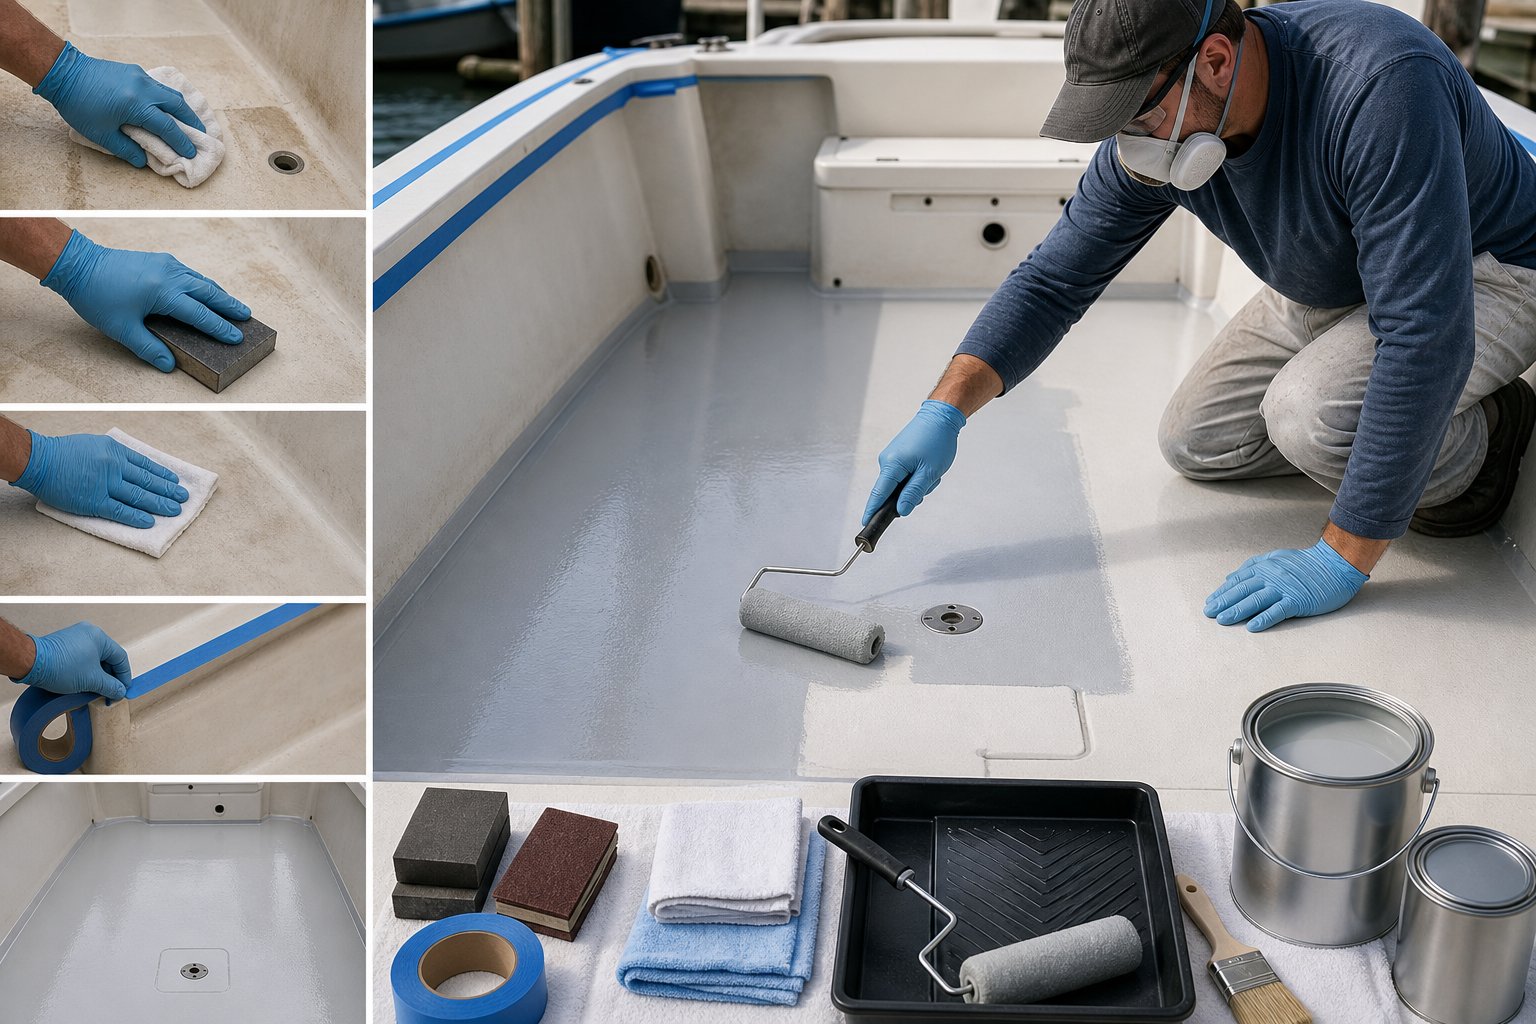
The process involves cleaning and sanding the surface, applying marine-grade primer, adding two to three coats of specialized boat floor paint, and finishing with a non-skid additive for traction. Expect the job to take a few days, since you need to wait for each coat to dry. You don’t need pro-level skills for a solid result—just patience and the right approach.
With the right materials and techniques, you can achieve a durable finish that protects your floor from moisture and wear. Preparation is everything, and using paint designed for boats is non-negotiable. Let’s walk through the process so you can tackle this project with a bit more confidence.
Key Takeaways
- Proper surface prep—cleaning and sanding—makes or breaks paint adhesion and durability
- Marine-grade primers and paints for fiberglass floors give the best defense against water and wear
- Non-skid additives in your last coat are a must for a safer, slip-resistant surface
- Key Takeaways
- Benefits of Painting a Fiberglass Boat Floor
- Common Challenges of Painting Fiberglass
- Types of Marine Paint for Fiberglass Surfaces
- Gathering Paints, Primers, and Additives
- Sanding and Cleaning Essentials
- Masking and Application Supplies
- Cleaning and Degreasing the Floor
- Sanding and Repairing Imperfections
- Masking Off Areas for Protection
- Choosing and Applying Marine Primers
- Best Methods for Painting a Fiberglass Boat
- Sanding Between Coats for Smoothness
- Using Non-Skid Additives and Pre-Mixed Options
- Selecting and Applying Antifouling and Ablative Paints
- Curing and Initial Protection
- Routine Cleaning and Inspection
- Periodic Touch-Ups and Reapplication
Understanding Fiberglass Boat Floors and Paint Options
Fiberglass boat floors need certain paint types and prep methods to handle all that moisture, foot traffic, and sun. The right marine paint protects against wear, adds grip, and looks pretty sharp too.
Benefits of Painting a Fiberglass Boat Floor
Painting your fiberglass boat floor creates a protective barrier against oxidation, saltwater, fuel, and harsh cleaners. A fresh coat of paint can fill in those little scratches and pits that love to collect dirt and moisture.
Paint provides these key advantages:
- Better traction and safety with textured or non-skid finishes
- Much easier cleaning compared to old, bare fiberglass
- Protection from UV rays that cause fading and chalkiness
- Longer floor life by sealing out water
The painting process restores appearance and durability while reducing ongoing maintenance. You’ll spend less time scrubbing and more time out on the water. Paint also covers up stains and discoloration that even the best polish can’t touch once fiberglass ages.
Common Challenges of Painting Fiberglass
Fiberglass is smooth and non-porous, so paint doesn’t stick easily unless you prep it right. You have to sand the floor to give the paint something to grip.
Three big challenges can mess up your paint job:
- Bad prep – Skip cleaning or sanding and you’ll see peeling fast
- Moisture underneath – Water trapped under paint causes blisters and peeling
- Wrong paint choices – Some paints just don’t play nice with what’s already there
The gelcoat layer on fiberglass is different from paint and needs to be totally sanded before you start. Miss a shiny spot and paint will peel there, guaranteed. You also need to wipe off all wax, oil, and mold release with solvent before sanding.
Temperature and humidity matter too. If it’s too cold or damp, the paint might never cure all the way.
Types of Marine Paint for Fiberglass Surfaces
One-part polyurethane is a go-to for DIYers. It dries as the solvent evaporates and gives decent durability with just a brush or roller. Products like Interlux Brightside get the job done without fancy gear.
Two-part polyurethane is tougher and shinier. You mix a base and hardener, and spraying it gives the best results. It’s more durable than one-part, but a bit trickier to apply well.
Marine enamel and acrylic urethane are easier to use and cost less. They’re fine for boats that don’t see a ton of action, but they’ll wear out faster if you have heavy foot traffic.
Want to avoid costly fiberglass boat repair mistakes?
Learn how to inspect damage properly, decide when to DIY, and prevent expensive fiberglass problems before they start.
| Paint Type | Durability | Application Method | Typical Cost |
|---|---|---|---|
| One-part polyurethane | Good | Brush/roller | $ |
| Two-part polyurethane | Excellent | Spray preferred | $$ |
| Marine enamel | Moderate | Brush/roller | $ |
Don’t use antifouling or ablative paint on decks. Those are for underwater and have biocides—not something you want underfoot.
Essential Tools and Materials for a Professional Finish
Getting a good result depends a lot on having the right stuff before you start. You’ll need marine-grade paints, the right sanding materials, and quality brushes and rollers to make the finish last.
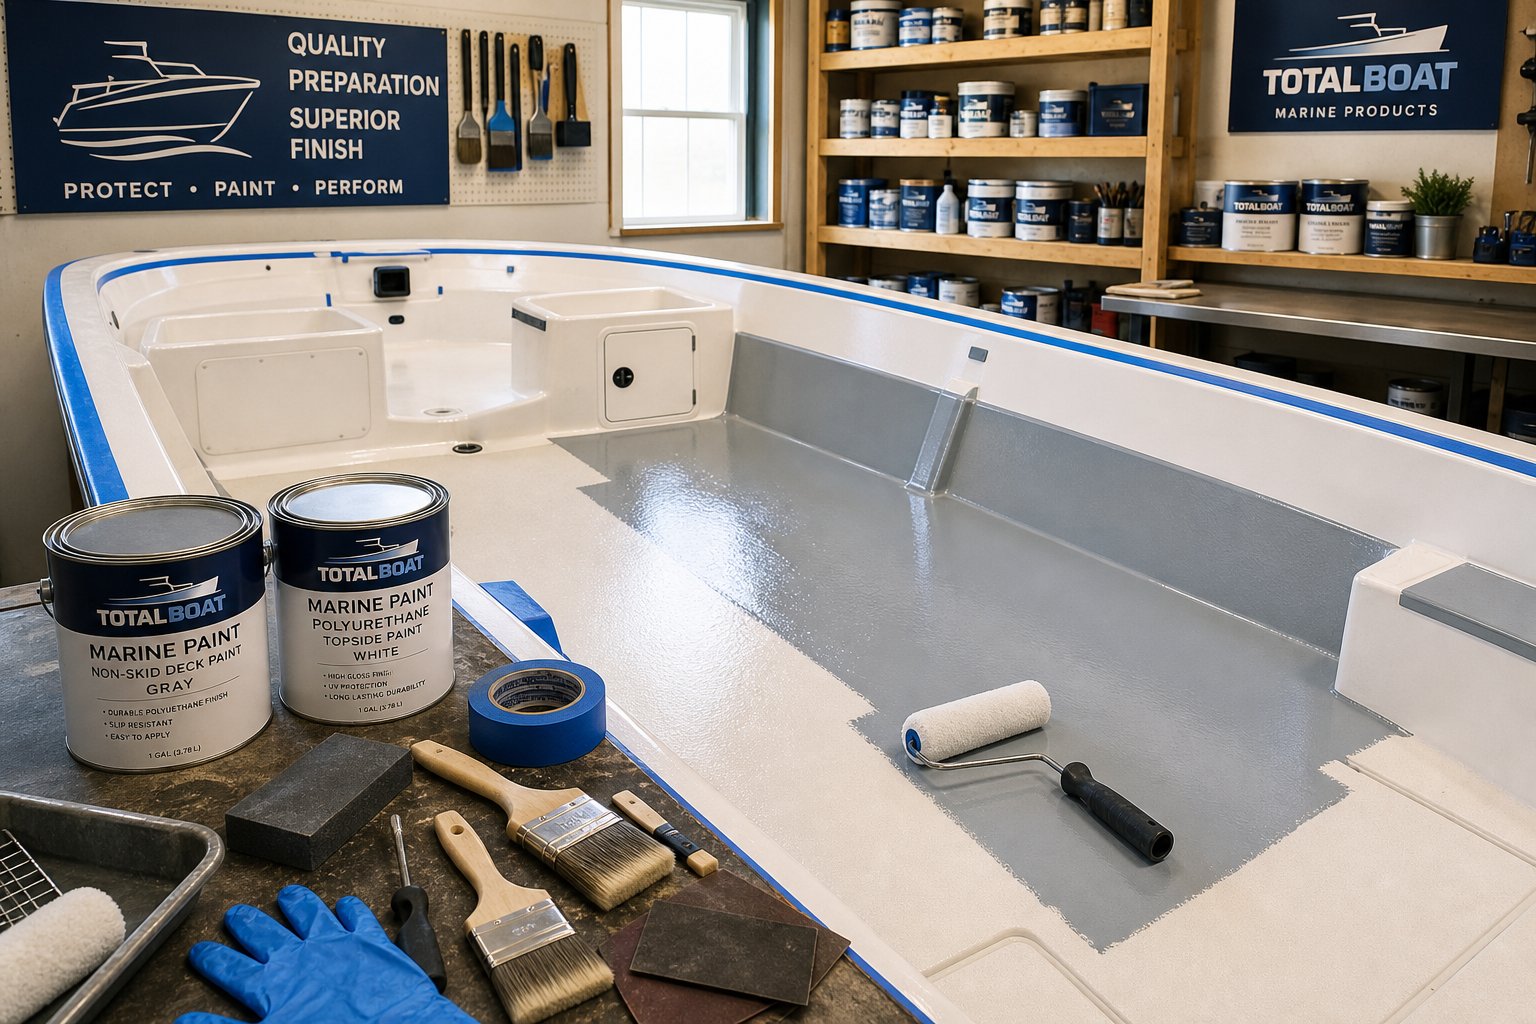
Gathering Paints, Primers, and Additives
Start with a marine primer—it’s what bonds the fiberglass to your topcoat. Marine primers handle water and temperature swings way better than regular ones.
Pick your topcoat: acrylic, polyurethane, or epoxy all work, depending on your budget and how tough you want the floor. Polyurethane stands up to UV and keeps its shine longer.
For safety, you need traction. You can buy non-skid paint with the grit already in it, or just mix non-skid additives into regular marine paint. These additives come in different grits, so you can pick how rough you want the floor to feel.
Figure out how much paint you need by measuring your floor and checking the coverage on the can. Don’t guess—you don’t want to run out halfway through.
Sanding and Cleaning Essentials
Start with 80-grit sandpaper to strip off old paint and rough up the fiberglass. It’s aggressive, but it saves time.
After that, go over everything with 120-grit sandpaper to smooth things out but still leave enough texture for paint to stick.
Once you’re done sanding, clear out all the dust, oil, and grime. Use wax and grease remover—it gets rid of stuff that soap and water miss. Wipe with clean rags, always in one direction.
Finish up with a tack cloth to grab the last bits of dust. That sticky stuff works better than you’d think.
Masking and Application Supplies
Use painter’s tape and plastic sheeting to cover anything you don’t want painted—edges, drains, hardware. Curved tape is handy if your floor has lots of rounded corners.
Grab paint trays that fit your roller. Disposable trays make cleanup way easier. For a smooth finish, go with foam rollers; for extra grip, try textured rollers with your non-skid additive.
Keep a few brushes for corners and tight spots. Natural bristles are good for oil-based paints, synthetics for water-based. It’s not a huge deal, but it helps.
You’ll want plenty of mixing sticks, drop cloths, and clean rags nearby. Trust me, you’ll use more than you expect.
Surface Preparation for Long-Lasting Results
If you want the paint to last, prep is everything. The floor has to be spotless, smooth, and totally free of gunk before you even think about primer or paint.
Cleaning and Degreasing the Floor
Start by sweeping or vacuuming up all the loose dirt and dust. Then, hit the floor with a marine-grade wax and grease remover to cut through oil, fuel, and silicone. Regular cleaners just don’t cut it here.
Work in small patches and wipe with clean rags. Swap rags often so you don’t smear grime around. After your first pass, go over the whole floor again with fresh remover and rags for good measure.
Let the floor dry all the way before moving on. If you trap moisture under paint, you’ll regret it—blisters and peeling aren’t fun to fix.
Sanding and Repairing Imperfections
Start sanding with 80-grit sandpaper to knock down the glossy gelcoat layer and give the primer something to grab. Use a palm sander or sanding block for flat spots. The whole floor should look dull—no shiny bits left.
Switch to 120-grit sandpaper for a second pass. This smooths out the scratches from the rougher paper but still leaves enough texture for paint to hold.
Fill any cracks or gouges with marine epoxy filler before your final sanding. Sand those repairs flush with 120-grit. Wipe the floor with a tack cloth to grab every last bit of dust. You’ll be surprised how much it picks up.
Masking Off Areas for Protection
Protect what you don’t want painted with painter’s tape and plastic sheeting. Cover hardware, drains, hatches, and the hull edges. Press tape down tight—paint loves to sneak under loose edges.
Lay tape in straight lines and smooth out wrinkles or bubbles. For curves, use flexible marine masking tape. Double-check everything before you start painting. It’s easy to miss a spot.
Pull the tape and masking off while the last coat is still a bit tacky. That way, you avoid chipping the paint edge when you remove it. It’s a small detail, but it makes a difference.

This guide helps boat owners understand fiberglass damage clearly — what matters, what doesn’t, and when repairs are truly necessary, so small issues don’t turn into expensive mistakes.
See What Every Boat Owner Should Know →Priming and Painting Techniques
Getting the primer and paint application right really matters. It can mean the difference between a floor that lasts for years and one that chips in just a few months.
Use marine-grade products and stick to good application methods. That way, your boat floor stands up to water, foot traffic, and UV damage.
Choosing and Applying Marine Primers
Marine primer forms a strong bond between your fiberglass floor and the topcoat paint. Pick a marine-grade primer designed for fiberglass—it’s got UV inhibitors and mildewcides that regular primers just don’t have.
Apply primer in thin, even coats with a foam roller or paint sprayer. Two coats usually do the trick for most fiberglass boat floors.
Let each coat dry all the way. Most manufacturers say it takes about 4-6 hours.
Try to apply primer when it’s between 50-85°F. Painting in direct sun or high humidity? Not a good idea—it can cause bubbling or slow drying.
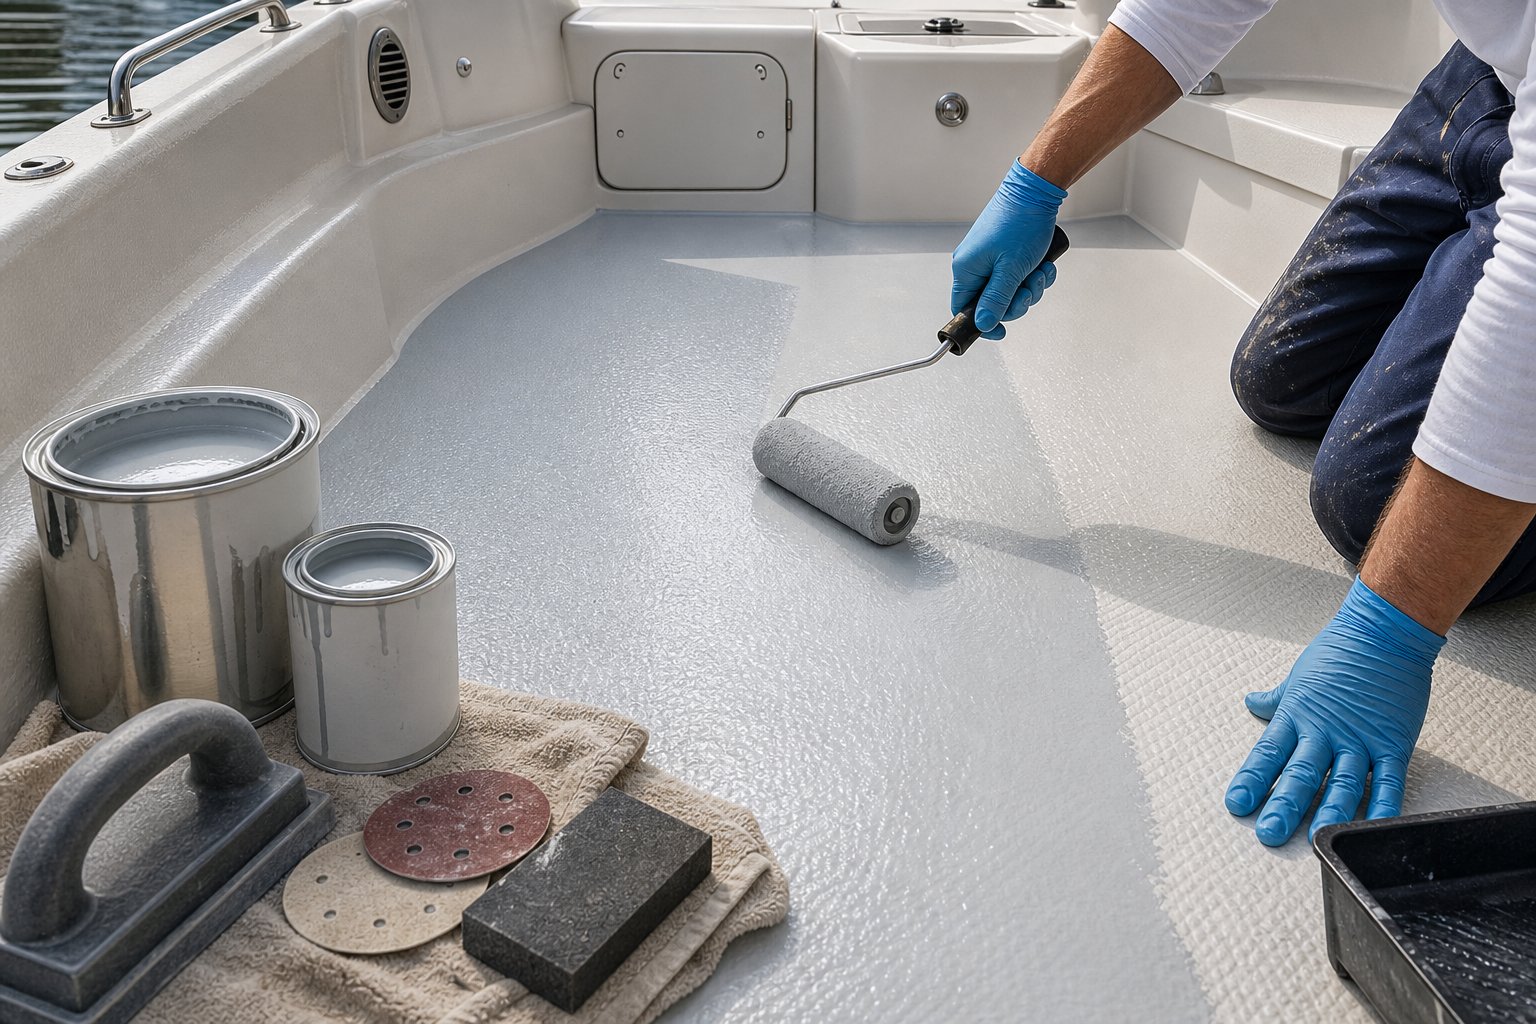
Best Methods for Painting a Fiberglass Boat
Marine-grade paint gives your boat floor the toughness it needs. A high-quality foam roller or paint sprayer both work for a smooth finish.
Start with a thin first coat. Work in small sections and use long, overlapping strokes to keep roller marks in check.
Most floors need 2-3 coats for solid coverage and protection.
Application methods:
- Foam roller: Great for small to medium floors, lets you control the paint
- Paint sprayer: Covers faster but takes more prep and a steady hand
- Brush: Only for edges and tight spots
Wait 6-8 hours between paint coats. Keep the area well-ventilated to help the paint dry and cut down on fumes.
Sanding Between Coats for Smoothness
Light sanding between coats knocks down imperfections and helps each layer stick. Grab some 220-grit sandpaper after the primer dries and between paint coats.
Sand gently in circles until the surface feels smooth. Don’t go overboard—too much sanding can create dips.
Wipe away all sanding dust with a tack cloth or damp rag before the next coat. This part takes extra time but really improves adhesion and makes the finish smoother.
Skip sanding after your final coat. That way, you keep the glossy finish of your marine paint intact.
Enhancing Safety and Durability with Non-Skid and Antifouling Finishes
Adding texture to your boat floor helps prevent slips. Protective coatings on underwater surfaces stop algae and barnacle growth.
Both features extend your boat’s lifespan and keep you safer out there. It’s worth the effort.
Using Non-Skid Additives and Pre-Mixed Options
You’ve got two main ways to add grip to your fiberglass floor. One: mix non-skid additives like silica sand, polymer beads, or rubber particles right into your paint.
You control how grippy the surface feels by changing how much additive you use. Two: buy pre-mixed non-skid paint, like Interlux Interdeck or Pettit EZDecks.
Those come with texture already inside, so you don’t have to guess or mix anything in.
Common Non-Skid Materials:
- Silica sand – Sharp grip, but not friendly to bare feet
- Polymer beads – Rounded texture, feels smoother
- Rubber particles – Softest, still plenty of traction
For cabin soles and inside floors, go with fine textures that won’t hurt bare feet. High-traffic decks need something coarser for grip, especially when wet.
Roll on your textured coating in even strokes. If you’re using mix-in additives, stir the paint often—those particles love to settle at the bottom.
Selecting and Applying Antifouling and Ablative Paints
Antifouling paint keeps underwater hull surfaces free from barnacles, algae, and other gunk. Most folks only put antifouling bottom paint on the hull exterior, not inside floors.
Ablative paint slowly releases biocides as water wears away thin layers. It works well for boats that live in the water full-time.
Hard antifouling paint forms a tough shell and lasts longer on trailered boats.
Application Steps:
- Clean and sand the surface with 80-grit
- Apply compatible primer if it’s needed
- Roll on two coats of antifouling paint
- Wait 24-48 hours between coats
Only use these coatings on parts that stay underwater. For decks and walkways, stick to non-skid deck paints made for foot traffic.
Aftercare and Maintenance for Painted Fiberglass Boat Floors
Taking care of your painted floor keeps it looking sharp and protected. The paint needs time to harden, regular cleaning keeps it fresh, and touch-ups handle the wear and tear.
Curing and Initial Protection
Let your freshly painted floor sit for at least 72 hours before walking on it. Full curing? That takes anywhere from 7 to 14 days, depending on temperature and humidity.
Keep the boat in a dry, breezy spot while the paint cures. Hold off on putting heavy gear or equipment on the floor for the first week.
Don’t let water or moisture near the new paint until it’s fully cured. Early water contact can bubble or peel the paint—pretty frustrating after all that work.
Once it’s cured, rub on a thin coat of marine wax for extra protection. Wax shields the paint from UV and water. Reapply every 2 to 3 months if you want the best results.
Routine Cleaning and Inspection
Wash your painted floor every 2 to 4 weeks with mild soap and fresh water. Use a soft-bristle brush or mop—no need to scratch things up.
Skip harsh chemicals, bleach, or abrasive cleaners on fiberglass boat paint. Those can dull the finish and eat away at the protective layer.
Rinse well after each cleaning. Soap residue makes the floor slippery and attracts dirt.
Check for chips, scratches, or worn spots every time you clean. Pay extra attention to high-traffic areas because that’s where most problems start.
Periodic Touch-Ups and Reapplication
When you spot small chips or scratches, jump on them fast before water sneaks in under the paint. Clean the spot, give it a quick once-over with 220-grit sandpaper, and brush on a thin layer of matching paint.
Deeper scratches? Those usually need a few thin coats rather than just one thick glob. Let each coat dry before you go for the next—yeah, it takes a bit more time, but it’s worth it.
High-traffic zones, especially near entry points or under seats, wear down quicker than you’d expect. You’ll probably find yourself repainting those spots every couple of years—maybe every 2 to 3, if you’re keeping track.
Every 5 to 7 years, the whole floor might need a fresh start, depending on how much action it’s seen. If you notice widespread fading, lots of bare patches, or the paint just feels gritty and rough, that’s your cue for a full redo.

Warren is the founder of BoatGenesis and brings practical experience in fiberglass boat repair, marine equipment testing, and powerboat building. He has worked on a range of repair and restoration projects and now focuses on creating clear, research-based guides to help boat owners avoid costly mistakes and make smarter maintenance decisions. Learn more about Warren.