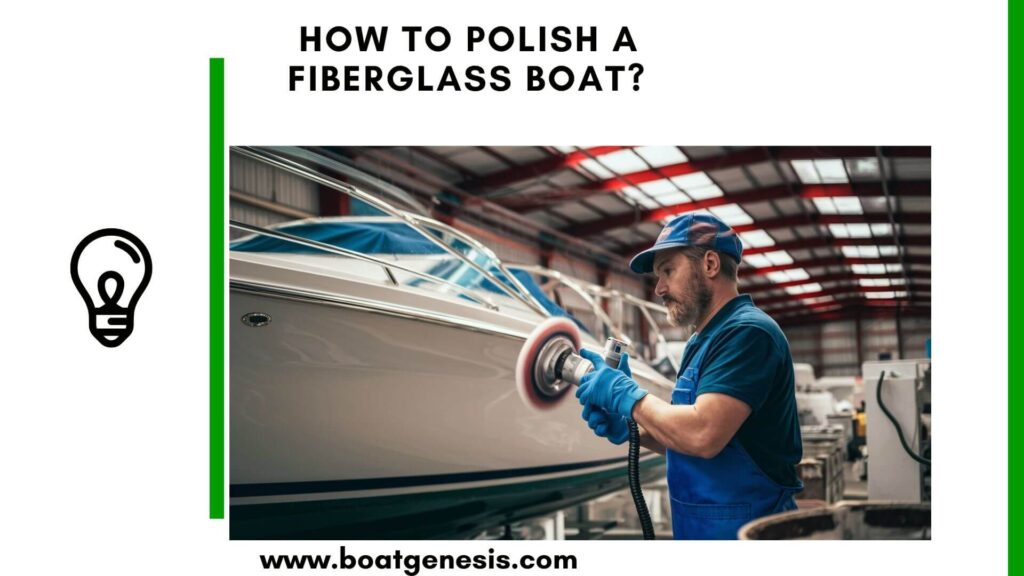
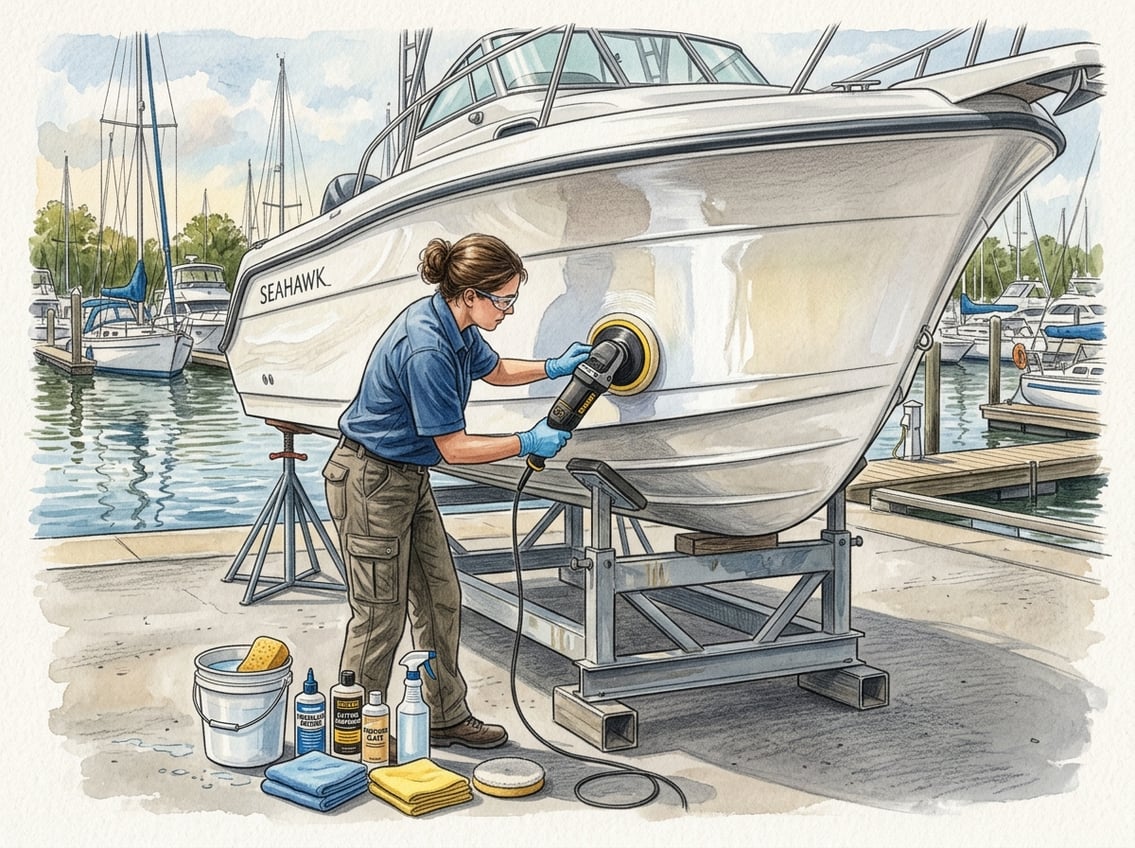
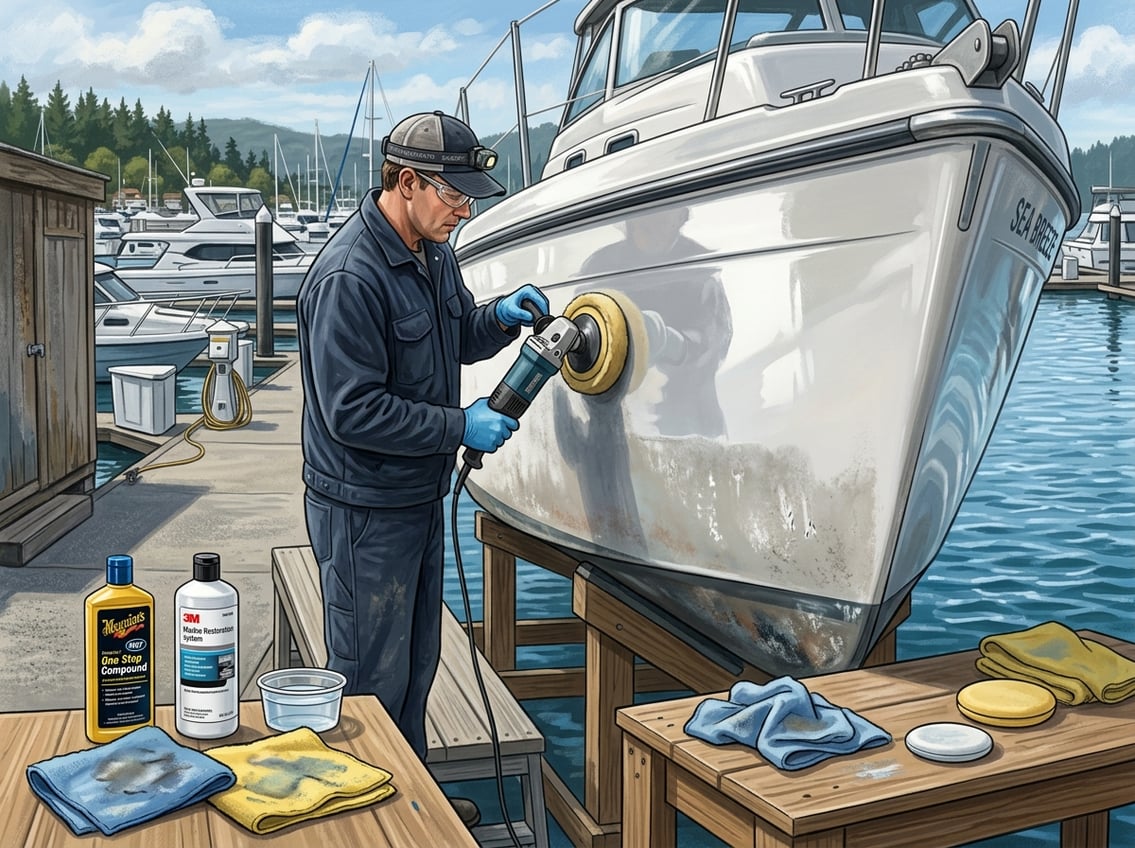
If you want your vessel looking showroom-ready, knowing how to polish a fiberglass boat is an essential skill for any boat owner.
Polishing a fiberglass boat means washing the surface, using the right compound or polish based on oxidation severity, working in small sections with a machine polisher or by hand, and sealing the results with marine wax to protect the gelcoat.
Understanding fiberglass polishing means knowing the difference between light surface haze and heavy oxidation that needs more aggressive treatment. If you choose the wrong method, you waste time and can damage your gelcoat.
Light oxidation often responds to a cleaner-wax product. Moderate to heavy chalking needs a rubbing compound and proper technique.
Gelcoat care requires patience and the right materials. You can restore that showroom shine yourself.
This guide explains how to test oxidation levels, select appropriate products, apply compounds safely, and protect your work so it lasts through the season.
Key Takeaways
- Test oxidation severity by rubbing a dry cloth on the hull to see if chalky residue transfers.
- Work in small two-foot sections using appropriate compounds and machine polishers at controlled speeds between 1200-2000 RPM.
- Always protect freshly polished gelcoat with marine wax to slow future oxidation and maintain the restored shine.
- Understanding Fiberglass Oxidation and Restoration
- Assembling the Right Tools and Products
- Surface Preparation for Optimal Results
- Removing Oxidation and Surface Defects
- Polishing Techniques for a Mirror Finish
- Protecting and Maintaining the Restored Surface
- Frequently Asked Questions
- What is the best way to remove oxidation from a fiberglass boat's gelcoat?
- Which compounds and polishes work best on fiberglass gelcoat for a high-gloss finish?
- How do you compound and polish a fiberglass boat without damaging the gelcoat?
- What steps should you follow to polish a fiberglass boat by hand for consistent results?
- When should you use a cutting compound versus a finishing polish on a boat hull?
- Should you apply wax or a sealant after polishing a fiberglass boat, and how often?
Understanding Fiberglass Oxidation and Restoration
Fiberglass boats develop a chalky, faded appearance over time as oxidation breaks down the gelcoat surface. Understanding what causes this damage and how to address different severity levels helps you maintain your boat’s protective finish and appearance.
Causes of Gelcoat Fading
UV rays from the sun cause most gelcoat deterioration on your fiberglass boat. Sunlight breaks down the chemical bonds in the resin, weakening the outer layer and creating a dull, chalky texture.
Saltwater speeds up the breakdown process. Minerals in salt act as abrasives and draw moisture into tiny cracks in the gelcoat.
Freshwater boats oxidize too, but more slowly than boats in marine environments. Environmental pollutants and acid rain also damage the surface by eating away at protective wax layers, exposing the gelcoat.
Restoration becomes more difficult if you delay treatment, as oxidation penetrates deeper into the gelcoat over time.
Types and Stages of Oxidation
Light oxidation appears as a slight loss of shine with minimal chalking. You can remove this with a simple polish and some elbow grease.
The gelcoat still feels relatively smooth to the touch. Moderate oxidation shows obvious fading and a chalky residue that comes off on your hand when you rub the surface.
This stage needs a rubbing compound before polishing. The color looks washed out compared to protected areas.
Heavy oxidation creates a rough, porous surface with deep chalking and significant color loss. This severe stage requires wet sanding with progressively finer grits before you use compounds.
The gelcoat may show crazing or small cracks that trap dirt and moisture.
Oxidation Severity Guide:
| Stage | Appearance | Touch Test | Treatment Needed |
|---|---|---|---|
| Light | Slight dullness | Smooth surface | Polish only |
| Moderate | Chalky, faded | Powder residue | Compound + polish |
| Heavy | Very rough, cracked | Significant chalk | Wet sand + compound + polish |
Benefits of Regular Restoration
Regular fiberglass restoration extends the life of your gelcoat by removing damaged surface layers before oxidation penetrates too deep. You preserve the protective barrier that keeps water from reaching the fiberglass underneath.
This prevents expensive repairs like blistering and delamination. Restoring your boat’s finish also improves its resale value.
Buyers pay more for vessels that look well-maintained. A shiny, properly polished fiberglass surface signals that you’ve taken care of other maintenance items too.
Applying UV inhibitors after removing oxidized gelcoat protects your investment from future sun damage. These products contain compounds that reflect harmful rays and slow oxidation.
You’ll spend less time on restoration work when you maintain a regular polishing schedule every few months. Clean gelcoat also performs better on the water.
A smooth surface reduces drag and improves fuel efficiency slightly. The protective wax layers you apply during gelcoat care make cleaning easier since dirt and grime won’t stick as readily to the hull.
Assembling the Right Tools and Products
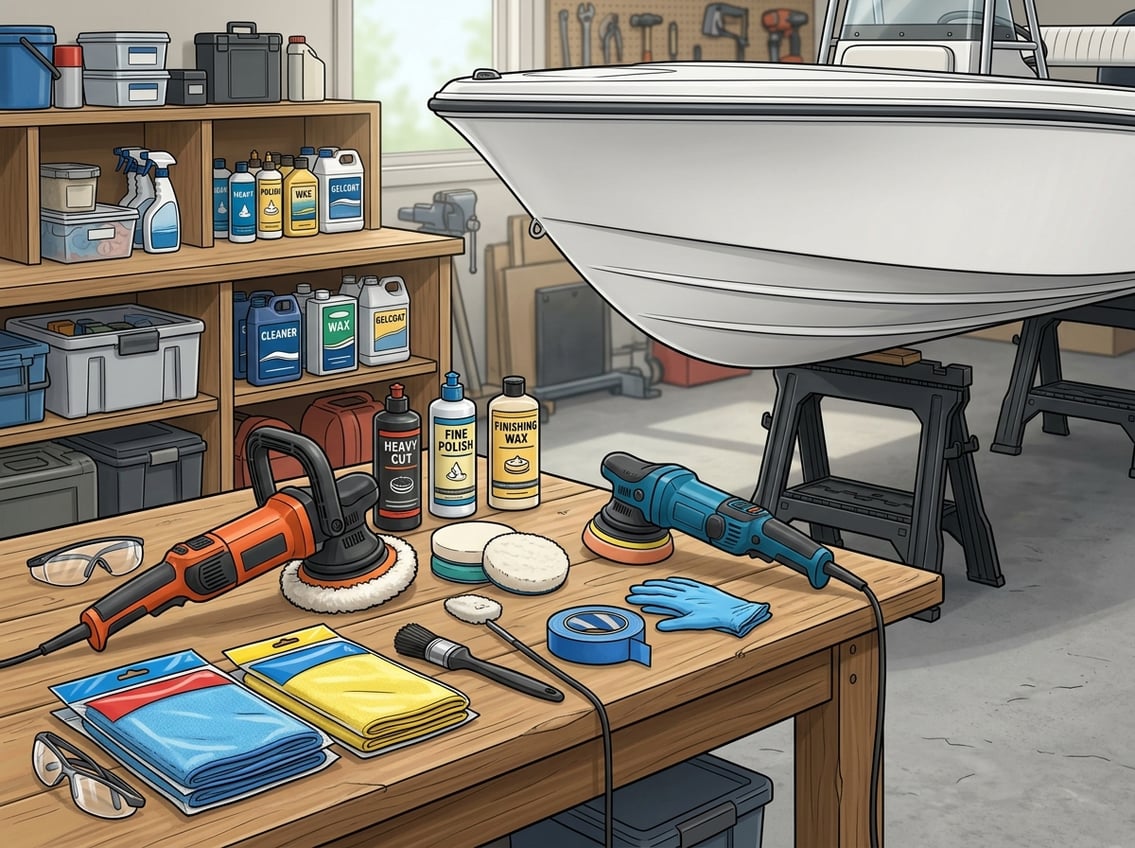
To make your fiberglass boat shine, you need specific tools and products that work together as a system. Gather proper cleaning supplies to prep the surface, the right compounds and polishes to cut through oxidation, and quality machines with pads to apply them effectively.
Essential Cleaning Supplies
Before you use any polish, start with a clean surface. A dedicated boat soap or marine soap cuts through salt spray, grime, and organic buildup without stripping protective layers from your gelcoat.
Regular car wash soap doesn’t handle marine environments as well. For tougher stains and discoloration, use a fiberglass cleaner that works on gelcoat without causing damage.
Stock up on plenty of microfiber towels. Use separate towels for washing, wiping off compound, removing polish, and buffing wax.
If you use the same towel for different products, you transfer chemicals and grit that can scratch your finish. Buy at least a dozen quality microfiber towels and keep them organized by task.
Want to avoid costly fiberglass boat repair mistakes?
Learn how to inspect damage properly, decide when to DIY, and prevent expensive fiberglass problems before they start.
Compounds, Polishes, and Waxes
Your boat polishing compound choice depends on your gelcoat’s condition. A rubbing compound or cutting compound removes heavy oxidation and deeper scratches by aggressively cutting into the surface.
These contain coarse abrasives that level the gelcoat. For moderate oxidation, use a standard polishing compound that balances cutting power with safety.
After heavy correction, use a finishing polish to remove fine scratches and swirl marks left by the compound stage. Marine wax protects your work after polishing.
Choose products labeled as marine polish or fiberglass polish since they contain UV inhibitors that protect against sun damage. Some people use a poli glow boat & rv polish kit that combines multiple steps into one system.
Pick products designed for marine use rather than automotive products. Marine products are formulated for the harsher saltwater environment.
Polishers, Pads, and Towels
A dual-action polisher is the safest choice for most boat owners. It oscillates randomly while spinning, which prevents heat buildup and damage.
A rotary polisher spins in one direction and cuts faster, but you need experience to avoid burning through gelcoat. Use multiple buffing pads and polishing pads for different stages.
Pair wool or heavy-cutting foam polishing pads with cutting compounds for correction work. Use softer foam pads with finishing polishes for the final shine.
Some manufacturers sell a complete restoration kit with compatible pads, compounds, and polishes designed to work together. This makes matching products easier.
Ensure you have at least three different pad types: aggressive cutting pads, medium polishing pads, and soft finishing pads.
Surface Preparation for Optimal Results
Proper surface preparation removes contaminants and creates the best foundation for polishing compounds to work. Clean fiberglass accepts polish more evenly, while damaged areas need repair before buffing to prevent further harm.
Deep Cleaning and Decontamination
Rinse your boat with fresh water to remove loose dirt and salt residue. Mix marine soap or boat soap with water according to product instructions, then wash the entire hull using a soft sponge or cloth.
Work in sections from top to bottom to keep dirty water from running over already-cleaned areas. For stubborn stains and oxidation, apply a dedicated fiberglass cleaner to problem areas.
These cleaners break down chalky residue and embedded grime that regular soap can’t remove. Scrub gently in circular motions, focusing on heavily oxidized spots.
Rinse thoroughly with clean water after washing. Dry the surface completely using microfiber towels to prevent water spots and streaking.
Microfiber towels absorb more water than regular cloths and won’t scratch the gelcoat. Any remaining moisture can interfere with the polishing process and dilute your compounds.
Inspecting and Addressing Surface Damage
Walk around your boat and examine the hull for cracks, chips, gouges, and blisters. Run your hand across the surface to feel for rough patches your eyes might miss.
Mark problem areas with tape so you can address them before polishing.
Small scratches and minor oxidation will buff out during polishing. Repair deeper damage first.
Fill cracks and chips with gelcoat repair paste that matches your boat’s color. Sand repairs smooth after curing, starting with 220-grit sandpaper and finishing with 600-grit for a seamless blend.
Check for soft spots that may indicate structural issues. A professional should assess these before you do any cosmetic work.
Masking and Prepping for Polishing
Cover all hardware, trim, and non-skid surfaces with painter’s tape and plastic sheeting. Polishing compounds can stain rubber, plastic, and metal parts if left to dry.
Tape off waterlines, boot stripes, and graphics to keep them clean and protected.
Remove any wax buildup with a wax remover or fiberglass cleaner. Old wax blocks fresh polish from bonding properly to the gelcoat.
The surface should feel slightly rough, not slick.
Work in a shaded area if possible, as direct sunlight causes compounds to dry too quickly. Set up your workspace with all tools and products within reach.
Keep extra microfiber towels nearby for wiping away excess compound during polishing.
Removing Oxidation and Surface Defects
Oxidation creates a chalky, dull layer on fiberglass. You need abrasive compounds to remove it.
The severity of oxidation determines which products and tools you need. Use light polishes for minor fading and heavy-cut compounds for severe chalking.
Selecting the Right Compound
Choose your compound based on the oxidation level. Light oxidation appears as slight dullness and responds well to an abrasive polish or medium-cut rubbing compound.
Moderate oxidation shows visible chalking when you run your hand across the surface. Use a cutting compound with more abrasives in this case.
Heavy oxidation leaves thick chalk on your fingers. Use a heavy-cut compound to remove the damaged gelcoat layers.
An oxidation remover designed for fiberglass works faster on severely weathered surfaces.
Start with the least aggressive product that can handle your oxidation level. Move to a stronger compound if needed, but avoid excessive material removal.
Test your chosen compound on a small, hidden area first to verify the results.
Applying Compounds with Polishing Tools
Use a dual-action polisher with the right buffing pads for best results. Foam pads come in different firmness levels—firmer pads cut more aggressively while softer pads polish gently.
Use wool pads only for heavy oxidation removal. Wool pads cut the fastest but can create swirl marks.
Work in 2×2 foot sections to maintain control during compounding and polishing. Apply three to four pea-sized dots of compound to the pad and spread it across the section at low speed.
Increase to medium speed (1200-1800 RPM). Keep the pad flat against the surface and overlap your passes by 50%.
Let the compound do the work without heavy pressure. Excessive pressure generates heat and can damage the gelcoat.
Work the compound until it becomes clear or nearly dry. Wipe away residue with a microfiber towel.
Scratch and Stain Removal Techniques
Minor scratches disappear during normal compounding if they only affect the surface layer. Deeper scratches require wet sanding with 1000 to 2000-grit sandpaper before you apply compound.
Sand in one direction with light pressure until the scratch edges blend into the surrounding gelcoat.

This guide helps boat owners understand fiberglass damage clearly — what matters, what doesn’t, and when repairs are truly necessary, so small issues don’t turn into expensive mistakes.
See What Every Boat Owner Should Know →Remove stains using specialized techniques based on the stain type. Rust stains respond to oxalic acid cleaners, while waterline stains need dedicated hull cleaners.
Apply stain removers before compounding to avoid spreading discoloration.
Follow scratch removal with progressively finer compounds. Start with a heavy-cut compound, then use a medium rubbing compound, and finish with a fine abrasive polish.
This stepped approach removes sanding marks and restores clarity to the repaired area.
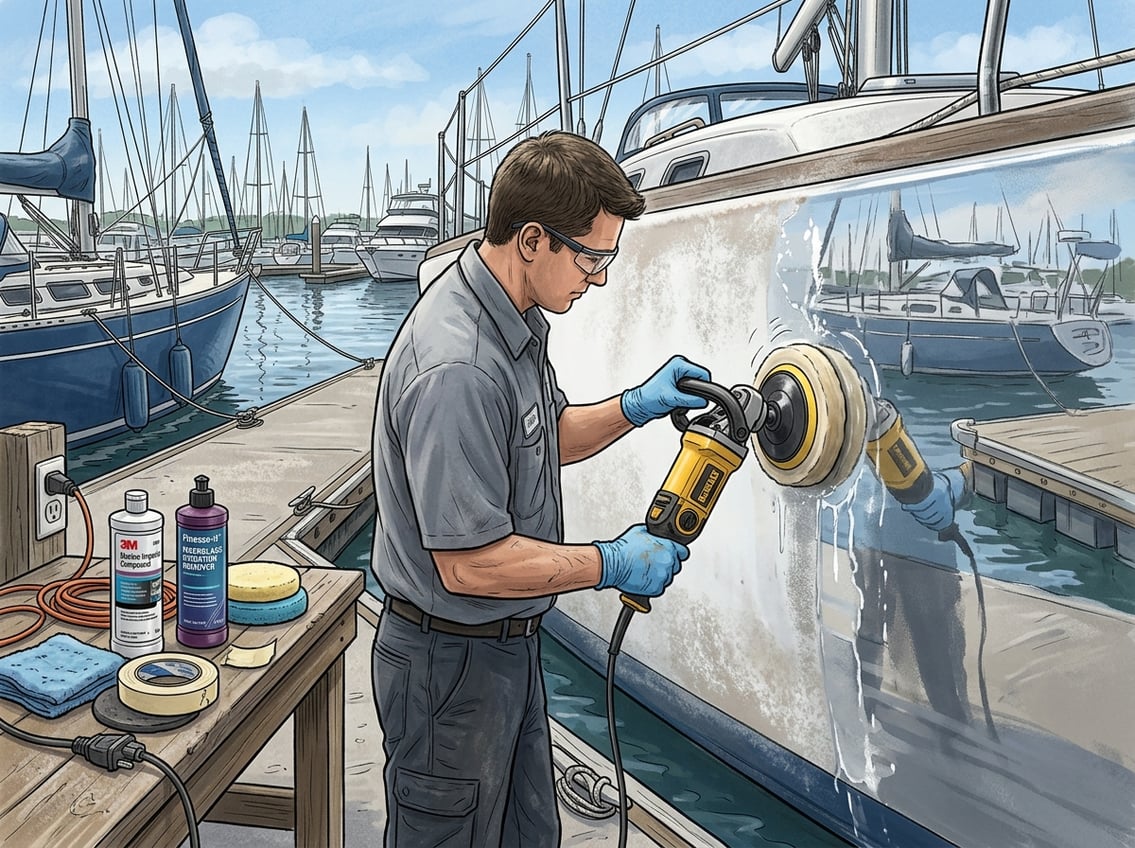
Polishing Techniques for a Mirror Finish
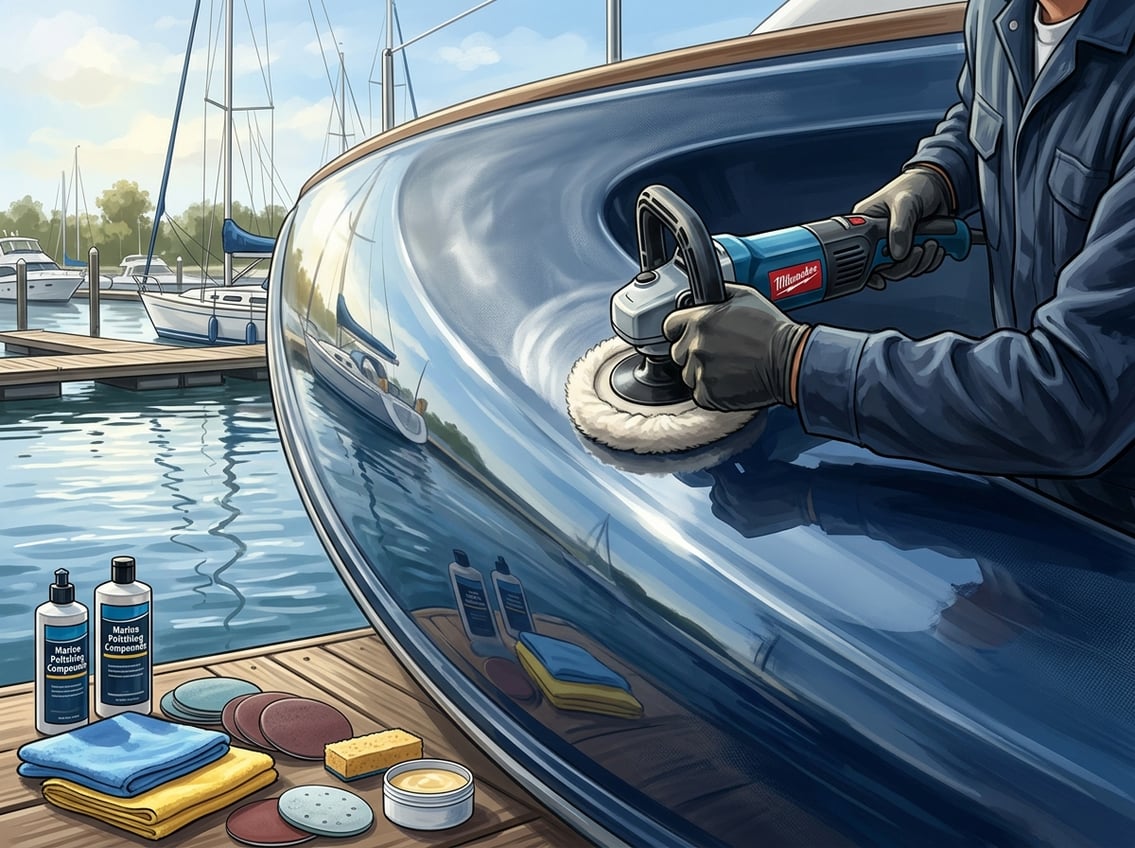
The right polisher and pad combination creates a showroom shine. Applying polish correctly ensures you remove oxidation without causing new scratches or burns in the gelcoat.
Choosing Between Rotary and Dual-Action Polishers
A dual-action polisher moves in two directions at once, reducing heat buildup and making it harder to damage your boat’s surface. This type works well for beginners and handles most polishing jobs safely.
The spinning and orbiting motion spreads polish evenly across the gelcoat.
A rotary polisher spins in one continuous circle and cuts faster through heavy oxidation. It generates more heat and requires steady hands to avoid burning through the gelcoat.
Use a rotary polisher only if you have experience or need to remove severe damage.
Most boat owners get better results with a dual-action polisher for fiberglass surfaces because it prevents overheating and uneven finishes.
Start with a dual-action model if you plan to polish your boat yourself.
Correct Use of Polishing Pads
Foam polishing pads come in different firmness levels for various stages of polishing boat fiberglass. Firm cutting pads remove heavy oxidation, medium pads work for general polishing, and soft finishing pads create the final shine.
Match your pad to your compound or polish. Cutting compounds need firm pads while fine polishes require soft ones.
Keep your polishing pads clean during use by raking them with a pad cleaning tool every few minutes.
Apply polish to the pad in four or five small dots instead of one large blob. Spread the polish across a small section before turning on your polisher.
Work in 2-foot by 2-foot areas to maintain control and ensure complete coverage.
Best Practices for Even, Glossy Results
Keep your polisher moving at all times to prevent heat spots that can burn the gelcoat. Use overlapping passes in a crosshatch pattern—first side to side, then up and down.
Apply moderate pressure and let the machine do the work. Start with your polisher on its lowest speed setting to spread the product.
Increase to medium speed for the actual polishing work. Avoid maximum speed to prevent too much heat.
Key Application Tips:
- Work one small section at a time
- Keep the pad flat against the surface
- Polish until the compound becomes clear or nearly invisible
- Wipe away residue with a clean microfiber cloth before moving to the next section
The surface should feel smooth and look glossy after polishing fiberglass correctly. If you see dull spots or swirl marks, apply more polish and work the area again with lighter pressure.
Protecting and Maintaining the Restored Surface
After you restore the mirror shine, you want to keep it from fading. The right protective products block UV rays, salt water, and oxidation while keeping your gelcoat looking polished for months.
Applying Marine Wax and Sealants
Marine wax is your first line of defense against the elements. Marine-grade products are made to handle constant salt water and intense UV exposure.
Apply wax after polishing to lock in the fresh gelcoat.
You have two main options: traditional carnauba wax or synthetic polymer sealants. Carnauba wax gives a warm, deep shine but usually lasts 2-3 months.
Synthetic sealants offer longer protection, usually 4-6 months, and provide excellent water repellency.
Apply wax in small sections with a foam applicator pad. Work it into the gelcoat in circular motions, then let it haze over for 5-10 minutes.
Buff it off with a clean microfiber towel. Don’t apply wax in direct sunlight or on a hot surface as this makes removal harder and can leave streaks.
For maximum protection, apply 2-3 thin coats instead of one thick coat. Wait at least 12 hours between applications.
UV Protection and Inhibitors
UV rays are the biggest threat to your restored fiberglass. Sunlight breaks down the gelcoat’s resin, causing chalky oxidation.
UV inhibitors in marine wax and polish create a protective shield that reflects damaging rays.
Look for products labeled with UV blockers or inhibitors. Some specialized products like Poli Glow boat and RV polish contain high concentrations of UV protection.
These create a harder, glass-like finish that offers extended protection compared to standard wax.
Reapply UV protection every 3-4 months, or more often if your boat sits in direct sunlight. Boats stored outdoors in southern climates need protection reapplied monthly during peak summer months.
Water Repellency and Maintenance Tips
Good water repellency shows your protection is still working. When water beads up and rolls off, your wax or sealant is doing its job.
When water starts sheeting instead of beading, it’s time to reapply. Wash your boat regularly with pH-neutral marine soap to prevent dirt buildup.
Avoid dish soap or harsh cleaners that strip away protective layers. A quick rinse after each outing removes salt and prevents water spots.
Use a spray detailer or quick detailer between wax applications. These add a thin protective layer and maintain water repellency without full waxing.
Keep a bottle on board and spray down high-wear areas after cleaning. Inspect your gelcoat every few months.
Catching early oxidation lets you polish a small area instead of redoing the entire boat.
Frequently Asked Questions
The right products and techniques make all the difference when restoring your boat’s finish. Understanding when to use specific compounds, how to avoid gelcoat damage, and which protective coatings last longest will help you achieve professional results.
What is the best way to remove oxidation from a fiberglass boat’s gelcoat?
Wash your boat thoroughly to remove surface dirt and grime. This prevents you from grinding contaminants into the gelcoat during correction.
For light to moderate oxidation, use a heavy-cut marine compound with a wool or microfiber cutting pad on a dual-action polisher. Work in small 2×2 foot sections using overlapping passes at 1200-1500 RPM.
Wet sand heavy oxidation before compounding. Start with 800-grit wet/dry sandpaper, then move to 1000-grit, 1500-grit, and finish with 3000-grit.
Keep the surface wet and use a sanding block for even pressure. After sanding, the gelcoat will look hazy, which means you’ve removed the oxidized layer.
Which compounds and polishes work best on fiberglass gelcoat for a high-gloss finish?
Marine-specific compounds work better than automotive products. These handle the unique challenges of oxidation and UV damage on boats.
Use a heavy-cut compound to remove oxidation and scratches. Follow with a finishing polish to refine the surface and boost gloss.
Pair wool or twisted microfiber pads with heavy-cut compounds for correction. Use soft foam finishing pads with fine polishes to create a mirror-like shine.
Choose the right boat polishing compound based on your gelcoat’s condition. Heavily oxidized surfaces need aggressive compounds, while lightly weathered gelcoat responds well to one-step polish products.
How do you compound and polish a fiberglass boat without damaging the gelcoat?
Do not start your polisher directly on the gelcoat. Place a few pea-sized drops of compound on the pad, spread it over the area with the machine off, then start at low speed.
Keep the polisher moving at all times to avoid generating excessive heat. Holding it in one spot can burn through the gelcoat in seconds.
Use light to medium pressure and let the machine do the work. Pushing too hard creates more heat without improving results.
A dual-action polisher is safer for beginners. The random orbital motion lowers the risk of burning the gelcoat or leaving swirl marks.
Check your work frequently by wiping away compound residue. This helps you see your progress and avoid over-working any area.
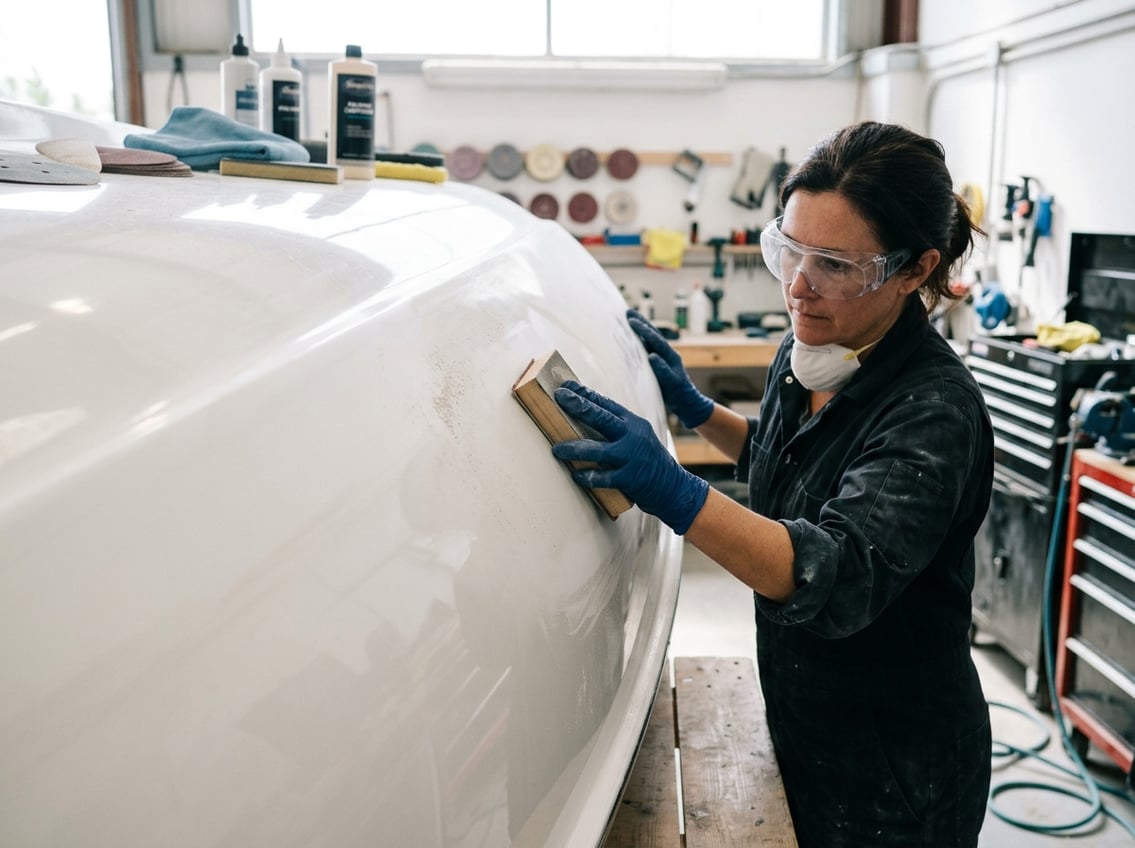
What steps should you follow to polish a fiberglass boat by hand for consistent results?
Hand polishing takes more time and effort but works well for small areas or touch-ups. Apply a small amount of compound to a foam applicator pad and work it into the gelcoat using firm, circular motions.
Overlap your passes by about 50% for even coverage. Work in sections no larger than 2×2 feet to prevent the compound from drying out.
Once the compound hazes, buff it off with a clean microfiber towel using straight, overlapping strokes. Flip to a fresh section of the towel frequently.
Apply finishing polish the same way after compounding to remove any micro-marring and maximize gloss. Hand polishing gives you complete control over pressure and technique.
When should you use a cutting compound versus a finishing polish on a boat hull?
Cutting compounds contain abrasives that remove material from the gelcoat surface. Use these first to eliminate oxidation, scratches, or other defects.
Finishing polishes have finer abrasives that refine the surface without removing much material. Use these after compounding to remove haze or micro-scratches.
If your gelcoat only has light oxidation or dullness, test a small area with finishing polish first. You might not need a heavy compound.
The systematic process of sanding, compounding, and polishing reveals fresh material underneath. Each step uses progressively finer abrasives to refine the finish.
Never apply wax without polishing first. Polishing removes defects instead of just hiding them under a layer of protection.
Should you apply wax or a sealant after polishing a fiberglass boat, and how often?
Always apply protection after polishing. Freshly corrected gelcoat becomes more porous and vulnerable to UV damage after polishing.
Wax gives a warm, deep shine and usually lasts 1-3 months. Sun exposure and use affect how long it lasts.
Wax is easy to apply but needs more frequent reapplication.
Synthetic sealants bond to the gelcoat and can last 4-6 months or longer. They offer excellent UV protection and make cleaning easier.
Ceramic coatings provide the longest protection, often lasting 1-2 years. Applying ceramic coatings requires care, but they create a hard, hydrophobic barrier.
Reapply your chosen protection when water stops beading on the surface. This usually happens before the product completely wears off, allowing you to maintain protection and prevent gelcoat damage.

Warren is the founder of BoatGenesis and brings practical experience in fiberglass boat repair, marine equipment testing, and powerboat building. He has worked on a range of repair and restoration projects and now focuses on creating clear, research-based guides to help boat owners avoid costly mistakes and make smarter maintenance decisions. Learn more about Warren.