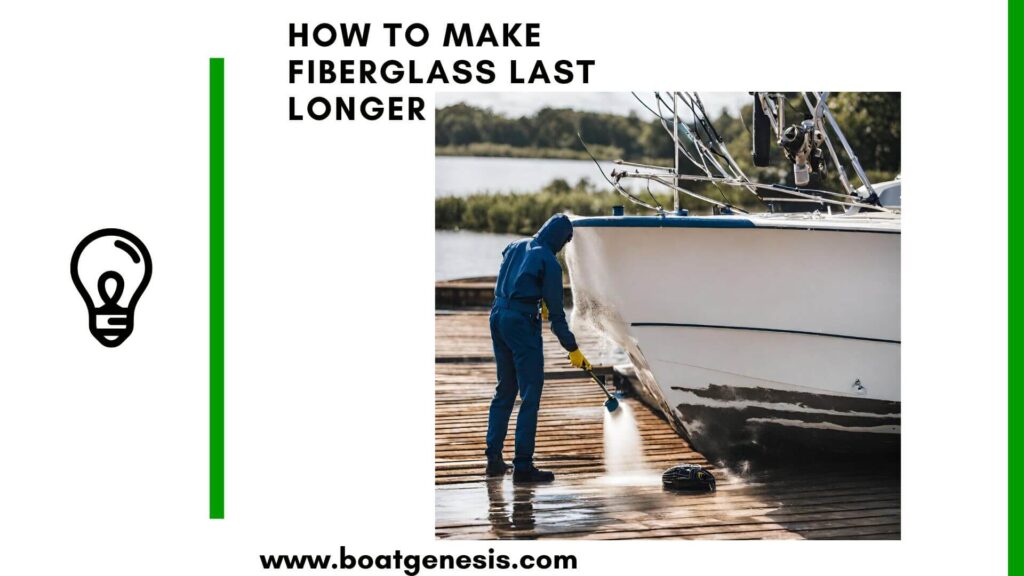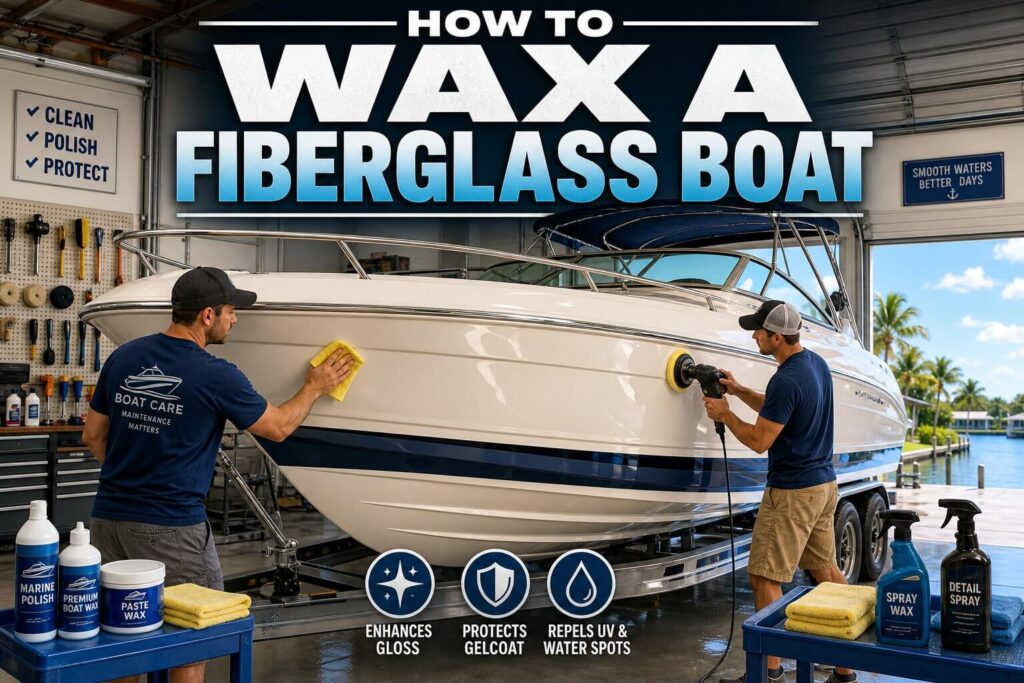
Learning how to wax a fiberglass boat is one of the best skills you can pick up as a boat owner.
A proper wax job doesn’t just make your boat look great — it protects the gel coat from UV damage, oxidation, and the harsh marine environment.
The good news? You don’t need to pay a professional. With the right supplies and a few hours on a weekend morning, you can keep your boat looking showroom-fresh all season long.
Key Takeaways
- Wash first, always — never wax over a dirty hull
- Inspect the gel coat before waxing and deal with oxidation or scratches first
- Apply thin, even coats — thick application wastes product and is harder to buff
- Work in sections and stay out of direct sunlight
- Wax every 3 months during peak season (more often for boats kept in the water)
- Use a marine-specific wax — automotive products can damage fiberglass gel coat
- Water beading stops = time to wax again — use this as your visual trigger
- Key Takeaways
- Why Waxing Your Fiberglass Boat Actually Matters
- What You Need Before You Start
- How To Wax a Fiberglass Boat?
- How Often Should You Wax a Fiberglass Boat?
- Common Waxing Mistakes to Avoid
- How To Know If Your Gel Coat Needs Polish Before Waxing
- Choosing the Right Marine Wax
- Frequently Asked Questions
- Final Thoughts
Why Waxing Your Fiberglass Boat Actually Matters
A lot of boat owners skip waxing and only notice the damage after it’s too late.
Here’s the thing: your gel coat is porous. Without a wax layer sitting on top of it, UV rays, salt water, and oxidation work their way in — fading the color, causing micro-cracks, and making the surface feel chalky and dull.
Once oxidation sets in deeply, you’re looking at compounding and polishing work that takes far more time than a simple wax job would have.
Regular waxing also makes your boat much easier to clean throughout the season. Dirt, algae, and grime don’t bond as easily to a waxed surface — they wipe right off.
Bottom line: Waxing is cheap protection against an expensive problem.
What You Need Before You Start
Gather these supplies before getting started:
| Supply | Purpose |
|---|---|
| Marine-grade fiberglass wax or polish | Core protection layer |
| Applicator pads (2–3) | Applying wax evenly |
| Microfiber cloths (several) | Buffing off residue |
| Soft terry towels | Drying the hull |
| Marine boat soap | Safe, residue-free washing |
| Rubbing compound (optional) | Pre-wax scratch and oxidation removal |
| Gloves | Protecting your hands |
| Bucket and clean water | Washing the hull |
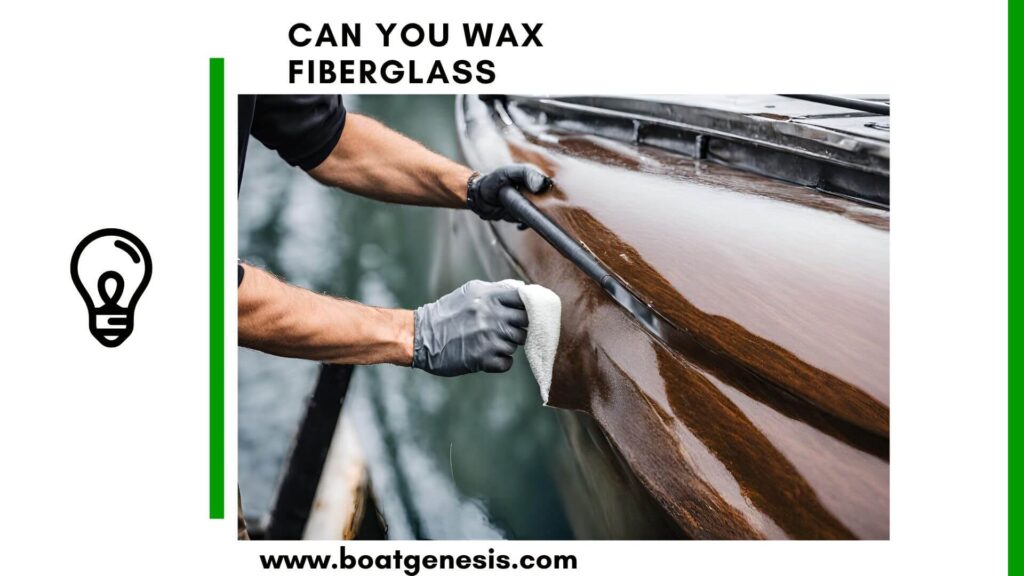
Always use a wax specifically formulated for fiberglass boats. Automotive wax products can contain chemicals that damage marine gel coats over time.
How To Wax a Fiberglass Boat?
Here are my recommended steps to wax your fiberglass boat gel coat.
Want to avoid costly fiberglass boat repair mistakes?
Learn how to inspect damage properly, decide when to DIY, and prevent expensive fiberglass problems before they start.
Step 1 — Wash the Hull Thoroughly
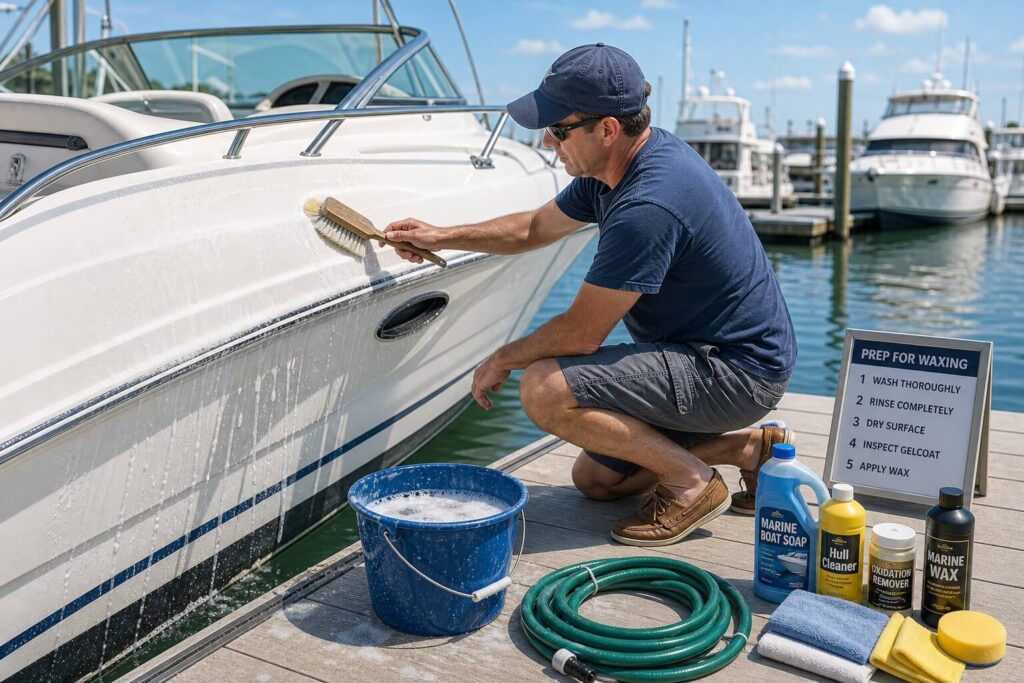
Start with a clean boat. Use a marine-safe soap and a soft wash brush or sponge to scrub down the entire hull.
Pay close attention to:
- The waterline, where algae and mineral deposits like to hide
- Corners and crevices around fittings and cleats
- Any area that stayed damp for a long time
Rinse completely and let the surface dry. Applying wax over a wet or dirty hull traps grime under the wax — not what you want.
==>> Check out my recommended best wax for your boat here.
Step 2 — Inspect the Gel Coat
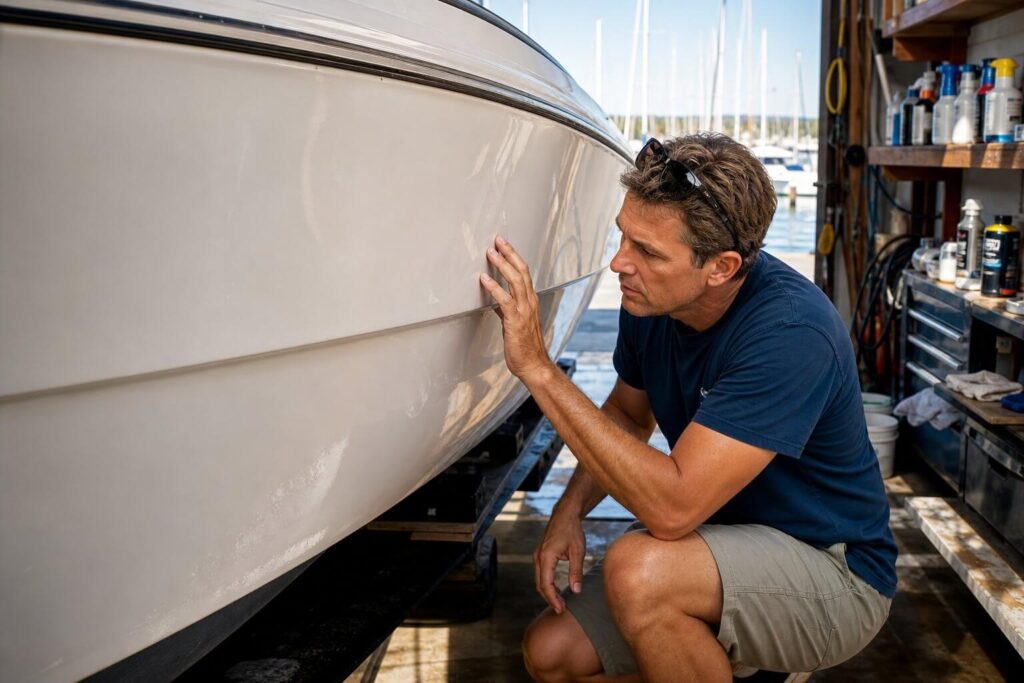
Once the hull is dry, do a close inspection before applying anything.
Look for:
- Oxidation — a dull, chalky appearance
- Hairline scratches or scuffs — usually from docking or trailering
- Deeper gouges or cracks — these need repair before waxing
If you spot oxidation or light scratches, apply a rubbing compound with an applicator pad first. Work it in with small circular strokes, then wipe clean. This pre-wax step removes the dead layer of gel coat and gives the wax a fresh, smooth surface to bond to.
Step 3 — Apply the Wax
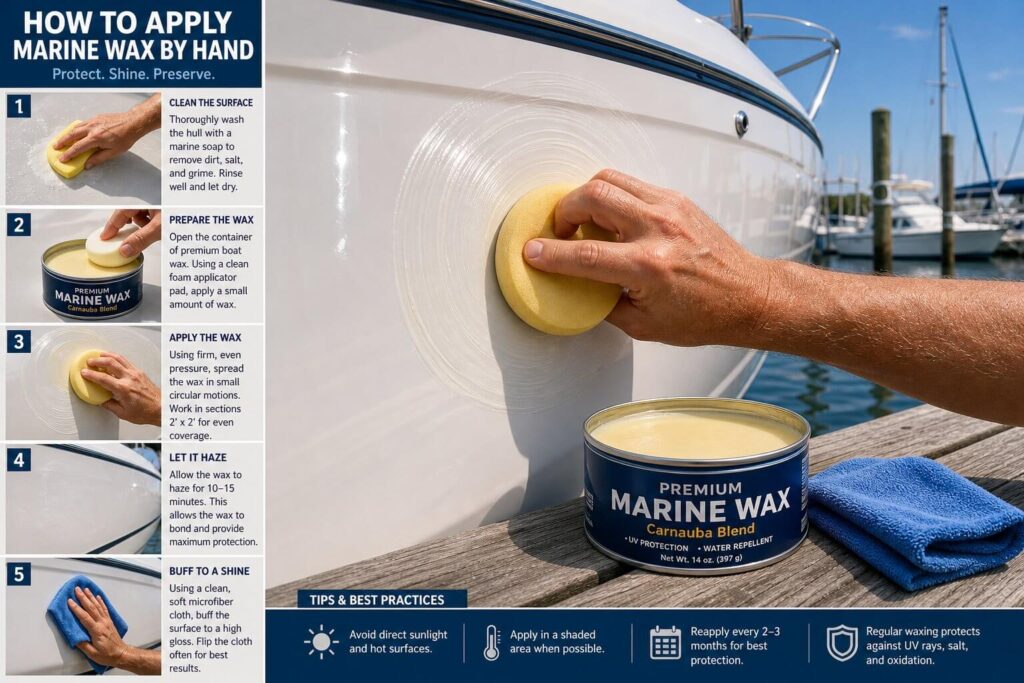
Now you’re ready to wax.
Apply a small, even amount of marine wax to a clean applicator pad — you don’t need much. Work in sections (roughly 2–3 square feet at a time) using gentle, circular strokes. Thin, even coverage works better than thick globs.
Tips for application:
- Work in the shade or during the cooler part of the day — heat causes wax to dry too fast and streak
- Don’t apply wax in direct sunlight
- Keep the surface dry throughout
Let the wax haze over before buffing. Most products take 5–10 minutes depending on temperature. Check the label on your specific product.
Step 4 — Buff Off the Wax
Once the wax has hazed, grab a clean microfiber cloth and buff it off using light, even pressure. Work in the same small sections you applied the wax.
Don’t scrub hard — firm circular pressure is all you need. Scrubbing too aggressively can leave light swirl marks in the gel coat.
Use a fresh, clean section of microfiber cloth as it gets saturated with wax residue. Buffing with a dirty cloth just smears residue around.
Step 5 — Inspect and Admire
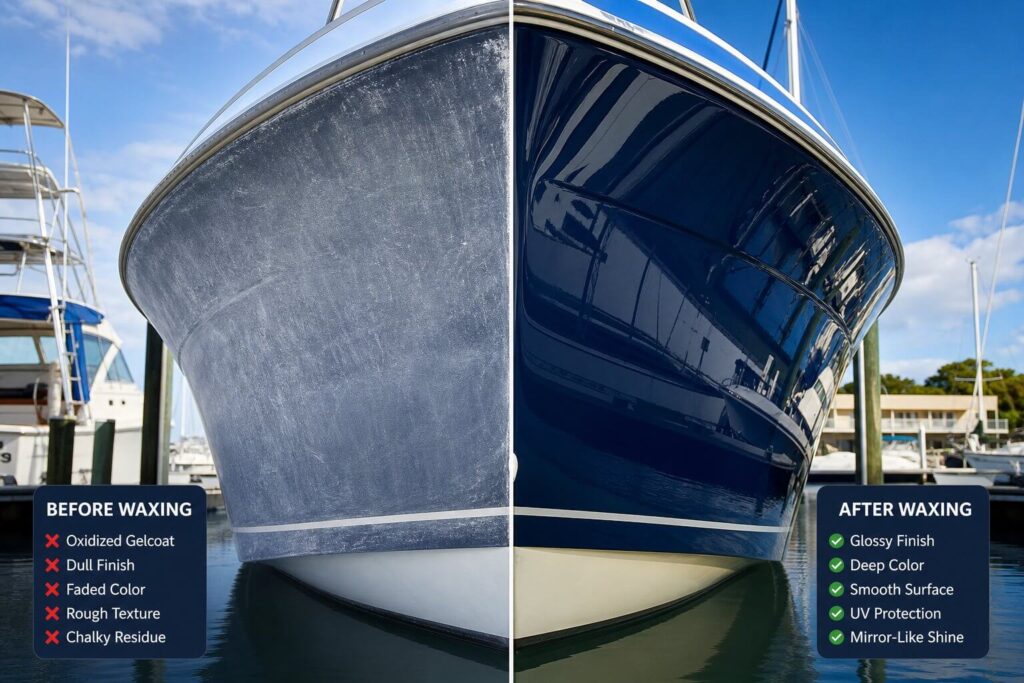
Step back and look at the result. A properly waxed gel coat has a deep, wet-looking shine that reflects light cleanly. Run your hand across the surface — it should feel smooth and slightly slippery.
If you spot any hazy patches, hit them again with a fresh cloth. Missing spots are much easier to catch right after waxing than a week later.

This guide helps boat owners understand fiberglass damage clearly — what matters, what doesn’t, and when repairs are truly necessary, so small issues don’t turn into expensive mistakes.
See What Every Boat Owner Should Know →How Often Should You Wax a Fiberglass Boat?
| Boat Usage | Recommended Waxing Frequency |
|---|---|
| Trailered (seasonal use) | Every 3 months during the season |
| Kept in a slip (fresh water) | Every 2–3 months |
| Kept in a slip (salt water) | Every 4–6 weeks |
| Stored under cover | Once at the start of the season |
Salt water and constant sun exposure accelerate gel coat degradation — so boats that stay in the water full time need more frequent attention. A quick visual check every few weeks tells you a lot: if the water stops beading on the surface, it’s time to wax again.
Common Waxing Mistakes to Avoid
Most wax jobs go wrong for simple, avoidable reasons.
Waxing a dirty hull — Wax traps whatever is on the surface. Always wash first.
Applying too much wax — More is not better. A thin, even coat is easier to buff and bonds just as well.
Waxing in direct sunlight — Heat dries the wax too fast, leaving streaks and making it harder to buff clean.
Using the same pad to apply and remove — Keep your applicator pads separate from your buffing cloths. Cross-contamination leaves residue on the surface.
Skipping the pre-wax compound step — If there’s oxidation on the gel coat, wax won’t fix it — it just covers it temporarily. Address oxidation first.
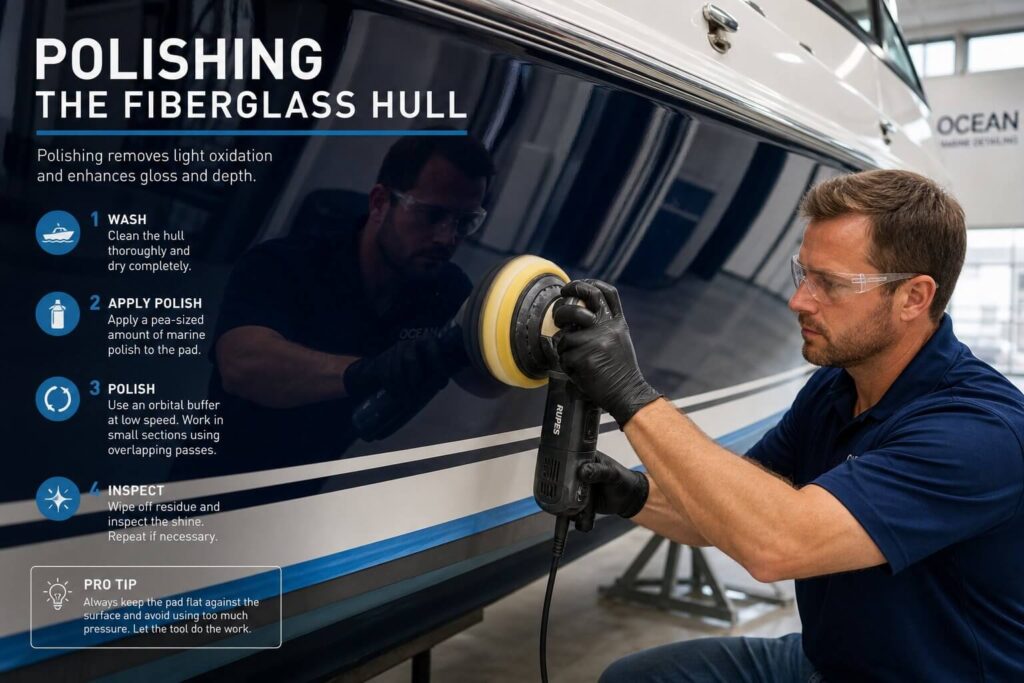
How To Know If Your Gel Coat Needs Polish Before Waxing
Wax protects a healthy gel coat. Polish (or rubbing compound) restores a damaged one.
Here’s a simple test: pour a few drops of water on the surface. If the water beads up and rolls off, the gel coat is in decent shape and just needs wax. If the water spreads flat and soaks in, you’re dealing with oxidation and you need to polish first.
You can also run a finger across the surface. A chalky white residue on your fingertip is a classic sign of oxidation.
For light oxidation: a marine polish applied by hand is usually enough. For heavy oxidation: a dual-action polisher with a cutting compound will save you a lot of time and elbow grease.
For more detail on restoring heavily oxidized gel coat, the BoatUS Foundation guide to gel coat maintenance is a solid reference.
==>> See how often you should wax your boat here.
Choosing the Right Marine Wax
Not all marine waxes are the same, and the right choice depends on how you use your boat.
Carnauba wax — Natural plant-based wax. Produces a deep, warm shine. Great for boats that stay trailered or get regular care. Needs more frequent reapplication (every 2–3 months).
Synthetic polymer wax — Longer-lasting protection, usually 4–6 months per application. Better suited for boats that stay in the water or get heavy UV exposure.
Wax + polish combo products — Good for slightly weathered gel coats that don’t need a full compound treatment. Combines mild cutting action with protection in one step. Saves time.
Frequently Asked Questions
Can I use a random orbital polisher to wax my boat?
Yes, and it saves a lot of time on larger hulls. Use a foam finishing pad at a low speed setting. Don’t press hard — let the machine do the work.
How long does wax take to cure?
Most marine waxes reach full cure within 24 hours of application. Avoid getting the hull wet during this window if possible.
What happens if I don’t wax at all?
Over time, the gel coat will oxidize and fade. UV rays break down the pigment, causing the color to look washed out and chalky. Once oxidation is severe, restoring the finish requires significantly more effort than routine waxing would have.
Can I wax over old wax?
Yes. You don’t need to strip old wax before applying a new coat. If there’s visible buildup in seams or corners, clean that out first with a detailing brush.
Final Thoughts
Waxing a fiberglass boat isn’t complicated — it just takes a little time and consistency. Do it a few times a year and your gel coat stays protected, looks sharp, and is far easier to clean. Skip it for a few seasons and you’re stuck dealing with oxidation, dull finishes, and potentially costly restoration work.
Set aside a morning each quarter. Wash the hull, spot any issues, apply wax in sections, buff it out. That’s really the whole routine. Your boat will hold its value, look great on the water, and the whole job gets easier each time you do it.
Now that you know how to wax, you should also learn how to remove wax from a fiberglass boat here.

Warren is the founder of BoatGenesis and brings practical experience in fiberglass boat repair, marine equipment testing, and powerboat building. He has worked on a range of repair and restoration projects and now focuses on creating clear, research-based guides to help boat owners avoid costly mistakes and make smarter maintenance decisions. Learn more about Warren.