Gelcoat spider crack repair is something every fiberglass boat owner will likely face.
These fine, web-like cracks—also known as crazing—may not look serious, but over time, they allow moisture to penetrate and damage the underlying fiberglass. While not typically structural, neglecting them can lead to costly repairs down the road.
The good news? You can fix most spider cracks yourself with the right tools, materials, and a little patience.
This guide walks you through a reliable 8-step DIY method to restore your gelcoat and protect your boat’s finish.
Want to avoid costly fiberglass boat repair mistakes?
Learn how to inspect damage properly, decide when to DIY, and prevent expensive fiberglass problems before they start.
KEY TAKEAWAYS
- Spider cracks are surface-level: They rarely affect the fiberglass structure but should be repaired to prevent water intrusion.
- Sun, impact, and stress: The main causes of crazing are UV exposure, temperature shifts, and pressure points—often around fittings or high-traffic areas.
- Proper prep is key: Cleaning and scuffing the surface helps the filler bond effectively.
- Use a gelcoat repair kit: These kits include color-matched filler, making it easy to blend repairs with your boat’s finish.
- Tape helps level the repair: A simple trick—using tape to remove excess gelcoat—can save sanding time.
- Regular maintenance prevents cracks: Protect your gelcoat with wax, covers, and impact protection to extend its lifespan.
- What Causes Gelcoat Spider Cracks?
- Gelcoat Spider Crack Repair Process
- Supplies Needed
- Step 1: Clean the Cracks with Acetone
- Step 2: Lightly Sand or Scuff the Area
- Step 3: Mix the Gelcoat Filler Properly
- Step 4: Apply the Gelcoat Filler into the Cracks
- Step 5: Use Tape to Smooth and Remove Excess
- Step 6: Let the Repair Fully Cure
- Step 7: Lightly Sand for a Smooth Finish
- Step 8: Buff and Wax for a Factory-Like Shine
- Spider Crack Repair FAQs
- Final Word
What Causes Gelcoat Spider Cracks?
Unlike Stress cracks, Spider cracks often occur due to surface tension or minor impacts on the gelcoat layer.
Factors like prolonged sun exposure, changes in temperature, impact from docks or debris, and normal flexing of the fiberglass can cause the top gelcoat layer to develop small stress cracks.
Areas around hardware or seating are typical hotspots.
This guide helps boat owners understand fiberglass damage clearly — what matters, what doesn’t, and when repairs are truly necessary, so small issues don’t turn into expensive mistakes.
See What Every Boat Owner Should Know →Gelcoat Spider Crack Repair Process
While tiny hairline spider cracks may not need immediate repair, it’s smart to fix them before they expand, allowing moisture ingress.
Here is a quick DIY gelcoat spider crack repair method:
Supplies Needed
- Acetone – cleans and degreases the repair area
- Scuff pad – roughens the surface for better adhesion
- Gelcoat repair kit – provides colored repair compound
- Spreaders/stir sticks – mixes the gelcoat filler
- Disposable brushes – apply gelcoat into cracks
- Tape – creates clean edges and removes excess filler
Step 1: Clean the Cracks with Acetone
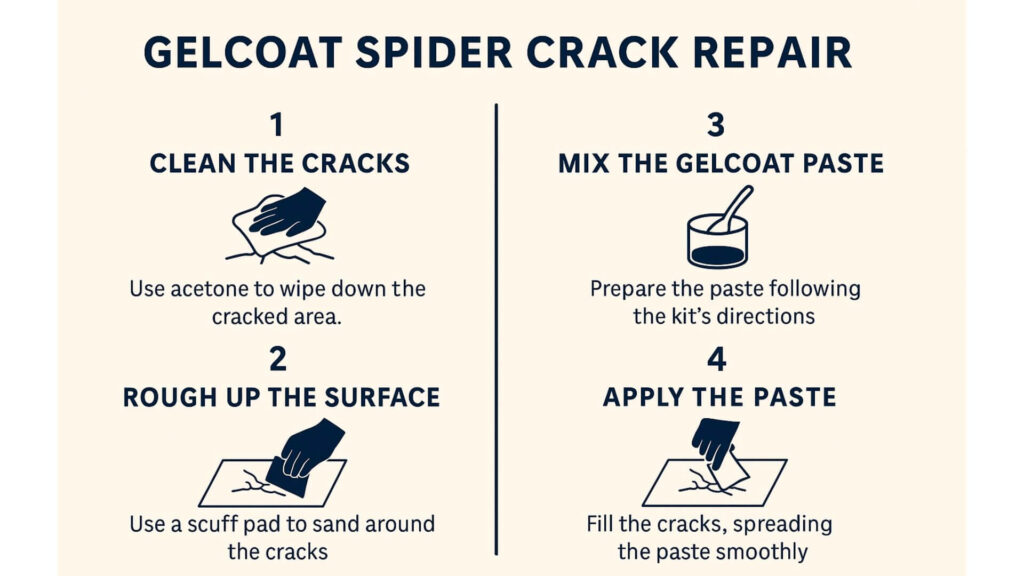
Start by thoroughly cleaning the area around the spider cracks. Use a clean rag and acetone to remove wax, dirt, grease, or oxidation.
This step is crucial because any contamination can prevent the gelcoat filler from bonding properly. Make sure the surface is completely dry before moving on.
Tip: Don’t rush this step—gelcoat doesn’t stick to dirty or oily surfaces.
Step 2: Lightly Sand or Scuff the Area
Use a scuff pad or 220-grit sandpaper to gently sand the area around the cracks. You don’t need to sand too deep—just rough up the gelcoat surface to help the filler adhere better. Sand a slightly larger area than the visible cracks for better blending.
Read my recommended best sanding blocks here!
Why it matters: A lightly abraded surface gives the filler something to “grab onto.”
Step 3: Mix the Gelcoat Filler Properly
Open your gelcoat repair kit and mix the filler according to the instructions. You’ll typically mix a base gelcoat with a hardener or catalyst. Be precise with the ratio—too much hardener can cause cracking, and too little may keep it from curing.
Pro tip: Mix only what you need for one repair session to avoid wasting material.
Step 4: Apply the Gelcoat Filler into the Cracks
Use a small spreader, stir stick, or disposable brush to work the gelcoat paste deep into each crack. Spread the filler slightly beyond the crack edges for a flush finish. Press gently to ensure all gaps are filled.
Important: Filling cracks properly seals out moisture and prevents further damage.
Step 5: Use Tape to Smooth and Remove Excess
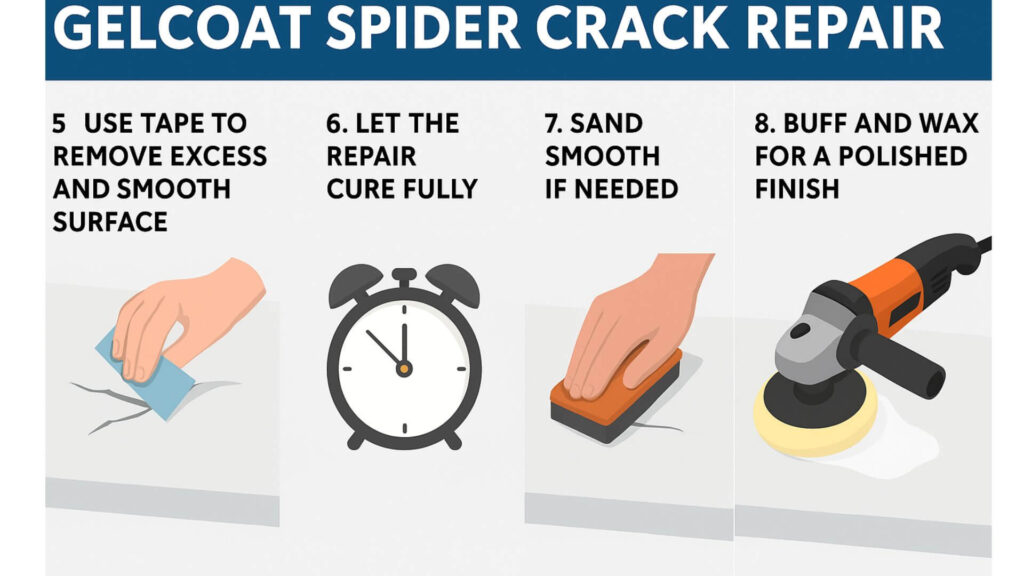
This little trick makes a big difference. Place painter’s tape directly over the filled cracks, then pull it off slowly. This levels the surface and removes extra gelcoat, reducing the sanding you’ll need later.
Why use tape? It helps keep the repair area neat and saves time during cleanup.
Step 6: Let the Repair Fully Cure
Allow the gelcoat to cure completely. Depending on the product and temperature, this might take several hours or overnight. Don’t touch or disturb the area while it cures.
Note: Curing too soon or under poor conditions may lead to poor bonding or surface defects.
Step 7: Lightly Sand for a Smooth Finish
Once the filler is fully hardened, use 400–600 grit sandpaper to smooth out the surface. Wet sanding works best to avoid overheating the gelcoat and to keep dust down. Sand until the repaired area blends seamlessly with the surrounding gelcoat.
Pro tip: Use a foam sanding block for better control and even pressure.
Step 8: Buff and Wax for a Factory-Like Shine
Finish the repair by polishing and waxing the area. This brings back the shine and adds UV protection. Use a rubbing compound followed by marine wax for best results.
Bonus benefit: A freshly waxed surface repels water and resists future cracking.
Once cured, the gelcoat repair should be waterproof and blend with the surrounding area. Be sure to address what caused the cracks originally to prevent more from forming.
Spider Crack Repair FAQs
Here are answers to some frequently asked questions about dealing with gelcoat spider cracks:
Very fine hairline cracks may not need filler yet. But if wide/dark enough to allow water ingress, or cause the surrounding area to be porous, repair is recommended.
Using a colored gelcoat filler matched closely to your boat’s existing gelcoat works better than basic epoxy, allowing for an invisible repair that will last.
While not typically a structural issue, cracks that penetrate deep enough to allow underlying wood or laminate layers to get wet will lead to more expensive repairs if ignored too long.
No – While acetone effectively removes dirt and wax before repairs, it can dull uncured gelcoat and is not generally advised for overall cleaning. A boat-specific soap and water works better for normal washing.
I hope these expanded FAQ’s give you more insight into effectively dealing with tricky gelcoat spider cracks! Let me know in the comment section below if you have any other questions.
Final Word
Repairing gelcoat spider cracks might seem minor, but it plays a big role in maintaining your boat’s integrity and appearance.
With the right prep, materials, and technique, even DIYers can achieve professional-looking results.
The key is to act early, before water infiltration causes deeper damage. After your repair, take steps to prevent future cracks: apply wax regularly, minimize impact with fenders, and store your boat under cover.
You should also read my article about repairing all types of gel coat cracks on a fiberglass boat here.

Warren is the founder of BoatGenesis and brings practical experience in fiberglass boat repair, marine equipment testing, and powerboat building. He has worked on a range of repair and restoration projects and now focuses on creating clear, research-based guides to help boat owners avoid costly mistakes and make smarter maintenance decisions. Learn more about Warren.


