
Gelcoat stress cracks are the pesky spiderwebs that haunt every boat owner’s nightmares. If you’ve ever noticed tiny, hairline cracks zigzagging across your boat’s glossy surface, you’re not alone.
Learning how to repair gelcoat stress cracks is a must for keeping your boat looking sharp and protected from deeper damage.
The good news? You don’t need to be a pro to tackle this repair. With the right tools and a little patience, you can restore your gelcoat and keep your boat looking like new.
Key Takeaways:
- Gelcoat stress cracks are common but fixable with DIY methods.
- Proper prep, attention to detail, and patience are key.
- Understanding the cause of cracks helps prevent future issues.
- Using the right materials and techniques ensures a lasting repair.
- What Are Gelcoat Stress Cracks?
- What Causes Gelcoat Stress Cracks?
- Tools & Materials You’ll Need
- Step-by-Step Guide: How to Repair Gelcoat Stress Cracks
- Pro Tips for a Seamless Gelcoat Repair
- What Others Don’t Tell You
- Common Mistakes to Avoid
- Preventing Gel Coat Stress Cracks in the Future
- When to Call a Professional
- Advanced Tips: Elevate Your Gelcoat Repairs
- A Real-World Example
- Gel Coat Stress Crack Repair: Your FAQs Answered
- Final Thoughts
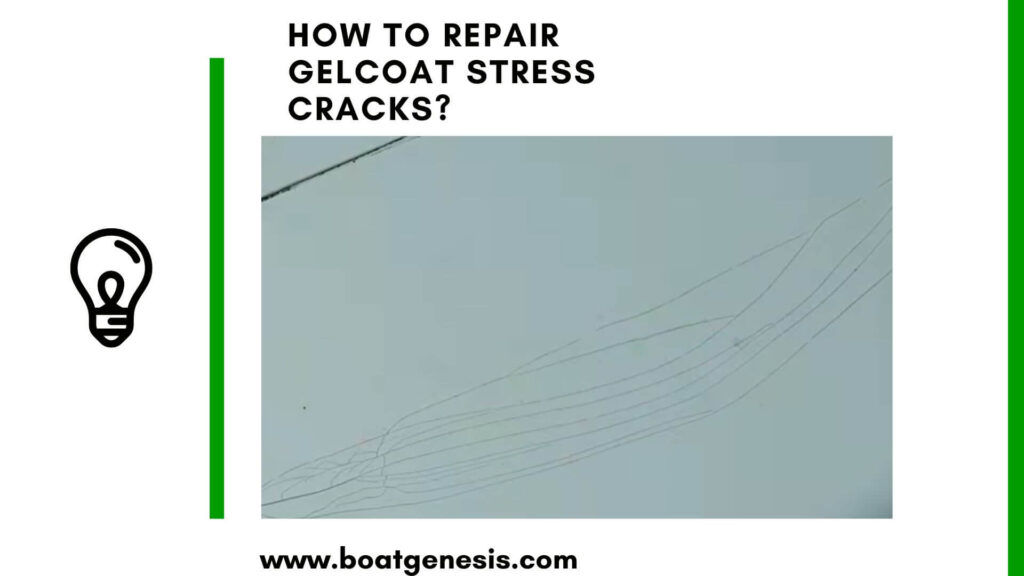
What Are Gelcoat Stress Cracks?
Gelcoat stress cracks are thin, superficial lines that appear on a boat’s surface.
They’re often called “spider cracks” or “crazing.” These cracks form when the gelcoat—the glossy, protective layer on your boat—can’t flex as much as the fiberglass underneath.
Over time, exposure to the sun, impacts, or even just regular use can cause the gelcoat to fracture.
Why Do They Matter?
While stress cracks rarely threaten your boat’s structural integrity, they can allow water to seep in, leading to more serious issues like delamination or rot. Plus, they’re just plain unsightly!
What Causes Gelcoat Stress Cracks?
Before you jump into repairs, it’s smart to understand what caused the cracks in the first place. Here are the most common culprits:
- Flexing: Boats flex as they move through the water. If the gelcoat is too thick or brittle, it cracks instead of flexing.
- Impacts: Dropping heavy objects or bumping into docks can create localized cracks.
- Aging: UV rays and weather can make gelcoat brittle over time.
- Poor Manufacturing: Sometimes, cracks appear because the original gelcoat was improperly applied.
Knowing the cause helps you fix the root problem, not just the symptom.
Tools & Materials You’ll Need
Let’s get hands-on. Here’s what you’ll need to repair gelcoat stress cracks:
- Dremel tool or small grinder (for opening up cracks)
- Sandpaper (80, 220, and 400 grit)
- Acetone (for cleaning)
- Masking tape
- Gelcoat repair kit (with catalyst/hardener)
- Mixing cups and stir sticks
- Fine paintbrush or small spatula
- Polishing compound
- Clean rags
- Safety gear (gloves, goggles, mask)
Step-by-Step Guide: How to Repair Gelcoat Stress Cracks
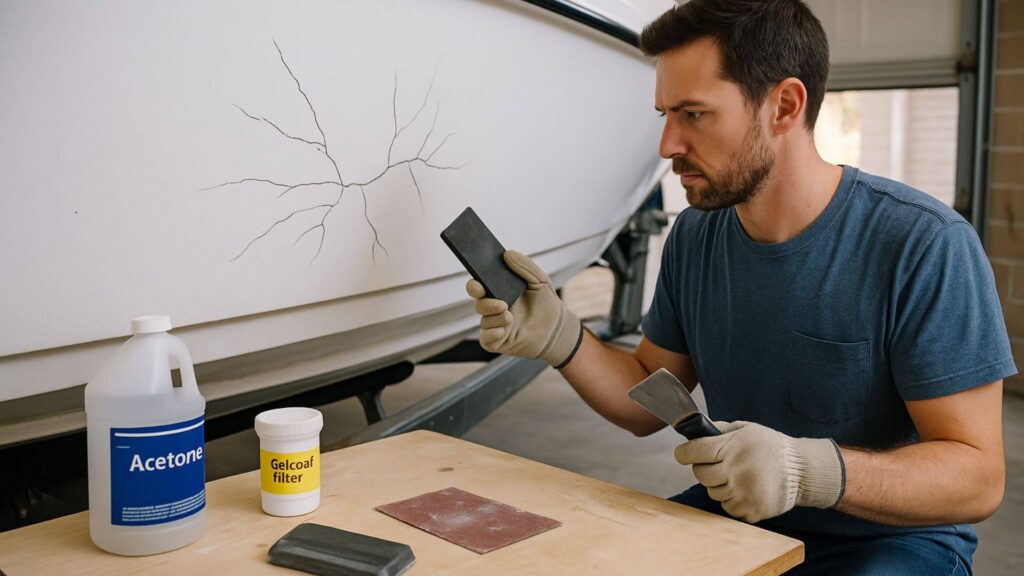
1. Inspect and Prep the Area
Start by cleaning the area thoroughly with soap and water, then wipe it down with acetone. This removes wax, grease, and dirt that could interfere with the repair.
Want to avoid costly fiberglass boat repair mistakes?
Learn how to inspect damage properly, decide when to DIY, and prevent expensive fiberglass problems before they start.
Use masking tape to mark off the cracked area and protect the surrounding gelcoat.
2. Open Up the Cracks
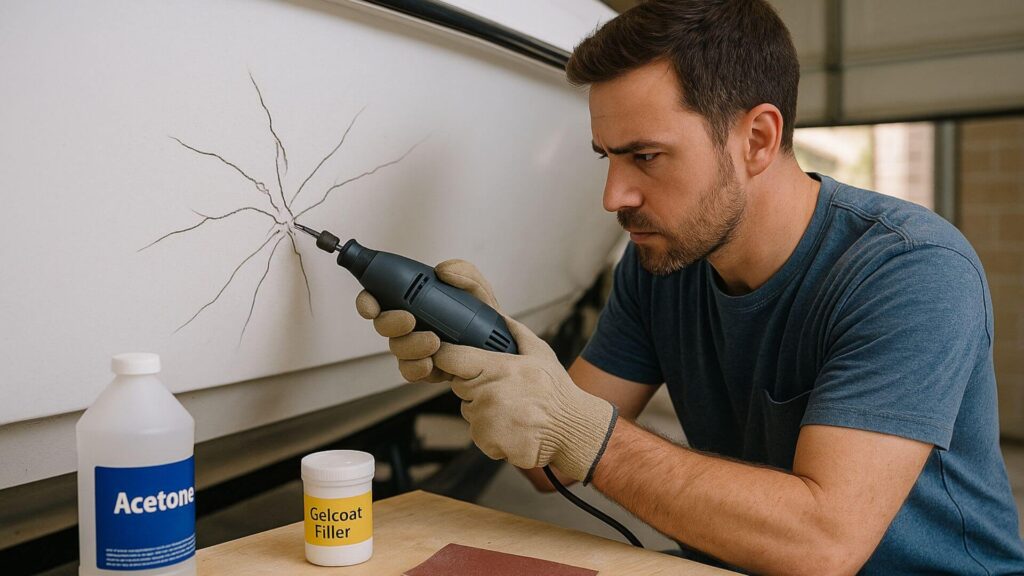
Here’s where most people go wrong: you can’t just fill the surface crack. You need to open it up slightly so the repair material can bond.
Use a Dremel tool with a small burr bit to gently widen the crack into a shallow “V” shape.
Don’t go too deep—just enough to expose fresh gelcoat and a bit of the fiberglass beneath if necessary.
3. Sand the Area
Sand the area with 80-grit paper to rough up the surface. This helps the new gelcoat stick. Feather the edges so your repair blends smoothly with the surrounding surface.
4. Clean Again
Wipe away all dust with a clean rag and acetone. Any leftover debris will mess with your repair.
5. Mix the Gelcoat
Follow the instructions on your gelcoat repair kit. Usually, you’ll mix the gelcoat resin with a catalyst (hardener).
Only mix what you can use in 10-15 minutes—gelcoat sets fast!
6. Apply the Gelcoat
Use a fine brush or a small spatula to work the mixed gelcoat into the crack.
Overfill the area slightly; gelcoat shrinks as it cures.
Smooth it as best you can, but don’t stress about perfection—you’ll sand it later.
7. Let It Cure
Allow the gelcoat to cure completely. This can take a few hours to overnight, depending on temperature and humidity.
Some kits recommend covering the repair with plastic wrap or wax paper to prevent air from inhibiting the cure.
8. Sand Smooth
Start with 220-grit sandpaper, then move to 400-grit for a smooth finish.
Wet sanding works best—keep the area damp to avoid clogging the paper.
9. Polish and Blend
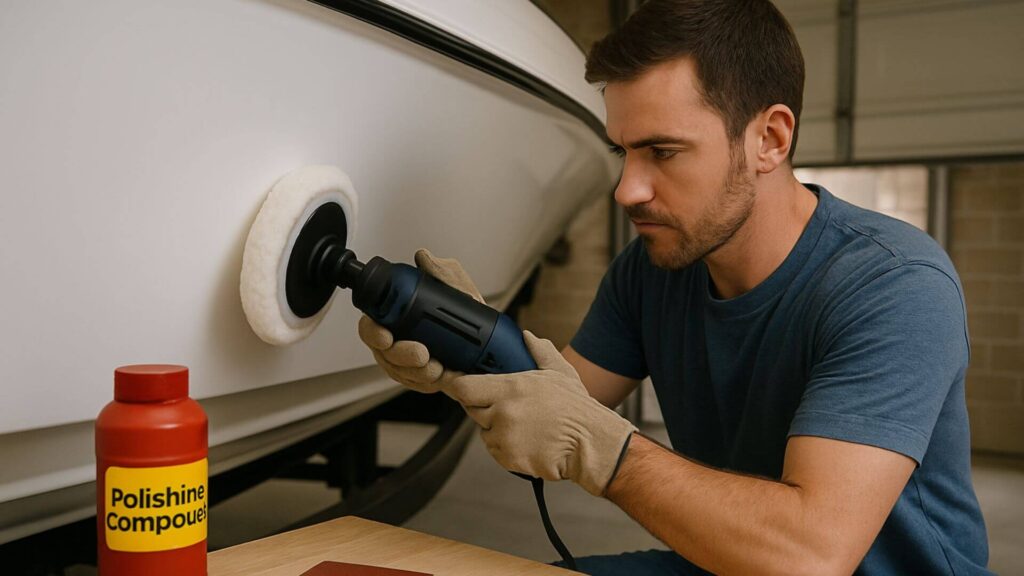
Buff the repaired area with a polishing compound to restore the shine. Use a clean rag or a buffing pad.
If you did it right, the repair should blend seamlessly with the surrounding gelcoat.
==>> You should also read my complete guide about fiberglass boat crack repair here.
Pro Tips for a Seamless Gelcoat Repair
- Color Matching: Gelcoat comes in many shades. Try to get a perfect match, but know that sun-faded gelcoat may never blend 100%. Some pros tint their gelcoat with pigments for a closer match.
- Multiple Cracks: If you have a cluster of cracks, it’s often best to repair the whole area rather than chasing each crack individually.
- Structural Cracks: If cracks go deep into the fiberglass, you may need a more extensive repair. Check for soft spots or flexing—these signal deeper damage.
- Prevent Future Cracks: Address the root cause. Add support under flexing areas, avoid impacts, and keep your boat covered when not in use.
What Others Don’t Tell You
The Hidden Dangers of Ignoring Stress Cracks
Many guides gloss over the fact that stress cracks can be a warning sign.

This guide helps boat owners understand fiberglass damage clearly — what matters, what doesn’t, and when repairs are truly necessary, so small issues don’t turn into expensive mistakes.
See What Every Boat Owner Should Know →If you notice cracks returning after repair, or if they’re accompanied by soft spots, you may have a structural problem lurking beneath.
Don’t just patch and forget—inspect the underlying fiberglass. If in doubt, consult a marine surveyor.
DIY vs. Professional Repairs
While DIY repairs are great for small, superficial cracks, larger or recurring cracks may need professional attention.
Pros can color-match perfectly, spray on gelcoat for a factory finish, and fix underlying structural issues.
Don’t be afraid to call in help for big jobs.
The Science of Gelcoat Curing
Gelcoat needs an oxygen barrier to cure properly.
That’s why some kits include a wax additive or suggest covering the repair with plastic wrap.
Without this, the gelcoat may stay tacky on the surface.
Common Mistakes to Avoid
- Rushing the Cure: If you start sanding or buffing before the gelcoat is fully cured, you’ll risk pulling up the repair or creating a dull finish. Patience pays off!
- Neglecting Safety: Gelcoat and acetone fumes are no joke. Always work in a well-ventilated area and wear gloves, goggles, and a mask.
- Over-sanding: It’s easy to sand through your new gelcoat or even the surrounding area. Use gentle pressure and check your progress often.
Preventing Gel Coat Stress Cracks in the Future
Prevention is always better than cure. Here are some actionable steps to help you avoid gelcoat cracks down the line:
1. Reduce Flexing
- Reinforce areas that flex too much, especially around decks and hatches.
- Add backing plates or extra fiberglass if you notice repeated cracking in the same spots.
2. Protect from Impact
- Install fenders and dock bumpers to minimize damage from knocks and bumps.
- Avoid placing heavy objects on unsupported surfaces.
3. Shield from UV and Weather
- Apply a UV-protective wax or polish to your gelcoat regularly.
- Keep your boat covered when not in use to prevent sun and weather damage.
4. Maintain Regularly
- Clean and inspect your gelcoat every season.
- Address small cracks as soon as you see them—early intervention prevents bigger problems.
You should also check out Epoxyworks, which explains the gelcoat crack repair process well.
When to Call a Professional

While most gelcoat stress cracks are a straightforward DIY fix, there are times when it’s best to call in a pro:
- Cracks are widespread or deep: If you see cracks that go beyond the gelcoat into the fiberglass, or if they cover a large area, you may have a structural issue.
- Water intrusion: If water has already gotten beneath the gelcoat, you’ll need professional help to dry and repair the core.
- Color matching is critical: For high-visibility areas or show-quality finishes, pros have the tools to blend new gelcoat seamlessly.
Advanced Tips: Elevate Your Gelcoat Repairs
1. Custom Tinting
If you want a near-invisible repair, buy a neutral gelcoat and pigment tints. Mix small batches and test on a hidden area until you get a match.
2. Spray Application
For larger repairs, consider spraying the gelcoat with an HVLP spray gun. This gives a smoother, more consistent finish, just like the factory.
3. Use a Release Film
After applying gelcoat, cover the repair with a sheet of Mylar or clear plastic. This helps the gelcoat cure tack-free and leaves a smoother surface that needs less sanding.
4. Check for Flex
After your repair, gently press around the area. If it flexes or feels soft, you may need to add reinforcement beneath the gelcoat.
A Real-World Example
Let’s put all this into context with a quick story:
Last summer, my neighbor noticed a cluster of fine cracks near his boat’s bow. He’d always docked a little roughly, and over time, the gelcoat gave way. Following the steps above, he opened up the cracks, reinforced the area with a bit of extra fiberglass, and carefully color-matched his gelcoat.
The result? You can’t even tell where the cracks were, and the bow is stronger than ever. He even started covering his boat when not in use—lesson learned!
Gel Coat Stress Crack Repair: Your FAQs Answered
Still have some lingering questions about repairing cracks in your boat’s gelcoat? Here are answers to a few frequently asked questions:
Spider cracks spread out in web-like patterns across the gelcoat surface. They may be shallow crazing from normal expansion and contraction.
-Stress cracks form straight lines emanating from corners and hardware. These result from consistent pressure on vulnerable areas.
Exposure to the sun, extreme heat, and dramatic temperature fluctuations can all cause expansion, contraction, and eventual cracking. Colder climates still lead to cracking as the boat hull moves in and out of freezing waters.
If done properly, a gelcoat repair can last for years. The key is thorough prep and curing, and preventing the causes of future cracks.
Gelcoat pens and fillers are quick fixes, but they’re usually only a temporary cosmetic solution. For a long-lasting repair, you need to open up the crack and fill it with catalyzed gelcoat.
If you’re very handy with tools and compounds, this can certainly be a DIY endeavor. For larger stress cracks or those in tricky locations, consider hiring a professional marine repair service instead.
Absolutely! Small cracks can let in water and lead to bigger problems if ignored. Plus, they’re easier and cheaper to fix when caught early.
With careful color matching and blending, most repairs are barely noticeable. Older, sun-faded gelcoat may be harder to match perfectly, but a good polish helps blend the repair.
Final Thoughts
Learning how to repair gelcoat stress cracks isn’t just about keeping your boat looking good—it’s about protecting your investment and preventing bigger headaches down the road.
With the right approach, a little patience, and attention to detail, you can tackle this repair yourself and gain the satisfaction of a job well done.
Remember:
- Take your time with prep and color matching.
- Don’t skip the V-groove step.
- Always check if there’s a deeper issue causing the cracks.
- Prevent future cracks by reinforcing weak spots and protecting your gelcoat.
Boating is about freedom and enjoyment—don’t let a few cracks spoil your fun. With this guide, you’re ready to keep your boat shipshape for future seasons.

Warren is the founder of BoatGenesis and brings practical experience in fiberglass boat repair, marine equipment testing, and powerboat building. He has worked on a range of repair and restoration projects and now focuses on creating clear, research-based guides to help boat owners avoid costly mistakes and make smarter maintenance decisions. Learn more about Warren.


I appreciate you informing us that sun exposure can cause gel coat to develop cracks along with normal expansion and contraction over time because of the stress points. I noticed that the water slide we have installed over our pool at home has visible cracks on the surface, so I need them fixed soon before they become worse over time. I’ll keep this in mind while I look for services in the area to hire for water slide structure repairs soon.
Hey, Claire
I am glad the article was helpful
Cheers
Warren NZAMBI
Dear Sir.
I am looking for advice on how to repair cracks that has appeared on the fibreglass fuel boxes or small compartments where the plastic fuel tanks are hidden away. cracks have appeared across the front top edge of just the one box, the second one looks fine to me. also can you please advise me on what products to use on this crack and how to prep the area properly before you even start to fill the cracks. the size of the crack is around 3mm wide by around 18 inches long. this seems to be the only crack I can find on the whole boat and the boat is 22 ft long. the boat is a colvic sea worker built in the mid to late 80s. and if there are any other important tips you can email me this would be very helpful for me to get a good finish on any repairs. I would be very grateful if you were able to send me any helpful tips to my email address so that I can take your advice in properly, due to having dementia I can’t take everything properly so if I have any advice from you via email I can then look things up without having go on line all the time. I hope I have sent this email to the correct person who is able sort this out for me. if not who ever gets this email would it please be possible for this person to send me any useful tips, and how maybe how to do this repair from start to finish.
I do appreciate you taking the time and effort to read my email.
My Kindest Regards
Phil.
Dear Phil,
Thank you for reaching out, and I truly appreciate the detailed explanation you provided—it really helps me understand your situation. I’ll do my best to guide you through the process in a clear and simple way, and I’ll also summarize everything at the end so you can refer back to it easily.
1. Preparing the Area:
Empty and clean the compartment thoroughly.
Use a mild detergent and water to remove any dirt, then wipe with acetone to remove grease or wax.
Lightly sand around the crack using 80-grit sandpaper. Sand about 2–3 inches beyond the crack so the repair material can bond well.
2. Assessing the Crack:
Since the crack is about 3mm wide and 18 inches long, it sounds structural rather than just a surface gelcoat crack. We’ll need to fill and reinforce it, not just patch it.
3. Repair Materials You’ll Need:
Fiberglass repair kit (resin + hardener, chopped strand mat or fiberglass cloth).
Epoxy-based marine filler (for final smoothing).
Acetone (for cleaning).
Sandpaper (80-grit, 120-grit, and 240-grit).
4. Repair Steps:
Open the crack slightly with a small grinder or file to create a “V” groove—this ensures the repair resin penetrates fully.
Lay Fiberglass:
Mix resin and hardener as per instructions.
Cut fiberglass cloth into strips slightly longer/wider than the crack.
Apply resin into the groove, lay a strip of fiberglass over it, and saturate it with more resin.
Repeat 2–3 layers, ensuring each layer is fully wetted out.
Let it Cure: Leave it for the recommended curing time (usually overnight).
Smooth & Finish: Sand smooth with 120-grit, then fill any imperfections with marine filler. Sand again with 240-grit for a smooth finish.
Optional Paint/Coat: If the area is visible, apply gelcoat or marine paint to match.
5. Important Tips:
Work in a well-ventilated area.
Wear gloves and a mask when working with fiberglass.
Take your time—preparation is the key to a long-lasting repair.
I’ve summarized the above steps in a simple checklist for you to follow at your own pace. I’ll be happy to email this summary directly to you—please confirm your email address so I can send it.
You’re doing the right thing by addressing this now—small cracks can grow if left untreated, and it’s much easier to fix them early.
My kindest regards,