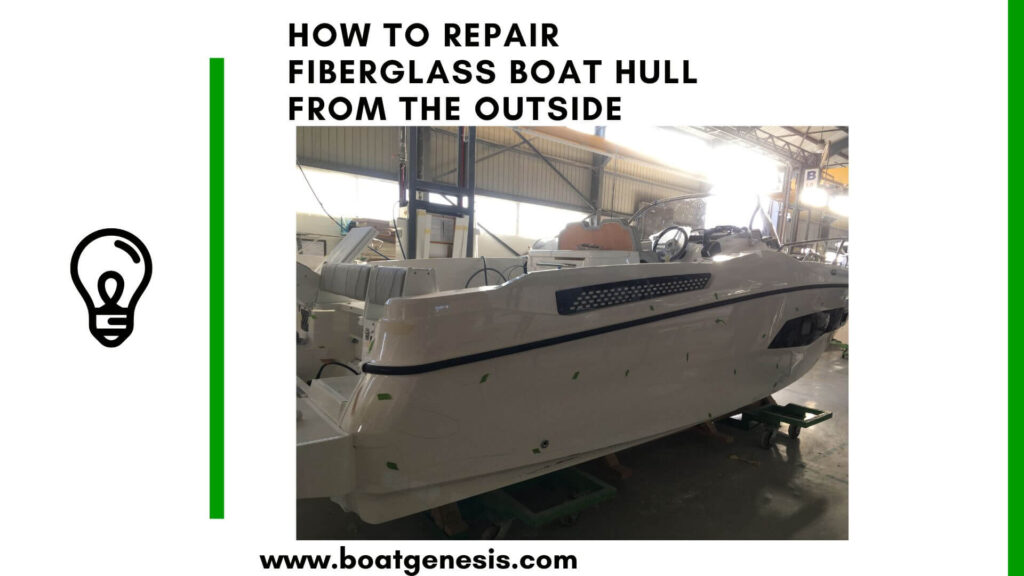
Found a crack, gouge, or suspicious soft spot on your hull? You’re not alone — and you don’t need a boatyard bill to fix it. Learning how to repair a fiberglass boat hull from the outside is one of the most valuable skills a boat owner can have.
Most damage looks worse than it is, and with the right materials and a bit of patience, you can restore your hull to full strength yourself.
This guide walks you through every stage — from reading the damage correctly, to mixing resin, to that final buff that makes the repair disappear. We’ve also included a working conditions guide, a DIY vs. professional decision table, and answers to the questions we see boaters ask most.
Quick note before you startThis guide focuses on external hull repairs — the most common type for recreational boats. If your damage runs all the way through the hull, jump to the “Inside vs. Outside” section before you buy materials.
- Understanding the types of gelcoat damage
- What you'll need
- How to repair Fiberglass boat hull from the outside?
- Working conditions matter more than most people think
- Outside repair vs. inside repair — which do you need?
- When to call a professional
- Keeping your hull in shape after the repair
- Key takeaways
- FAQ: How to repair Fiberglass boat hull from the outside
- 1. How long does a fiberglass hull repair last?
- 2. Can I repair a fiberglass hull while the boat is still in the water?
- 3. What's the difference between polyester and epoxy resin for hull repairs?
- 4. How do I match the gelcoat color to my boat?
- 5. How many layers of fiberglass cloth do I need?
- 6. My gelcoat cured tacky and won't harden — what happened?
- 7. Is fiberglass repair toxic?
- Final Word
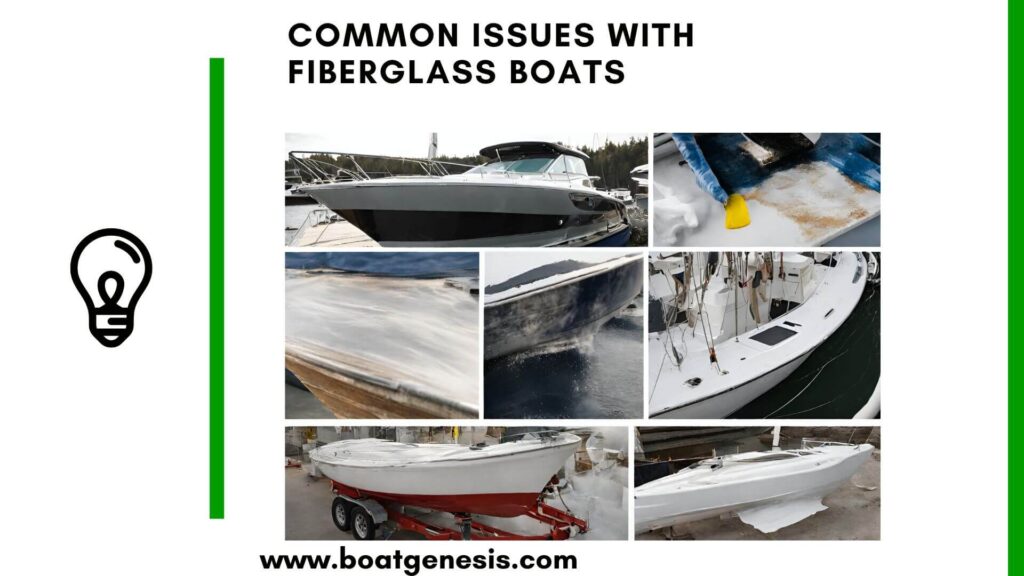
Understanding the types of gelcoat damage
Not all hull damage is the same, and misreading it leads to wasted time and weak repairs. Here’s how to tell what you’re actually dealing with.
| Damage type | What it looks like | Repair complexity |
|---|---|---|
| Scratches & scuffs | Fine surface marks, no depth | Low |
| Spider cracks | Web-like fine cracks in the gelcoat | Low–Mid |
| Chips & gouges | Material missing, possibly into fiberglass layer | Mid |
| Osmotic blisters | Raised bubbles, often below waterline | High |
| Structural breach | Cracks or holes through the full hull thickness | Professional |
Scratches and spider cracks are a cosmetic fix. Gouges that expose raw fiberglass need structural attention. Osmotic blisters and full-thickness breaches — especially near or below the waterline — are best handled by a professional.
What you’ll need
Gather everything before you start. Stopping mid-repair because you’re missing a component can ruin the cure.
Fiberglass repair kit: Resin, hardener, cloth — or buy individually
Sandpaper: 80–120 grit coarse, 220–400 grit fine, 600–1500 wet/dry
Gelcoat: Color-matched to your hull if possible
Acetone: For cleaning the surface before and after sanding
Mixing tools: Cups, stir sticks, spreaders or putty knife
Protective gear: Gloves, respirator, safety goggles — non-negotiable
Want to avoid costly fiberglass boat repair mistakes?
Learn how to inspect damage properly, decide when to DIY, and prevent expensive fiberglass problems before they start.
Release film: Plastic sheeting to cover fresh gelcoat while it cures
Buffing compound & wax: For the finishing stage
Pro tip on gelcoat color: Take a photo of your hull in natural light and bring it to a marine supply store. Many stores can mix a color-matched gelcoat. It won’t be perfect on older boats (the original gelcoat fades), but it’ll be close enough.
How to repair Fiberglass boat hull from the outside?
Follow these steps in order. Skipping prep steps is the most common reason repairs fail within a season.
1. Assess the damage honestly
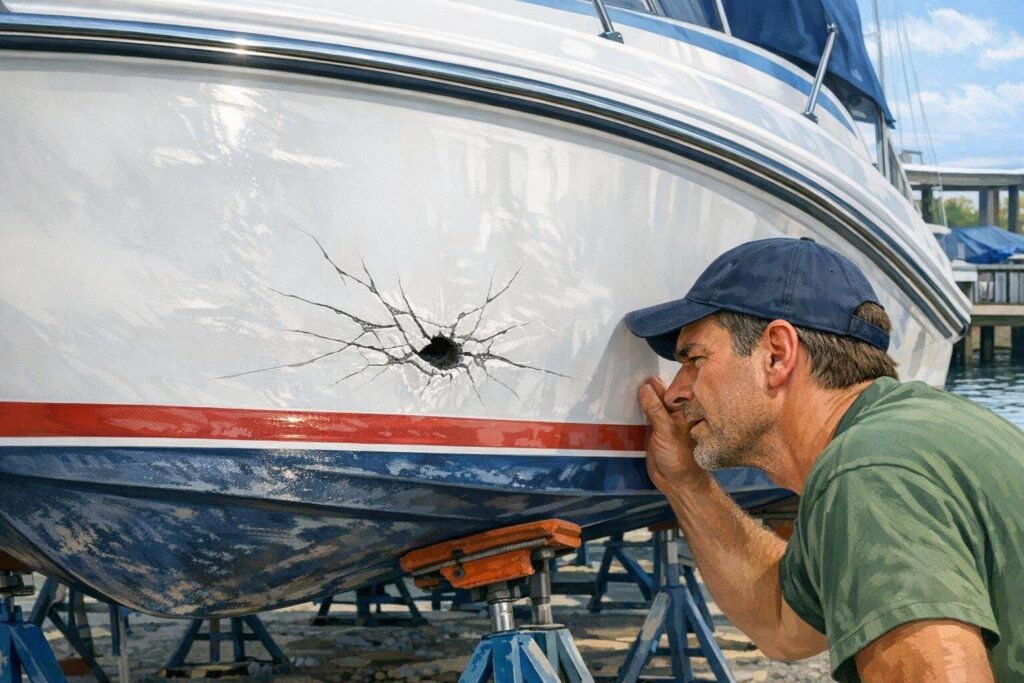
Look closely in good light. Press gently around the damaged area — soft spots mean the fiberglass beneath the gelcoat has delaminated. If it flexes, you need structural repair, not just a cosmetic fill.
2. Clean the area with acetone
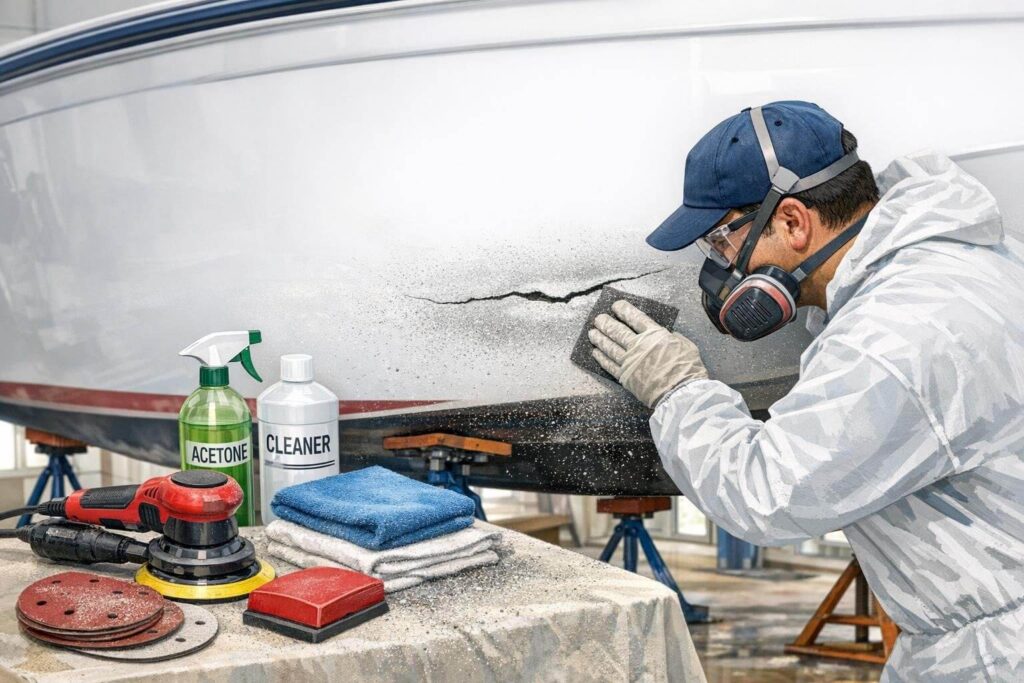
Wax and oil are the enemies of adhesion. Wipe down the entire repair area with acetone and let it flash off fully before touching the surface again.
3. Sand the area to create bite
Use 80–120 grit to roughen a zone slightly larger than the damage. New fiberglass and resin won’t bond to a smooth, shiny gelcoat surface. Wipe clean after sanding.
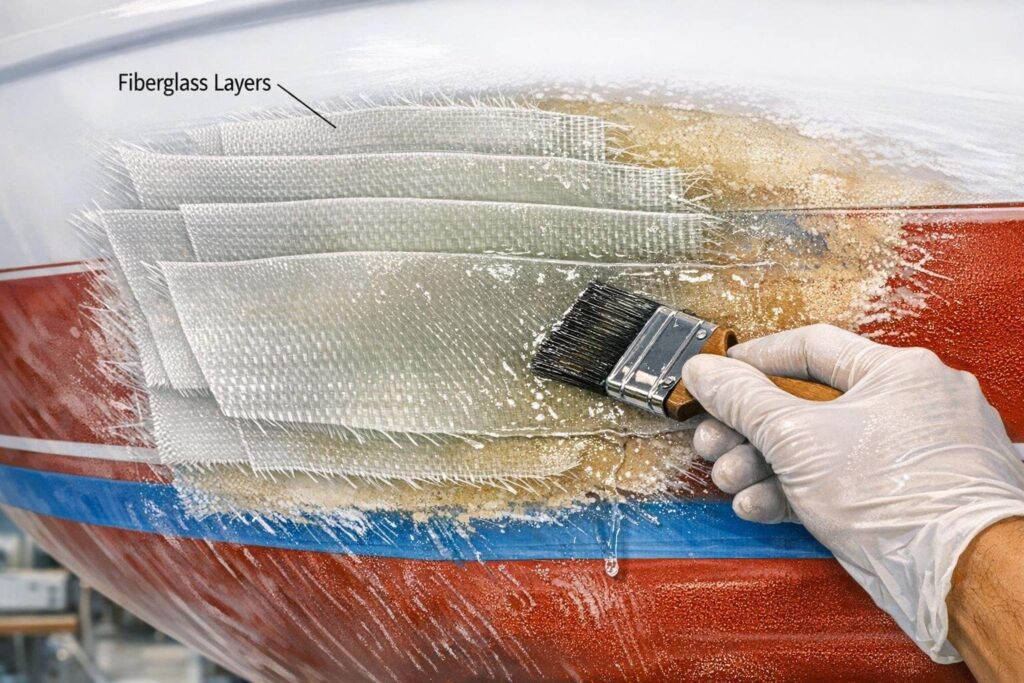
4. Cut and layer fiberglass cloth
For structural damage, cut cloth patches that extend at least 2 inches beyond the damaged zone.
If you need multiple layers, cut each one slightly larger than the last — this creates a tapered edge that distributes load better.
5. Mix resin and hardener precisely
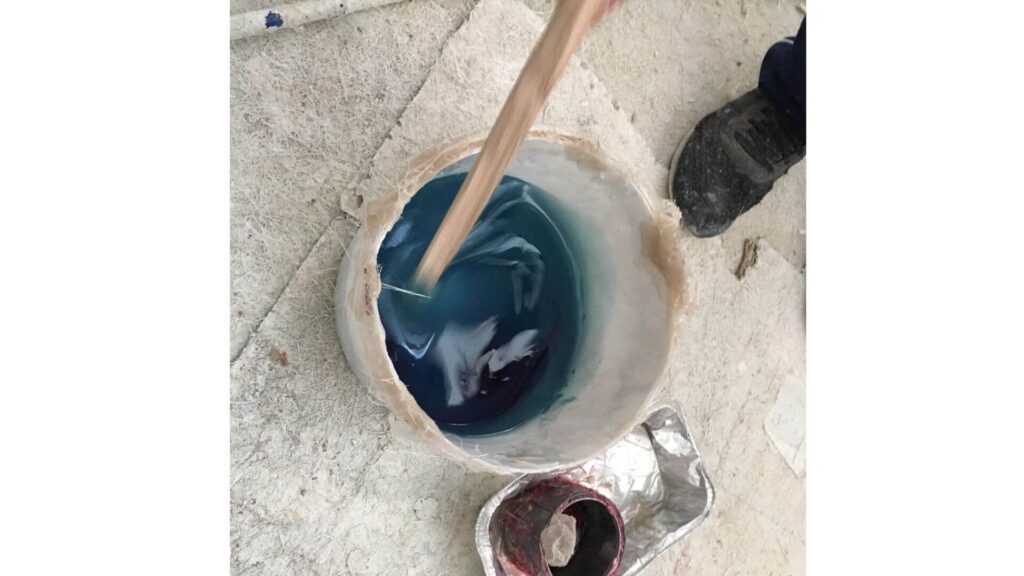
Follow the ratio on your kit exactly. Too much hardener = brittle, fast cure. Too little = it never fully hardens. Mix in a disposable cup and use it within the pot life window (usually 15–20 minutes).
6. Apply layers and wet out the cloth
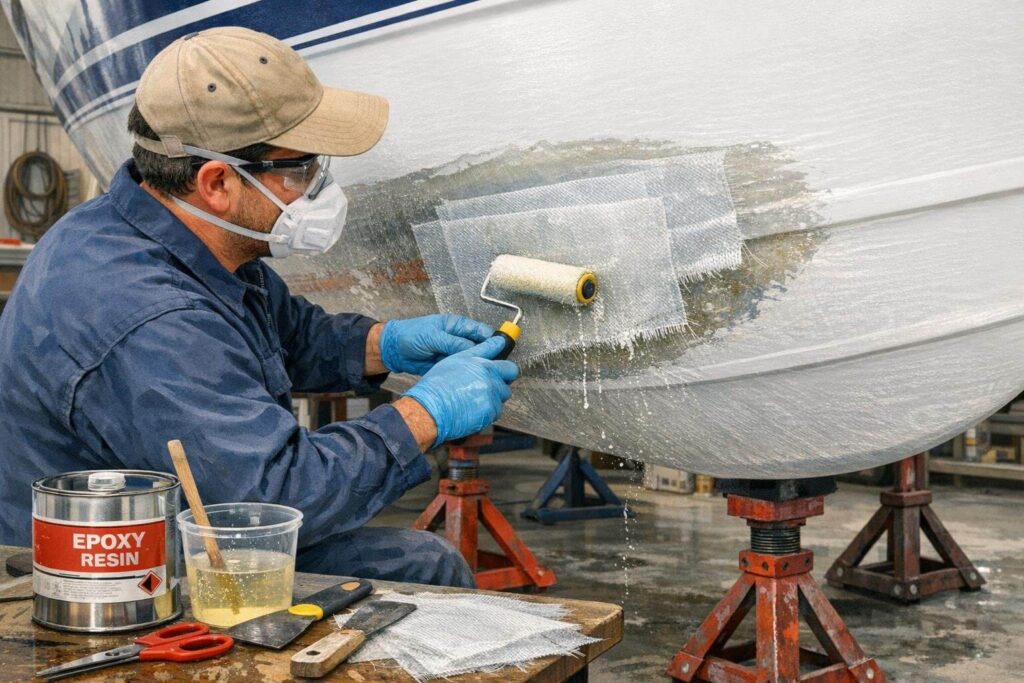
Brush a base layer of resin onto the prepped surface. Lay your first cloth patch, then apply more resin over it.
Work out any air bubbles with a roller or brush. Repeat with additional layers, letting each go tacky before the next.
7. Let the laminate cure fully
Don’t rush this. Depending on temperature and humidity, a full cure can take anywhere from 4 hours to overnight. The repair should feel hard and warm to the touch — not sticky.
8. Sand smooth and apply gelcoat
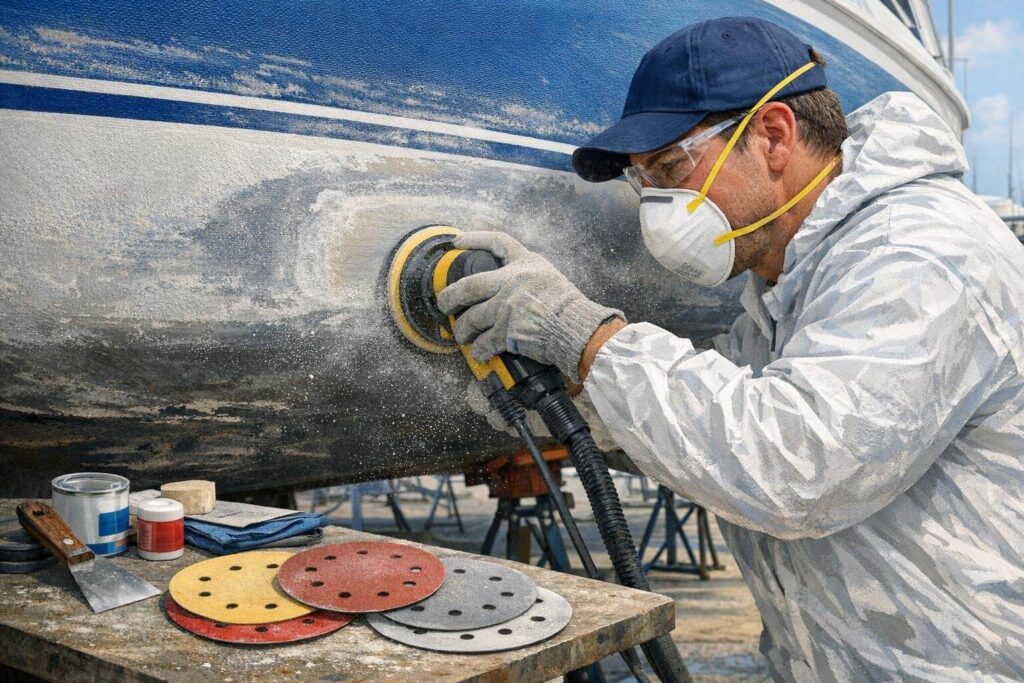
Start with 80–120 grit to knock down high spots, then progress to 220. Once the surface is smooth and even, apply your color-matched gelcoat.
Cover with release film to prevent air inhibition during cure — air-exposed gelcoat stays tacky on the surface.
9. Wet sand, buff, and wax
Once the gelcoat has hardened, wet sand through the grits (400 → 800 → 1500). Follow with buffing compound, then a UV-protective marine wax. At this stage, a good repair should be nearly invisible.
Working conditions matter more than most people think
Picking the right time to do the repair makes the difference between a finish that lasts and one that chalks and cracks within a year.

This guide helps boat owners understand fiberglass damage clearly — what matters, what doesn’t, and when repairs are truly necessary, so small issues don’t turn into expensive mistakes.
See What Every Boat Owner Should Know →GOOD CONDITIONS
Overcast, 60–80°F, low humidity, in shade or covered area, morning or evening work
AVOID
Direct sunlight, temperature above 90°F or below 50°F, high humidity or rain, wind (blows dust into wet resin)
IDEAL VENTILATION
Open-air or cross-ventilated space — resin fumes are heavier than air and pool at ground level
NEVER WORK HERE
Enclosed garage, boat cabin, or any space without fresh air moving through — resin fumes are both toxic and flammable
Temperature and resin cure: In hot sun, polyester resin can kick in under 10 minutes — before you’ve finished applying your cloth. In cold weather (below 55°F), it may never cure properly. Store your resin and hardener at room temperature the night before you work.
Outside repair vs. inside repair — which do you need?
This is the question most DIY guides skip. The answer changes your entire material list and process.
| Factor | Outside repair | Inside repair |
|---|---|---|
| Damage depth | Gelcoat surface to mid-fiberglass | Full thickness breach |
| Structural goal | Restore surface & outer skin | Restore full hull integrity |
| Access required | Exterior hull surface only | Interior of the hull (may need to remove panels/liners) |
| DIY feasibility | High — most boat owners can do this | Moderate to low — often needs professional assessment |
| Watertight concern | Important, especially at/below waterline | Critical — two-sided sealing required |
| Typical time | Half day to full day | Multiple days, may require haulout |
If your boat is taking on water, has visible soft hull panels, or shows delamination over a large area, skip the DIY route and call a certified marine surveyor first. A repair done wrong on a structural breach is worse than no repair.
When to call a professional

The external fiberglass repair process described here handles the majority of recreational boat damage. But there are real situations where stopping and calling a pro is the right call — not the cautious one.
Consider professional help if the damage is larger than about a dinner plate, if it’s at or below the waterline and you’re unsure whether the repair is fully watertight, if the boat shows signs of extensive osmotic blistering across the hull, or if you find soft, spongy areas that flex when pressed.
These are structural issues, and getting them wrong is an expensive mistake on the water.
So, call the pros if you cannot repair fiberglass boat hull from the outside yourself.
For a useful overview of what professional fiberglass inspections involve, the National Association of Marine Surveyors has resources for finding certified surveyors in your area.
Keeping your hull in shape after the repair
A good repair is wasted if the underlying cause isn’t addressed. Here’s what keeps fiberglass hulls healthy long-term.
Wax your hull at least twice a year with a marine-grade UV-protective wax. UV degradation is the leading cause of gelcoat chalking and cracking.
Keep the boat stored out of direct sunlight when not in use — a simple hull cover does more for longevity than most people realize.
Inspect the hull carefully after every grounding or hard impact, even if nothing looks wrong at first. Stress cracks in fiberglass can take weeks to show up fully.
Catching a spider crack early means a 30-minute patch job rather than a structural repair.
For boats kept in the water long-term, check below the waterline annually for osmotic blistering. The West System technical team has an excellent guide to osmotic blister repair and prevention that’s worth bookmarking.
Key takeaways
- Most fiberglass hull damage can be repaired from the outside without professional help — the key is correctly identifying the damage type first.
- Surface prep (cleaning and sanding) is the step that determines whether your repair lasts one season or ten.
- Temperature, humidity, and ventilation all affect how resin and gelcoat cure — work in shade, between 60–80°F.
- For structural repairs, build up multiple layers of fiberglass cloth, each slightly larger than the last, to distribute load evenly.
- Gelcoat cures tacky unless covered with release film — don’t skip this step before wet sanding.
- Full-thickness hull breaches, large delamination areas, and below-waterline osmotic blistering warrant a professional assessment.
- Regular waxing and UV protection extend hull life significantly — prevention is cheaper than repair.
FAQ: How to repair Fiberglass boat hull from the outside
1. How long does a fiberglass hull repair last?
A properly done repair can last the lifetime of the boat. The laminate repair itself won’t fail — what tends to degrade over time is the gelcoat surface finish. Keeping it waxed and protected from UV will keep it looking good for many years.
2. Can I repair a fiberglass hull while the boat is still in the water?
Only for repairs above the waterline, and only if you can keep the area dry. Resin won’t bond to a wet surface. For anything at or below the waterline, haul the boat and let the hull dry completely — at least 48–72 hours — before starting the repair.
3. What’s the difference between polyester and epoxy resin for hull repairs?
Polyester resin is what most production fiberglass boats are built with — it’s cheaper and easier to find, and gelcoat bonds well over it. Epoxy resin is stronger and more waterproof, which makes it better for below-waterline structural repairs. The catch: gelcoat doesn’t stick to epoxy reliably, so epoxy repairs below the waterline are usually finished with epoxy paint, not gelcoat.
4. How do I match the gelcoat color to my boat?
Older boats are the hardest — the original gelcoat fades over time and any new gelcoat will look brighter. Your best options are: use a color-matched gelcoat from the manufacturer if the boat is newer and still in production, or take a chip or photo to a marine supply store that offers custom mixing. Sanding and polishing the surrounding area before finishing the repair also helps blend the difference.
5. How many layers of fiberglass cloth do I need?
For surface or shallow repairs, one or two layers is usually enough. For structural repairs, you want to match the original hull thickness. As a rule of thumb, each layer of woven roving adds about 1–2mm. Measure the hull thickness at the repair site (a drill with a depth gauge works) and build up accordingly.
6. My gelcoat cured tacky and won’t harden — what happened?
Gelcoat is air-inhibited — oxygen prevents the surface from fully curing. You either forgot to cover it with release film (PVA film or plastic sheeting), or the film didn’t seal completely. Wet sand the tacky layer lightly with 220 grit, clean with acetone, and re-apply with a proper cover over the fresh coat.
7. Is fiberglass repair toxic?
The resins and hardeners involved are genuinely hazardous — skin sensitizers, lung irritants, and flammable. Always wear nitrile gloves (not latex — resin permeates latex quickly), a respirator rated for organic vapors, and eye protection. Work outdoors or in a space with strong cross-ventilation. Don’t eat, drink, or touch your face during the work.
Final Word
Repairing a fiberglass boat hull from the outside is one of those jobs that looks intimidating until you’ve done it once.
After that, it becomes just another part of owning a boat — like changing the oil or winterizing the engine. The materials are affordable, the process is straightforward, and the satisfaction of a smooth, seamless hull that you fixed yourself is hard to beat.
The most important things to take away from this guide: read the damage correctly before you buy anything, never rush the prep or the cure, and match your working conditions to what the resin actually needs.
Most failed repairs come down to one of those three things — not the skill of the person doing the work.

Warren is the founder of BoatGenesis and brings practical experience in fiberglass boat repair, marine equipment testing, and powerboat building. He has worked on a range of repair and restoration projects and now focuses on creating clear, research-based guides to help boat owners avoid costly mistakes and make smarter maintenance decisions. Learn more about Warren.