Fiberglass boat keel repair might sound intimidating, but it’s a skill every boat owner should have in their toolkit.
The good news? Most fiberglass keel damage is repairable at home with the right approach and materials. I’ve guided hundreds of boat owners through this process, and the truth is that a solid keel repair isn’t about perfection—it’s about proper technique, patience, and using materials that’ll actually hold up in marine conditions.
In this guide, you’ll get a complete walkthrough of fiberglass keel repair, from diagnosing the damage to applying the final protective coat. More importantly, you’ll learn the details that separate repairs that last decades from those that fail in a season—insights most generic guides leave out.
What you’ll learn:
- How to properly assess keel damage (including hidden issues most people miss)
- Step-by-step repair techniques that actually work long-term
- Material choices that matter—and which corners you can’t cut
- Protection strategies to prevent future damage
- When DIY makes sense and when to call a professional
Whether you’re dealing with a minor scrape or significant gouging, this guide will help you make informed decisions and, if you choose to tackle it yourself, do it right the first time.
- Why Fiberglass Boat Keel Repair Matters
- Inspecting Your Keel: Finding All the Damage (Not Just What's Obvious)
- Common Keel Damage Scenarios and What Causes Them
- Tools and Materials You’ll Need
- Step-by-Step Fiberglass Keel Repair Process
- Advanced Tips for a Professional-Grade Keel Repair
- Long-Term Protection: Making Your Repair Last Decades
- When to Call a Professional Marine Technician
- Troubleshooting Common Keel Repair Problems
- Frequently Asked Questions
- Can I use polyester resin instead of epoxy for keel repairs?
- How long does a properly done keel repair last?
- Can I repair my keel while the boat is in the water?
- Is it safe to launch my boat immediately after painting?
- What's the difference between a keel guard and a repair?
- My keel has spider-web cracking in the gelcoat but no structural damage. Do I need to repair it?
- How do I know if water has gotten into my keel?
- Can I do this repair in winter or during humid weather?
- Final Thoughts: The mindset for successful keel repair
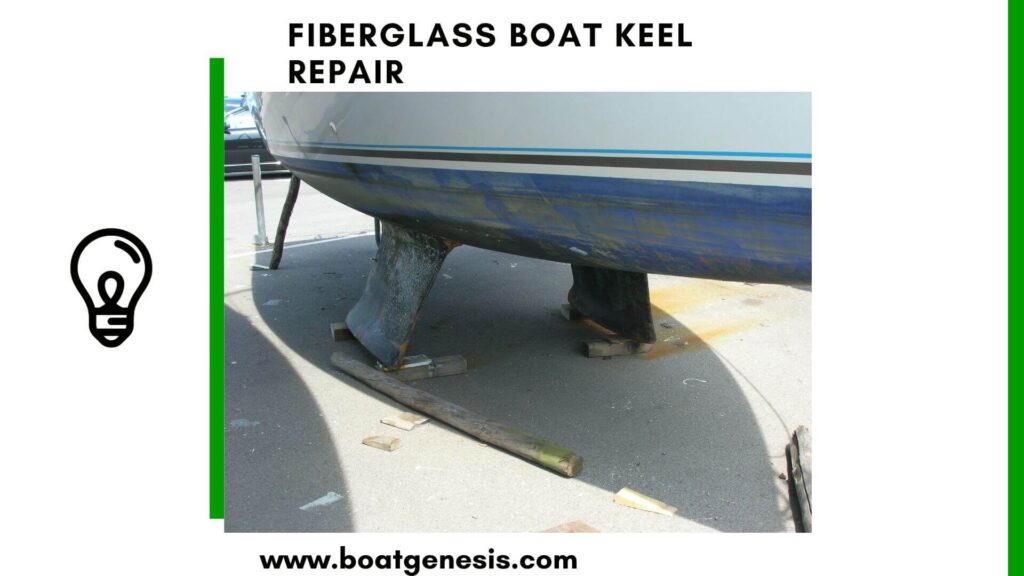
Why Fiberglass Boat Keel Repair Matters
Your boat’s keel isn’t just about hydrodynamics—it’s the primary point of contact between your hull and anything lurking beneath the waterline. Even minor damage creates vulnerabilities that compound over time.
Even minor dings can lead to water intrusion, delamination, or costly structural issues down the road.
That’s why understanding fiberglass boat keel repair is essential for every boater. Fixing issues early means less money spent, more time on the water, and peace of mind.
Here’s what happens if you ignore keel damage:
Water intrusion: Small cracks allow water to penetrate the laminate layers, leading to delamination between the fiberglass and core materials. Once water gets in, the damage spreads invisibly.
Structural compromise: The keel area often ties into critical structural components like stringers and floor frames. Damage here can affect the entire hull’s integrity.
Accelerated deterioration: UV exposure, freeze-thaw cycles (if you’re in colder climates), and electrolysis all work faster once the protective gelcoat barrier is broken.
Decreased performance: Even small irregularities in the keel profile increase drag and can affect handling, especially in sailboats where keel shape is critical.
Resale value: Prospective buyers and surveyors scrutinize the keel area. Visible damage or poor repairs are red flags that tank your boat’s value.
The bottom line: addressing keel damage early saves you money, preserves your boat’s performance, and gives you peace of mind every time you’re on the water.
Inspecting Your Keel: Finding All the Damage (Not Just What’s Obvious)
Before you start grinding and mixing resin, you need a complete damage assessment. Miss something now, and you’ll be doing this all over again next season.
Visual Inspection
Get the boat out of the water and cleaned up. Look for:
- Surface cracks: Hairline gelcoat cracks vs. deeper structural cracks
- Gouges and abrasions: Note depth and extent
- Missing gelcoat or exposed fiberglass: Areas where the protective layer is gone
- Discoloration: Often indicates water intrusion or previous repairs
- Distortion: Warping or irregularities in the keel profile
Use a wax pencil or painter’s tape to mark every area of concern. Take photos for reference.
The Tap Test
Tap along the keel with a coin or small hammer. You’re listening for:
- Solid, sharp sound: Healthy fiberglass
- Dull, hollow sound: Delamination or voids behind the surface
- Variation in sound: Boundaries between good and damaged areas
Map out any areas that sound suspect—even if they look fine visually.
Moisture Detection
This is the step most DIYers skip, and it’s often why repairs fail.
Moisture meter method: A pin-type moisture meter gives you numerical readings. Anything above 15-20% moisture content needs drying before repair.
Heat test: Gently warm the area with a heat gun. If moisture is present, you’ll see condensation or darkening.
Patience test: If you suspect moisture but can’t confirm it, drill a small (1/8″) test hole in an inconspicuous spot. If water or damp core material appears, you have your answer.
Want to avoid costly fiberglass boat repair mistakes?
Learn how to inspect damage properly, decide when to DIY, and prevent expensive fiberglass problems before they start.
Internal Inspection
Don’t forget to check inside the hull:
- Inspect the keel attachment area from inside (if accessible)
- Look for cracks radiating from the keel joint
- Check for water staining on stringers or bulkheads
- Feel for flexing or movement when pressure is applied to the keel from outside
Pro insight: I once worked on a boat where the external keel damage looked minor—just a 6-inch scrape. Internal inspection revealed a cracked floor frame and delaminated tabbing. What seemed like a two-hour repair became a multi-day structural fix. Always check both sides.
Common Keel Damage Scenarios and What Causes Them
Understanding how damage occurs helps you prevent it and recognize patterns during inspection.
Grounding Damage
The scenario: Impact with rocks, sandbars, or submerged objects What it looks like: Gouges, cracks, and exposed fiberglass, often concentrated in one area Hidden risks: Impact can create cracks that extend beyond visible damage; internal structure may be affected
Trailer Wear
The scenario: Repeated loading/unloading, improper bunk positioning, or roller damage What it looks like: Linear abrasion patterns, worn gelcoat, or pressure point damage Hidden risks: Prolonged stress can cause delamination even without visible cracking
Aging and UV Degradation
The scenario: Years of sun exposure and water contact What it looks like: Gelcoat crazing (spider-web cracks), chalking, and gradual thinning Hidden risks: Micro-cracks allow water intrusion; gelcoat may be intact but fiberglass beneath compromised
Failed Previous Repairs
The scenario: Improper materials, rushed work, or inadequate prep What it looks like: Cracking around patch edges, discolored repairs, or repairs that feel different from surrounding areas Hidden risks: Trapped moisture, poor adhesion creating weak spots, or cosmetic-only repairs over structural damage
Osmotic Blistering
The scenario: Water permeating through gelcoat and accumulating between laminate layers What it looks like: Small raised blisters, often in clusters; may weep vinegary-smelling liquid when popped Hidden risks: Extensive internal delamination; may require complete keel stripping and barrier coating
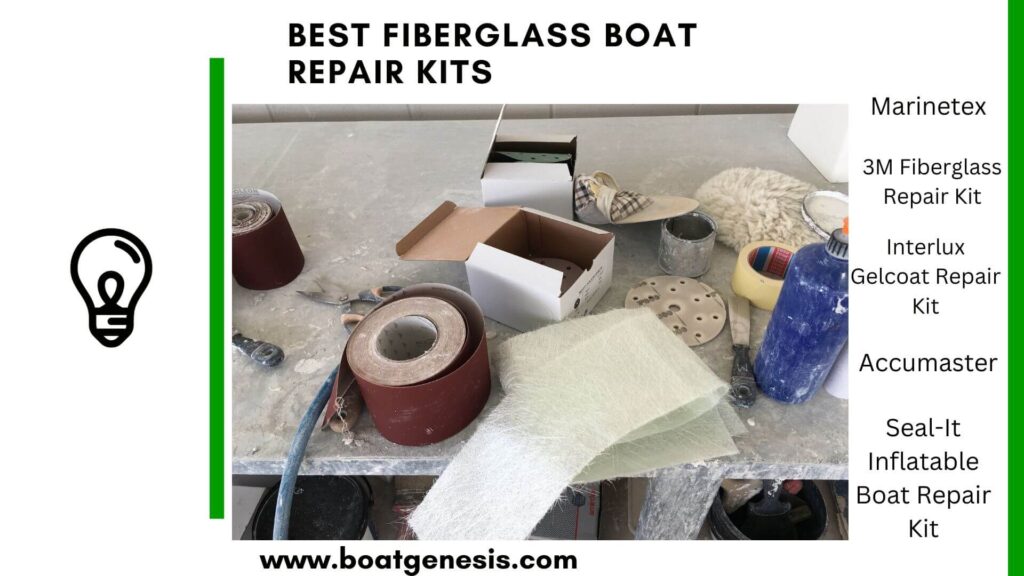
Tools and Materials You’ll Need

You don’t need a fancy workshop to tackle fiberglass boat keel repair. Here’s a simple checklist:
- Safety gear (gloves, goggles, respirator)
- Sandpaper (60-220 grit)
- Angle grinder or rotary tool (for large repairs)
- Fiberglass cloth or mat
- Epoxy resin and hardener
- Marine filler or fairing compound
- Acetone or marine cleaner
- Mixing cups and stir sticks
- Putty knife or spreader
- Painter’s tape and plastic sheeting
- Primer and marine paint
Optional but helpful: a moisture meter, heat gun, and a shop vacuum.
Step-by-Step Fiberglass Keel Repair Process
Step 1: Prepare the Work Area and Surface
Set up for success:
- Work in a well-ventilated area or outdoors in mild weather (60-85°F is ideal for epoxy)
- Block and support the boat securely—you’ll be applying pressure during repairs
- Cover surrounding areas with plastic sheeting and tape
Surface preparation:
- Clean thoroughly: Wash the keel area with a marine detergent, then wipe with acetone to remove all grease, wax, and contaminants. Any residue will compromise adhesion.
- Dry completely: This is critical. If moisture is present, use heat gun or space heater to drive it out. For deep moisture, drill small weep holes at the lowest points and allow 48-72 hours drying time. Repairing over trapped moisture guarantees failure.
- Mask off: Use quality painter’s tape to protect the surrounding hull. Place tape about 2 inches beyond your repair area.
Step 2: Remove Damaged Material
Grinding strategy:
- Use 36-grit flap disc on an angle grinder for deep gouges
- Grind away all cracked, loose, or delaminated fiberglass
- Create a “dish” shape—the center should be slightly deeper than the edges
- Feather the edges: Taper the repair area gradually over 2-3 inches for a strong, invisible transition
Depth considerations:
- For surface damage: grind until you reach solid material
- For delamination: remove all layers that sound hollow on the tap test
- For through-damage: grind until you reach healthy fiberglass on all sides
Critical detail: Don’t create vertical walls—think shallow ramps and gradual transitions. This prevents stress concentration and makes fairing easier.
Vacuum thoroughly between steps. Fiberglass dust contaminates resin and weakens bonds.
Step 3: Assess for Deeper Issues
Before proceeding, verify:
- Structural integrity: Check again for cracks extending to stringers or frames
- Complete dryness: Moisture meter should read <15%
- Sound perimeter: Tap test around your prepared area confirms you’ve removed all compromised material
If you find structural damage to floors, stringers, or the keel-hull joint, stop. These repairs require different techniques and often professional assessment.
Step 4: Build Up with Fiberglass Layers
This is where patience pays off. Rushing this step is the #1 cause of DIY repair failures.
Cutting reinforcement:
- Cut your first layer of fiberglass cloth to fit within the ground-out area
- Cut subsequent layers progressively larger—each about 1 inch bigger than the previous
- For a 1/4″ deep repair, plan on 3-4 layers; for 1/2″+, use 6-8 layers
Mixing epoxy:
- Follow manufacturer’s ratio exactly—don’t eyeball it
- Mix thoroughly for 2 minutes minimum
- Pour mixed epoxy into a clean cup (eliminates unmixed resin from corners)
- Work in small batches—you have limited working time
Laminating technique:
- First layer: Brush a coat of epoxy onto the prepared surface. Place your smallest cloth patch. Wet it out completely using a foam roller or brush, working from center outward. The cloth should appear transparent when fully saturated. Remove all air bubbles by rolling firmly or using a plastic squeegee.
- Subsequent layers: Apply immediately while previous layer is still tacky (ideal), or within 24 hours. If you wait longer, you’ll need to sand between coats for mechanical adhesion. Place next cloth, wet out, roll for consolidation. Repeat.
- Building proud: Your final layer should sit slightly higher than the surrounding surface—you’ll fair this down later.
Critical tips:
- Alternate the weave direction of your cloth 45° with each layer for maximum strength
- Don’t oversaturate—you want wetted fiberglass, not resin puddles
- Watch for resin running or sagging; wipe excess before it cures
- If temperatures drop, use a heat lamp to maintain cure temperature (check resin specs)
Cure time: Let the laminate cure fully before proceeding. This is typically 24 hours at 70°F, but check your specific epoxy’s technical data sheet.
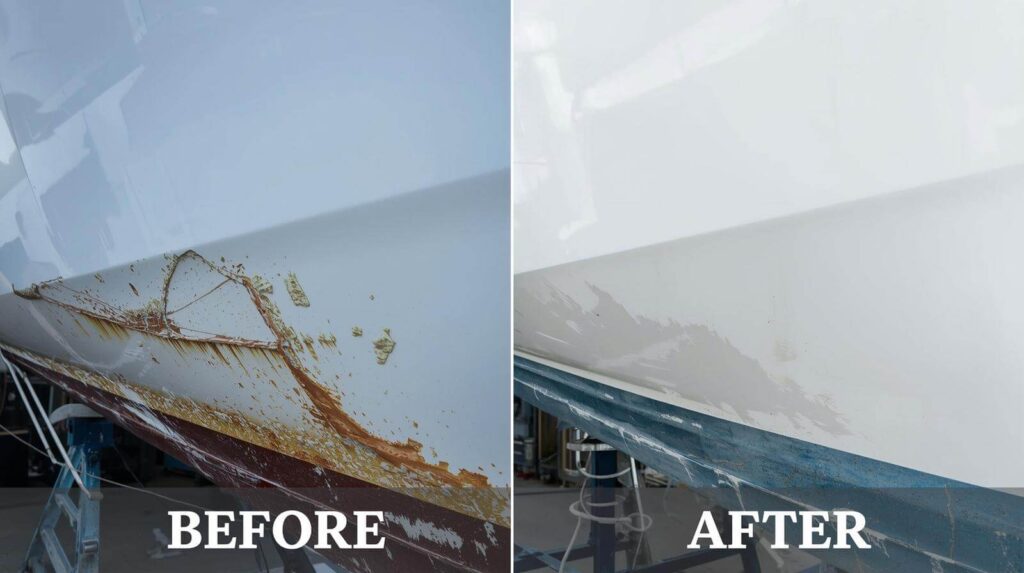
Step 5: Fair the Surface
Now you’ll blend your repair seamlessly into the original keel profile.
Initial sanding:
- Sand the cured laminate down close to the surrounding surface using 60-80 grit
- Check your progress frequently—you’re aiming for a smooth transition, not a depression
- Blow off or vacuum dust between checks
Applying fairing compound:
- Mix fairing compound according to directions
- Apply with a wide plastic spreader, using firm pressure to fill any low spots
- Overfill slightly—you’ll sand it back
- Let cure per manufacturer’s directions (usually 4-6 hours)
Progressive sanding:
- Start with 80-grit to knock down high spots
- Move to 120-grit for smoothing
- Finish with 220-grit for paint-ready surface
- Use a long sanding block to check for fairness
- Apply additional fairing compound to any remaining imperfections
Pro technique: Run your hand across the repair with your eyes closed. If you can feel the transition, keep fairing. Your sense of touch is more sensitive than your eyes.
The straightedge test: Use a long straightedge or batten along the keel. Light shouldn’t show gaps or bumps at the repair.
Step 6: Deal with Amine Blush
Epoxy often creates a waxy surface residue called amine blush as it cures, especially in humid conditions. This will prevent paint adhesion.
Removal:
- Wash the entire repair area with warm water and a Scotch-Brite pad
- Rinse thoroughly
- Dry completely
- Wipe with acetone
Skip this step, and your paint may peel off in sheets.

This guide helps boat owners understand fiberglass damage clearly — what matters, what doesn’t, and when repairs are truly necessary, so small issues don’t turn into expensive mistakes.
See What Every Boat Owner Should Know →Step 7: Prime and Paint
Priming:
- Apply marine epoxy primer in 2-3 thin coats, sanding lightly (320-grit) between coats
- Primer creates a moisture barrier and ensures paint adhesion
- Allow full cure (24-48 hours)
Painting:
- Color matching: If your keel is bottom-painted, matching is easy. If it’s bare gelcoat or painted, bring a sample to your marine supplier for color matching, or consider a keel guard that covers the repair
- Apply paint in thin, even coats—3-4 coats minimum
- Sand lightly (400-grit wet) between coats after the first two
- Final coat should flow smoothly for best appearance
For boats kept in the water: Use bottom paint on submerged portions of the keel. Follow the manufacturer’s directions for number of coats and launch timing.
Advanced Tips for a Professional-Grade Keel Repair

1. Layering for Strength
When laying up fiberglass, alternate the direction of the weave in each layer. This crisscross pattern boosts overall strength and resists future cracking. Use at least three layers for minor chips, and up to six for deeper gouges.
2. Tapering the Repair
Instead of a sharp edge, always feather the edges of your repair area. Tapering the repair (think: a gentle slope rather than a step) ensures the new fiberglass blends seamlessly and doesn’t create a weak spot. This detail is often overlooked but makes a huge difference in durability and appearance.
3. Avoiding Amine Blush
Epoxy can leave a waxy residue called “amine blush” as it cures, especially in humid conditions. Before sanding or painting, wash the repair area with warm water and a Scotch-Brite pad.
This simple step prevents adhesion issues with your paint or fairing compound.
4. Monitoring for Osmotic Blisters
After repair, keep an eye out for small bubbles or blisters under the paint—these can indicate osmotic blistering, a common problem in fiberglass keels exposed to water.
If you see them, sand down to the glass, dry thoroughly, and reapply an epoxy barrier coat.
Long-Term Protection: Making Your Repair Last Decades
The repair is done—now protect your work.
Install a Keel Guard
Keel guards are sacrificial protection strips that absorb damage instead of your hull.
Types:
- Fiberglass-reinforced tape: Bonds with adhesive, easy to replace
- Molded rubber strips: More forgiving on irregular keels
- Spray-on keel guard: Creates a thick, abrasion-resistant coating
Installation tips:
- Clean surface with acetone before application
- Apply in temperatures above 60°F
- Use a J-roller to eliminate air bubbles
- Extend protection 6-12 inches beyond typical impact zones
Annual Maintenance Checklist
Make keel inspection part of your yearly haulout or storage routine:
- Visual inspection for new damage
- Tap test for delamination
- Moisture meter check
- Inspect keel guard for wear (replace if 50%+ worn)
- Touch up paint or gelcoat as needed
- Check keel bolts (sailboats) for corrosion or loosening
Storage Considerations
How you store your boat affects keel longevity:
Trailer storage:
- Use proper bunks that distribute weight evenly
- Avoid single-point loads (like a center roller) on the keel
- Adjust bunks annually to prevent pressure point damage
Dry stack or cradle:
- Verify cradle pads contact the hull properly, not just the keel
- Pad contact points with carpet or rubber
In-water storage:
- Use bottom paint appropriate for your water conditions
- Monitor for blistering or water absorption
- Consider haul-outs every 2-3 years even if the boat lives in the water
When to Call a Professional Marine Technician
DIY saves money, but some situations require expert help. Call a professional when:
Structural damage is present:
- Cracks extending into stringers, floors, or bulkheads
- Keel bolt damage or loosening (sailboats)
- Hull flexing or “oil-canning” around the keel
- Damage to keel-hull joint or bonding
Repair is beyond your skill level:
- You’re uncomfortable with any step of the process
- The damage area is very large (>2 square feet)
- Multiple previous repair failures
- Boat has significant monetary or sentimental value and you want guaranteed results
Specialized situations:
- Cored hull construction with waterlogged core
- Extensive osmotic blistering requiring full bottom stripping
- Insurance claim requiring professional documentation
- Pre-purchase survey found issues you want expert assessment on
Finding a qualified tech:
- Look for ABYC (American Boat and Yacht Council) certified technicians
- Ask for references and photos of previous keel repairs
- Get written estimates from 2-3 shops
- Verify they’ll use marine-grade epoxy (not polyester resin)
Cost expectations: Professional keel repairs typically run $75-150/hour plus materials. A moderate repair might cost $500-1500; extensive structural work can reach $3000+.
Troubleshooting Common Keel Repair Problems
Problem: Repair Won’t Cure (Stays Tacky)
Causes:
- Incorrect resin-to-hardener ratio
- Expired or contaminated epoxy
- Too cold during cure
- Moisture contamination
Solutions:
- Verify you measured correctly (use pumps or graduated cups)
- Check expiration dates before starting
- Warm the area to 70°F+ and wait longer
- If still tacky after 72 hours, scrape it off and start over
Problem: Air Bubbles in the Laminate
Causes:
- Insufficient rolling during wet-out
- Too much resin applied too quickly
- Ambient temperature too warm (outgassing)
Solutions:
- Prevention: Roll firmly and thoroughly with each layer
- Minor bubbles: Sand them out during fairing
- Major voids: Grind them out, clean, and patch with fresh epoxy and cloth
Problem: Repair Cracking Along Edges
Causes:
- Insufficient taper/feathering
- Didn’t sand beyond repair area
- Flexing hull (inadequate structural support during repair)
Solutions:
- Grind out cracked areas
- Extend repair further, with proper 12:1 taper
- Ensure boat is properly supported so hull isn’t flexing
Problem: Paint Peeling or Bubbling
Causes:
- Didn’t remove amine blush
- Moisture trapped under paint
- Incompatible paint/primer system
- Insufficient cure time before painting
Solutions:
- Strip failed paint
- Wash surface thoroughly to remove blush
- Ensure complete dryness
- Use compatible marine primer and paint
- Allow full epoxy cure (48-72 hours minimum)
Problem: Color Match is Off
Causes:
- Gelcoat/paint fades over time
- Incorrect color formula
Solutions:
- Accept that perfect matching is rare on older boats
- Consider painting the entire keel for uniform appearance
- Use a keel guard to cover the repair area
- Professional gelcoat color matching services can help
Frequently Asked Questions
Can I use polyester resin instead of epoxy for keel repairs?
No, use marine epoxy for repairs. While polyester resin is cheaper and what your boat was originally built with, it doesn’t bond well to cured fiberglass. Epoxy creates a superior secondary bond and has better water resistance and strength. Polyester is for new construction; epoxy is for repairs.
How long does a properly done keel repair last?
A well-executed epoxy repair using proper materials and technique should last 15-20+ years—potentially the lifetime of the boat. I’ve seen repairs from the 1990s still going strong. The key factors are complete moisture removal before repair, proper surface preparation, and adequate UV protection (paint or gelcoat).
Can I repair my keel while the boat is in the water?
Not effectively. You need the damaged area completely dry for epoxy to bond properly, and you can’t achieve that below the waterline. Emergency temporary repairs (like epoxy putty sticks) exist for getting back to the ramp, but plan on a proper haulout for lasting repairs.
Is it safe to launch my boat immediately after painting?
No. Follow your specific epoxy and paint manufacturer’s cure schedules. Generally, you’ll want:
- 48 hours minimum after final epoxy application
- 72 hours after fairing compound
- 5-7 days after painting (longer for bottom paint—check the technical data sheet)
Launching too soon can result in soft, water-permeable repairs or paint failure.
What’s the difference between a keel guard and a repair?
A repair fixes existing damage and restores structural integrity. A keel guard is a protective layer applied to prevent future damage—think of it like a phone screen protector. Ideally, you repair any damage first, then install a keel guard to protect your work. Many boat owners wish they’d installed a guard before the damage occurred.
My keel has spider-web cracking in the gelcoat but no structural damage. Do I need to repair it?
Those fine cracks (crazing) are cosmetic in early stages but allow water intrusion over time. If the cracks are just surface gelcoat:
- Sand the area
- Apply gelcoat filler or paint over them
- Monitor annually
If they’ve penetrated to the fiberglass or you hear hollow sounds when tapping, treat it as a repair situation and follow the full process.
How do I know if water has gotten into my keel?
Use a moisture meter to check readings. Above 15-20% indicates moisture presence. Other signs include:
- Soft spots when pressing firmly on the keel
- Visible blistering
- Vinegary smell when you grind or drill into the area
- Discoloration or weeping from cracks
If moisture is present, you must dry it completely before repairs—this can take days or even weeks depending on severity.
Can I do this repair in winter or during humid weather?
Temperature and humidity significantly affect epoxy curing. Ideal conditions are 65-85°F with humidity below 70%.
In winter: Work in a heated space or wait for spring. Epoxy won’t cure properly below 50°F.
In humid weather: You’ll get more amine blush to clean off, and cure times extend. Work early in the day when humidity is lowest, or use a dehumidifier in your work space.
Final Thoughts: The mindset for successful keel repair
Fiberglass boat keel repair is more than a weekend project—it’s an investment in your boat’s future.
The difference between a repair that lasts and one that fails next season isn’t expensive tools or professional-grade materials (though quality matters). It’s patience and attention to detail.
Every step in this process exists for a reason:
- Thorough drying prevents internal delamination
- Proper feathering creates strong, lasting bonds
- Multiple thin layers outperform one thick one
- Adequate cure time between steps ensures strength
When you’re tempted to rush—to skip the moisture test, to apply the next layer before the previous one fully cures, to launch before the paint is fully hardened—remember that the extra day or two of patience now saves you from doing this entire process again next year.
Key principles to remember:
- Preparation determines outcome: 80% of repair success happens before you mix any epoxy
- Moisture is the enemy: If you remember nothing else, remember that water trapped in a repair guarantees failure
- Trust the process: These steps exist because shortcuts fail
- Protect your investment: A keel guard costs $50-100; a major structural repair costs thousands
The reward for doing this right is a keel as strong as factory original, a boat you can trust on the water, and the confidence that you’ve protected one of your most valuable investments.
If you ever feel overwhelmed, don’t hesitate to consult a professional or refer to other detailed guides like this DIY fiberglass repair guide.

Warren is the founder of BoatGenesis and brings practical experience in fiberglass boat repair, marine equipment testing, and powerboat building. He has worked on a range of repair and restoration projects and now focuses on creating clear, research-based guides to help boat owners avoid costly mistakes and make smarter maintenance decisions. Learn more about Warren.