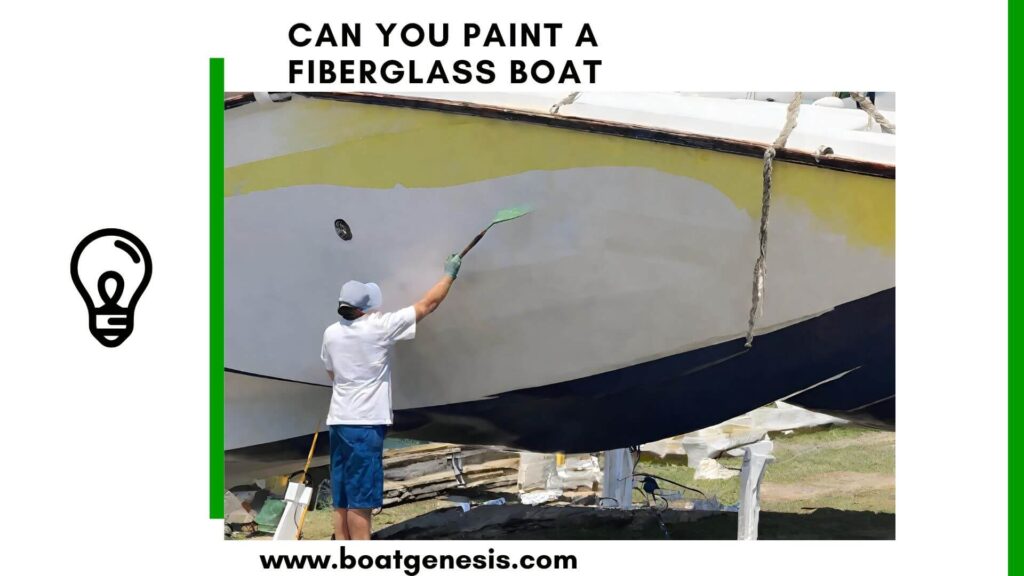
Are you ready to take your fishing game to the next level? Mounting a transducer on your fiberglass boat is a crucial step in getting the most out of your fish finder.
In this post, we’ll guide you through the process of installing a transducer on your fiberglass boat, ensuring that you get the best possible performance from your fish finder.
Let’s get started.
Importance of Proper Transducer Mounting
Mounting your transducer with precision is more than a technical task; it’s an investment in your safety and the effectiveness of your marine electronics.
A correctly installed transducer can drastically enhance your sonar system’s performance, giving you clear and accurate readings of what lies beneath the waves.
Before we start the mounting process, there are a few things you have to keep in mind.
Factors to Consider When Mounting
Before you mount, consider the transducer’s compatibility with your boat’s hull material and design, the depth at which you’ll be operating, and the type of fishing or boating you plan to do.
These elements will influence the mounting location and method you choose.
Tools and Materials Required
1. Essential Tools
You’ll need a handful of tools to mount your transducer, including a power drill, screwdriver, and marine sealant gun. Ensure you have all the necessary tools on hand before you begin to avoid any interruptions during the installation process.
2. Necessary Materials
Your transducer should come with a mounting kit, but you’ll also need additional materials like epoxy or silicone sealant for a watertight seal, and possibly anti-fouling paint if the transducer will be submerged.
It’s important to use materials designed for marine environments to withstand the harsh conditions they’ll encounter.
Choosing the Right Location
1. Importance of Location
The mounting location of your transducer directly affects its performance and the accuracy of the sonar readings. An incorrectly placed transducer can result in poor image quality or even damage to the device.
Want to avoid costly fiberglass boat repair mistakes?
Learn how to inspect damage properly, decide when to DIY, and prevent expensive fiberglass problems before they start.
2. Factors to Consider
When selecting a location, consider the hull’s shape and any potential obstructions to water flow.
Avoid placing the transducer in locations where air bubbles may form, as these can interfere with signal clarity.
Also, ensure the location is accessible for maintenance and far enough from the engine to avoid noise interference.
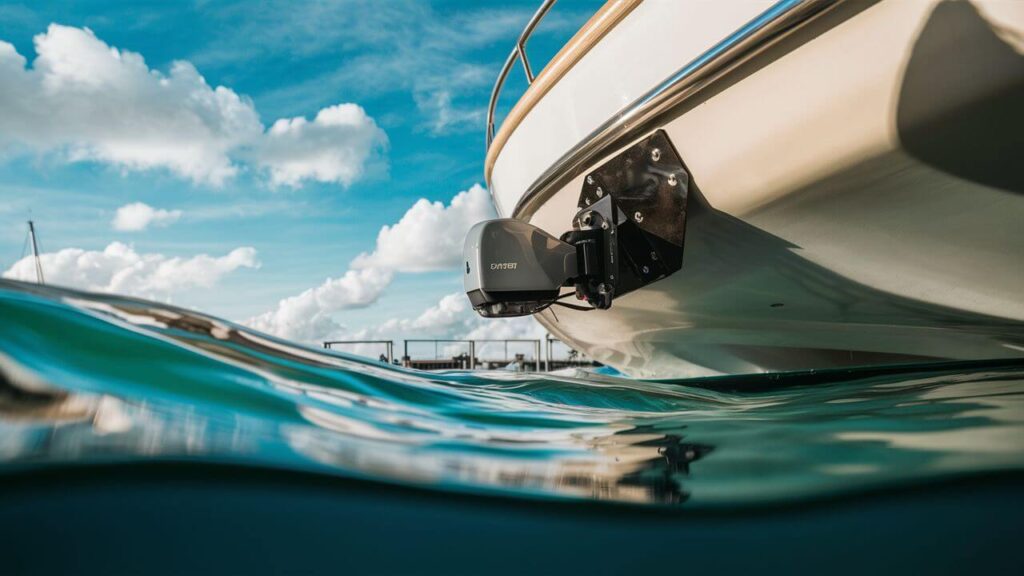
3. Common Mounting Locations
The transom is a popular mounting spot due to its ease of access and installation.
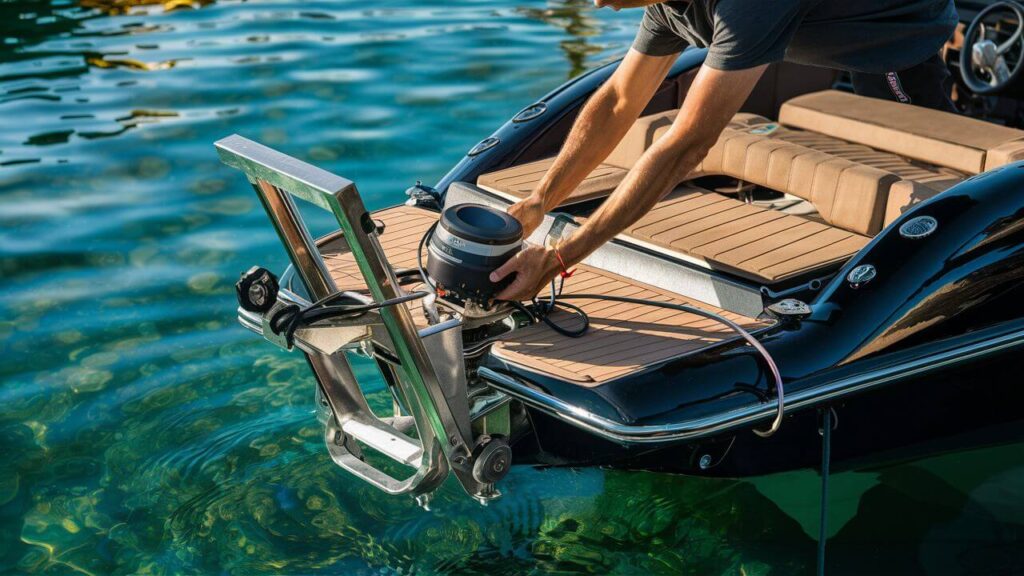
Alternatively, the bottom of the hull is a good choice for in-hull or thru-hull transducers, as it’s typically the smoothest and flattest area, providing consistent water contact.
Preparation Steps
Before mounting, read the manufacturer’s instructions carefully. Some transducers require specific orientation or additional setup steps to function correctly.
The mounting area on the boat must be clean, dry, and free of debris. Sand the area lightly to create a surface that will ensure a strong bond with the adhesive. If painting is required, do so before applying any adhesive.
Proper alignment is critical for accurate sonar readings. The transducer should be parallel to the waterline when the boat is at rest. This alignment might require adjustment based on the boat’s running angle in the water.
Now we can start the mounting process.
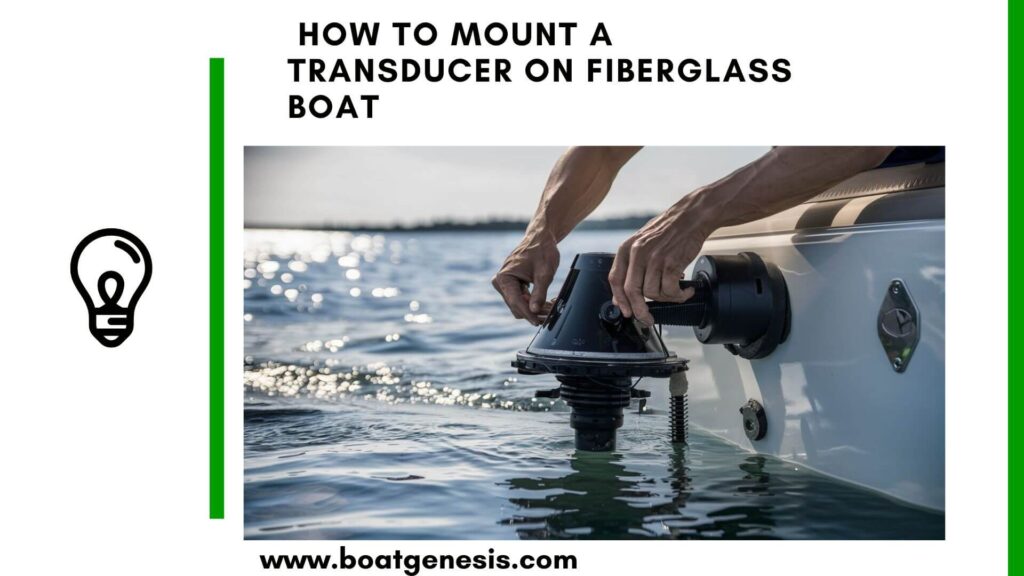
How to Mount a Transducer on a Fiberglass Boat?
Here are my recommended steps to mount a transducer on a fiberglass boat.
1. Dry Fitting
Before anything becomes permanent, position the transducer in the chosen spot without any adhesive to verify the fit and alignment. Mark the position once you’re satisfied with the placement.
2. Applying Adhesive
There are several methods for attaching a transducer to a fiberglass boat. One popular option is using marine-grade epoxy. Take a thin plastic bag, fill with water, insert the transducer and place it where you think you want to mount it. Compare readings. This allows you to test the performance of the transducer before permanently mounting it.
Another option is to use a mounting plate. Professional boat rigger, Andy Kratochvil, performs a detailed DIY install of a common fish finder mounting plate, demonstrating the process step-by-step.
3. Securing the Transducer
Attach the transducer to the boat using the mounting hardware provided. Tighten the screws or bolts, but be careful not to over-tighten and strip the threads or damage the transducer’s housing.
You can also use a marine-grade sealant to create a watertight seal around the transducer.
The goal is to secure the transducer firmly so that it does not move, without compromising the integrity of the boat or the device.
4. Double-Checking Alignment
After securing the transducer, it’s crucial to double-check the alignment. Even a slight shift during the mounting process can result in inaccurate readings.

This guide helps boat owners understand fiberglass damage clearly — what matters, what doesn’t, and when repairs are truly necessary, so small issues don’t turn into expensive mistakes.
See What Every Boat Owner Should Know →Ensure the transducer remains parallel to the waterline, and make any necessary adjustments before the adhesive fully sets.
==>> Read also our guide on how to remove a transducer mounting plate here.
Alternative Mounting Options
A. Through-Hull Mounting
For larger vessels or those requiring the most precise readings, a through-hull mount might be the best option. This involves drilling a hole through the boat’s hull and fitting the transducer so that it protrudes directly into the water.
It’s a more complex installation that typically offers better performance but requires a haul-out and careful waterproofing.
B. Shoot-Through-Hull Mounting
A shoot-through-hull mount is similar to a through-hull but without the need for a hole in the boat’s exterior.
Instead, the transducer is mounted inside the hull and sends signals through the fiberglass. This option works well for solid fiberglass hulls but is not suitable for cored hulls or those with air pockets that could disrupt the signal.
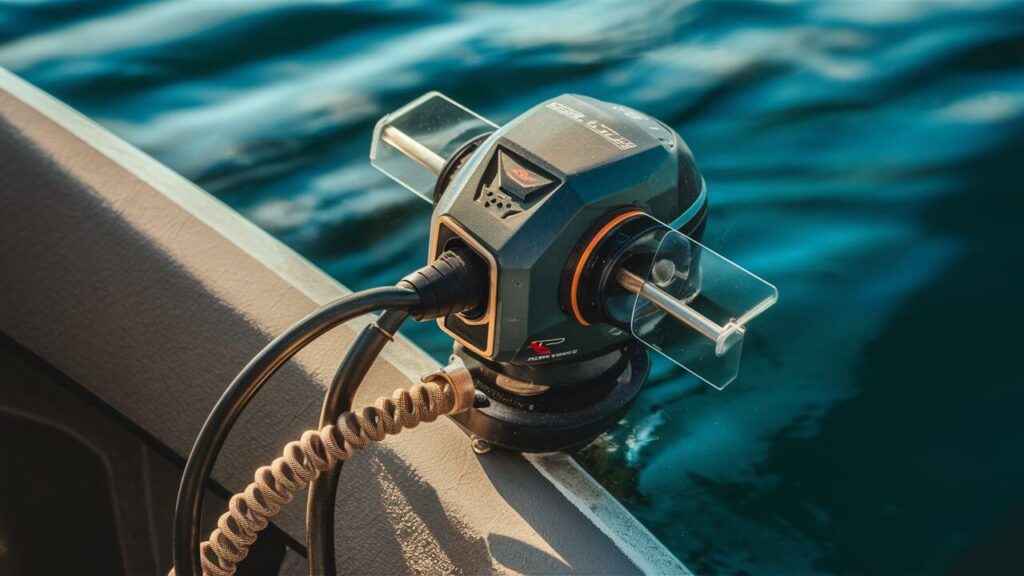
C. External Mounting Brackets
Some boat owners opt for external mounting brackets that can be attached to the transom without drilling into the hull.
These brackets allow for easy adjustment and removal of the transducer but may not provide as clean a signal as flush-mounted options.
==>> Also read: How to mount a trolling motor on a fiberglass boat?
Post-Installation Checks
1. Testing the Installation
Once the transducer is mounted and the adhesive has cured, it’s time to test the installation. Launch the boat and turn on the sonar system to evaluate the clarity of the readings.
It’s best to test in calm waters with known depths to get a baseline for performance.
2. Checking for Leaks
After the first voyage with the new transducer, inspect the installation area for any signs of water ingress.
Even a small leak can lead to significant problems down the line, so address any issues immediately.
==>> Also read: How to check a fiberglass boat for leaks?
3. Fine-Tuning Alignment if Necessary
If the initial tests show that the readings are off, you may need to fine-tune the transducer’s alignment.
Make minor adjustments while keeping an eye on the sonar feedback until the readings stabilize.
Maintenance Tips
1. Regular Inspection
Regularly inspect the transducer for any signs of damage, fouling, or wear. Physical damage can affect performance, while marine growth can interfere with the sonar signals.
Inspections should be part of your routine maintenance, especially after voyages in rough waters or areas with high debris.
2. Cleaning the Transducer
Clean the transducer with mild soap and water, avoiding harsh chemicals that could damage its surface.
If marine growth is present, remove it carefully to prevent scratching the transducer. Some boaters use a soft brush or plastic scraper designed for this purpose.
3. Reapplying Marine Sealant
Check the integrity of the marine sealant regularly, and reapply it as necessary to maintain a watertight seal.
This is particularly important for transducers that are mounted with screws or bolts, as the sealant prevents water from entering through the mounting holes.
4. Store Properly
When not in use, make sure to store your boat in a way that protects the transducer. If your boat is on a trailer, consider using a transducer cover to shield it from the elements. If possible, remove the transducer when storing the boat for an extended period.
5. Update Software
If your fish finder has software that can be updated, make sure to check for updates regularly. Manufacturers often release updates that can improve performance, fix bugs, or add new features. Keeping your software up to date ensures that your transducer works optimally.
Conclusion
Mounting a transducer on your fiberglass boat may seem daunting, but with the right tools, techniques, and guidance, it’s a straightforward process.
By choosing the optimal location, preparing the surface, applying the transducer securely, sealing it properly, and testing its performance, you’ll be well on your way to enjoying the benefits of a high-quality fish finder on your next fishing adventure.
A well-mounted transducer provides reliable data, whether you’re fishing, exploring, or simply enjoying a day on the water. It’s a critical component of your boat’s electronics that, when installed correctly, offers peace of mind and enhances your boating experience.

Warren is the founder of BoatGenesis and brings practical experience in fiberglass boat repair, marine equipment testing, and powerboat building. He has worked on a range of repair and restoration projects and now focuses on creating clear, research-based guides to help boat owners avoid costly mistakes and make smarter maintenance decisions. Learn more about Warren.