Have you ever noticed moisture or dampness in your boat’s transom? This relatively common issue can cause wood rot, corrosion, and other problems if left unchecked.
In this guide, we’ll break down everything you need to know about how to get moisture out of a transom, why it happens, and how to prevent it in the future.
Whether you’re a seasoned boater or new to fiberglass repairs, this post is packed with real-life tips, expert advice, and a few tricks the other websites aren’t talking about.
Key Takeaways
- Getting moisture out of a transom requires patience, the right tools, and a systematic approach.
- Early detection and action can save your transom from costly repairs or replacement.
- Most guides miss the importance of moisture meters and vacuum drying methods that can make all the difference.
- Prevention is just as important as repair; learn how to keep your transom dry for good.
- Key Takeaways
- Understanding the Problem: Why Does Moisture Get Into a Transom?
- Signs of a Wet Transom
- Diagnosing Moisture: Tools and Techniques
- How Do You Get Moisture Out of a Transom? Step-by-Step Solutions
- Advanced: What If the Wood Is Rotten?
- What Most People Don’t Know
- What About Chemical Drying Agents?
- How to Tell If Your Transom Is Truly Dry
- Sealing and Rebuilding: The Final Steps
- Pro Tips: Going Beyond the Basics
- Preventing Moisture in Your Transom: Long-Term Solutions
- Final Thoughts
Understanding the Problem: Why Does Moisture Get Into a Transom?
Before we jump into solutions, let’s talk about why transoms get wet in the first place.
The transom is the flat surface forming the stern of your boat, often made from plywood sandwiched between fiberglass skins. It’s strong, but not invincible. Over time, moisture can seep in through:
- Poorly sealed fittings or hardware
- Cracks in the fiberglass
- Old or missing drain plugs
- General wear and tear
Once water finds its way in, it gets trapped and starts to rot the wood. Left unchecked, this can lead to structural failure. That’s why acting fast is crucial.
Signs of a Wet Transom
How do you know if your transom is wet? Here are the telltale signs:
- Spongy or soft feeling when you press the transom
- Water stains or discoloration
- Cracks or bulging in the fiberglass
- Rusty or loose hardware
- Persistent water leaks
If you notice any of these, it’s time to check for moisture.
Diagnosing Moisture: Tools and Techniques
Using a Moisture Meter
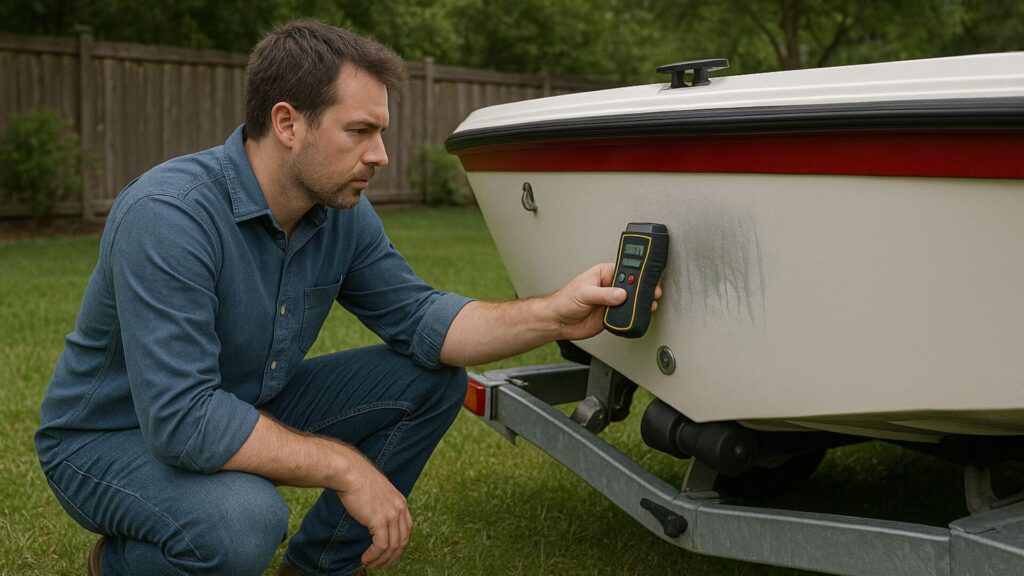
A moisture meter is your best friend here. It gives you a clear reading of how wet the transom is and where the worst spots are.
Move the meter across the transom, especially around fittings and the bottom edge. Look for readings above 15-20%—that’s a sign of trouble.
The “Drill Test”
If you don’t have a moisture meter, you can use a small drill bit (about 1/8″ or 1/4″) to carefully drill test holes in suspicious areas. If you hit wet wood, you’ll see water or damp shavings. Mark the wet spots for later repair.
How Do You Get Moisture Out of a Transom? Step-by-Step Solutions
Let’s get practical. Here’s how to get moisture out of a transom, from quick fixes to more involved repairs.
Want to avoid costly fiberglass boat repair mistakes?
Learn how to inspect damage properly, decide when to DIY, and prevent expensive fiberglass problems before they start.
1. Drill Drainage Holes
Start by drilling small holes (1/4″) at the lowest points of the transom, especially where you found moisture.
This allows trapped water to escape.
For best results, drill downward-sloping holes to encourage drainage. You might be surprised how much water comes out!
Let it drain for several days or even weeks, depending on how wet the core is.
2. Increase Airflow and Drying
Once water stops dripping, you need to dry the remaining moisture.
Remove any hardware and open up inspection ports if possible.
Place fans or a shop vac on “blow” mode to force air through the holes and across the transom. This speeds up evaporation.
3. Use Heat (Carefully)
Warm, dry air is your ally. If you’re working in a garage, use a space heater (set to low) to gently warm the area.
Don’t overdo it—too much heat can damage the fiberglass or cause warping. The goal is steady, gentle drying.
4. Try Vacuum Bagging
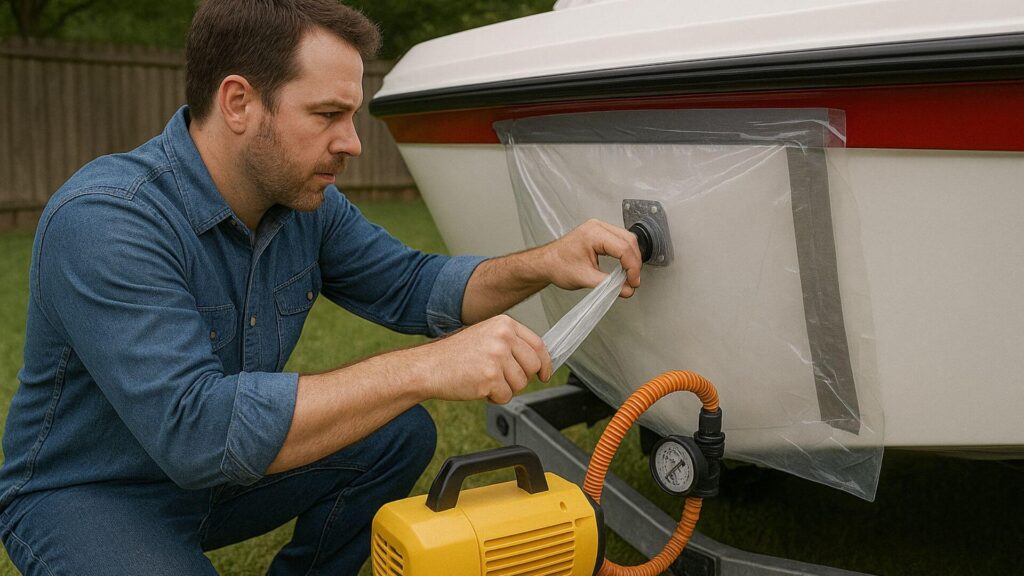
Here’s a pro tip most guides skip: vacuum bagging.
By sealing plastic over the transom and attaching a vacuum pump, you can pull moisture out much faster.
This method is used in professional boatyards and can save days or even weeks of drying time. It works by lowering air pressure, which forces water to evaporate at a lower temperature.
If you have access to a vacuum pump, this is a game-changer (read more about vacuum drying techniques).
5. Use Desiccants
For smaller jobs, silica gel or other desiccants can help absorb moisture. Place them in bags and hang inside the transom cavity. Replace as needed until the area is dry.
6. Monitor Progress
Keep using your moisture meter to track progress. When readings drop below 15%, you’re in the safe zone.

This guide helps boat owners understand fiberglass damage clearly — what matters, what doesn’t, and when repairs are truly necessary, so small issues don’t turn into expensive mistakes.
See What Every Boat Owner Should Know →The drying process can take anywhere from a week to several months, depending on how wet the transom was to begin with.
Advanced: What If the Wood Is Rotten?
If you find black, crumbly, or mushy wood, drying alone won’t save your transom. You’ll need to remove the rotten sections and replace them with new marine-grade plywood or a synthetic core.
This is a bigger job, but it’s the only way to restore strength. Here’s a quick outline:
- Cut away the fiberglass skin (usually from the inside).
- Remove all rotten wood.
- Dry the area thoroughly.
- Install new core material, using epoxy resin.
- Re-glass the skin and seal everything up.
If you’re not comfortable with this, consider hiring a professional.
What Most People Don’t Know
The Role of Epoxy Sealants
Many guides talk about drying, but few mention sealing the transom afterwards.
Once dry, inject thin epoxy resin into the holes you drilled. This not only fills the voids but also seals the wood against future moisture.
It’s a cheap insurance policy and strengthens the core.
Preventative Maintenance
Prevention is better than cure. After you’ve dried and sealed your transom:
- Reseal all hardware with marine-grade sealant.
- Check drain plugs regularly and replace if worn.
- Store your boat with the bow slightly raised so water drains aft.
- Inspect your transom every season with a moisture meter.
The Myth of “Quick Fixes”
You’ll see products claiming to “dry out” or “seal” a wet transom in a day—don’t fall for it. There are no shortcuts when it comes to removing moisture from a transom.
Moisture trapped inside wood takes time to escape, and rushing the process or using miracle cures can lead to hidden rot and bigger problems down the line.
Patience and thoroughness are your best tools.
What About Chemical Drying Agents?
Some forums and DIY sites recommend pouring alcohol or chemical agents into the transom to speed up drying.
While these can help in some cases, they often just mask the problem or, worse, damage the wood and fiberglass. If you do use any chemical agents, make sure they’re safe for marine use and always follow up with a thorough rinse and drying period.
Remember, mechanical drying (airflow, heat, vacuum) is always safer and more effective for long-term results.
How to Tell If Your Transom Is Truly Dry
This is where most people get tripped up. Even after days or weeks of drying, some moisture can linger deep inside the core. Here’s how to check if your transom is really dry:
- Moisture Meter: Continue to test at various depths and locations. Readings should be consistent and below 15%.
- Visual Inspection: Drill a few small test holes and check the shavings. They should be dry and light-colored.
- Feel: The transom should feel solid, not spongy or soft, when you press or tap it.
If you’re unsure, err on the side of caution and give it more time. It’s better to wait than to seal in moisture.
Sealing and Rebuilding: The Final Steps
Once you’re confident your transom is dry, it’s time to seal it up and restore its strength:
- Epoxy Injection: Fill the drilled holes with thin, penetrating epoxy. This not only seals the entry points but also reinforces the wood fibers, making your transom stronger than before.
- Fiberglass Repair: Patch any areas where you removed fiberglass. Use marine-grade fiberglass cloth and resin for a strong, watertight finish.
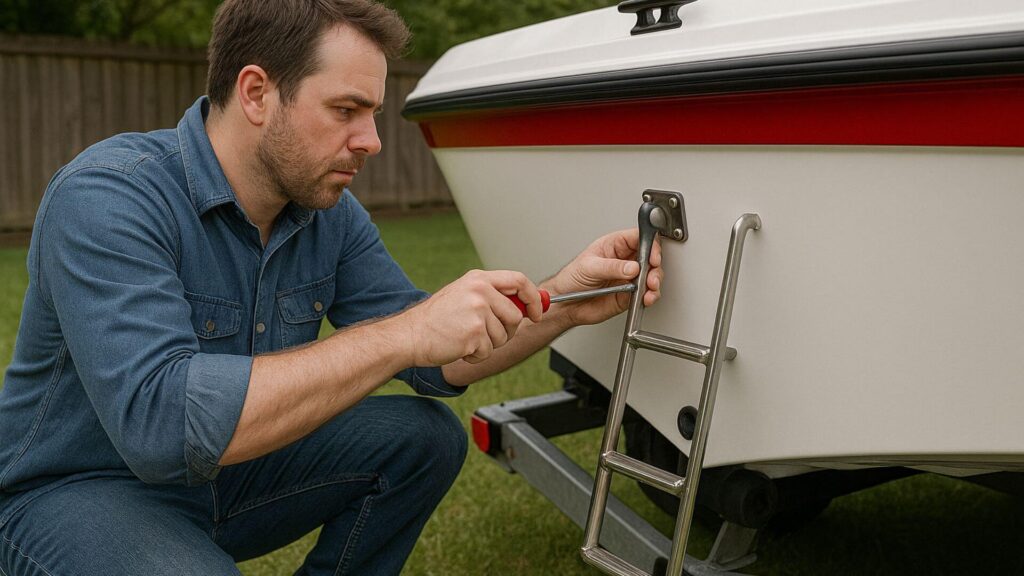
- Hardware Reinstallation: When reinstalling hardware, always use a high-quality marine sealant. This is your first line of defense against future leaks.
- Regular Maintenance: Make moisture checks part of your annual maintenance routine. Early detection is key to preventing future problems.
Pro Tips: Going Beyond the Basics
Use a Dehumidifier
If you’re working in a closed garage or workshop, a dehumidifier can pull moisture out of the air, speeding up the drying process. Place it near the transom and let it run continuously while you dry the core.
Borrow a Thermal Camera
Some marine surveyors use thermal cameras to spot wet areas inside the transom. Wet wood retains heat differently than dry wood, so a thermal image can reveal hidden damp spots you might miss with a moisture meter alone.
Document Everything
Take photos and notes as you go. This will help if you ever sell the boat, and it’s a great way to keep track of your progress and repairs.
Preventing Moisture in Your Transom: Long-Term Solutions
The best way to deal with a wet transom is to never let it happen again! Here’s how:
- Seal All Penetrations: Every screw, bolt, or fitting that goes through the transom should be sealed with marine-grade sealant.
- Upgrade to Synthetic Core: If you ever need to rebuild your transom, consider using a synthetic core material like Coosa Board or PVC foam. These materials don’t rot and are immune to water damage.
- Regular Inspections: Make it a habit to check your transom for signs of moisture every season.
- Store Your Boat Properly: When not in use, keep your boat covered and tilted so water can drain away from the transom.
Final Thoughts
Getting moisture out of a transom isn’t a glamorous job, but it’s one that can save your boat and keep you safe on the water.
With the right tools, a little patience, and a systematic approach, you can dry out your transom and prevent future problems.
Remember, the key is early detection, thorough drying, and proper sealing. Don’t rush the process, and don’t be afraid to call in a professional if you discover extensive rot.
If you’re curious about vacuum bagging and its benefits, here’s a forum discussion with some real-world tips.
==>> You should also consider reading my full guide on fixing a boat transom here.

Warren is the founder of BoatGenesis and brings practical experience in fiberglass boat repair, marine equipment testing, and powerboat building. He has worked on a range of repair and restoration projects and now focuses on creating clear, research-based guides to help boat owners avoid costly mistakes and make smarter maintenance decisions. Learn more about Warren.