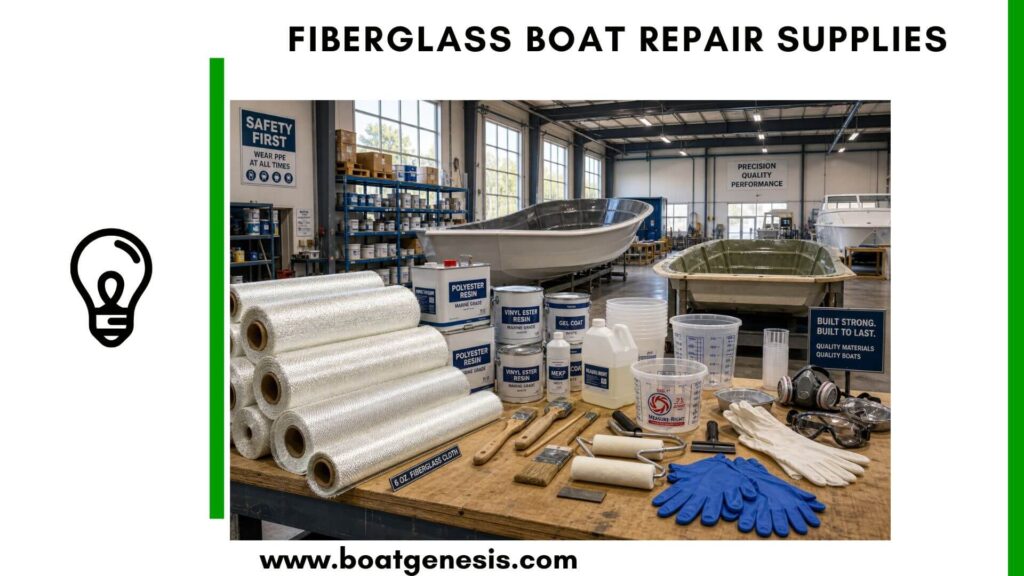
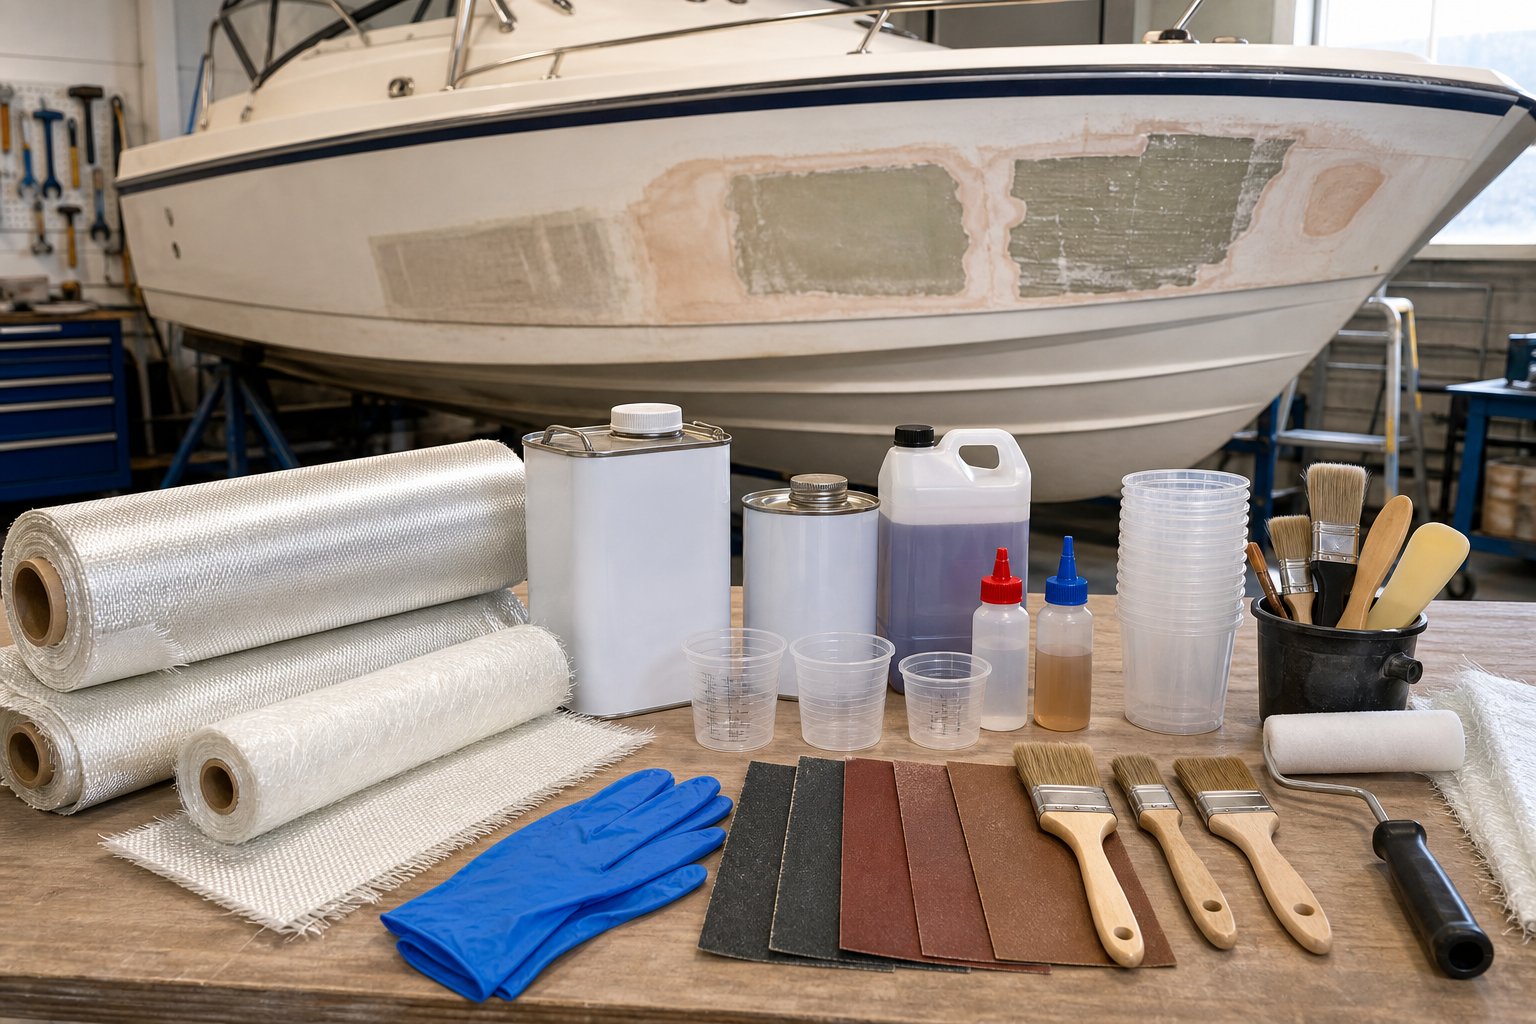
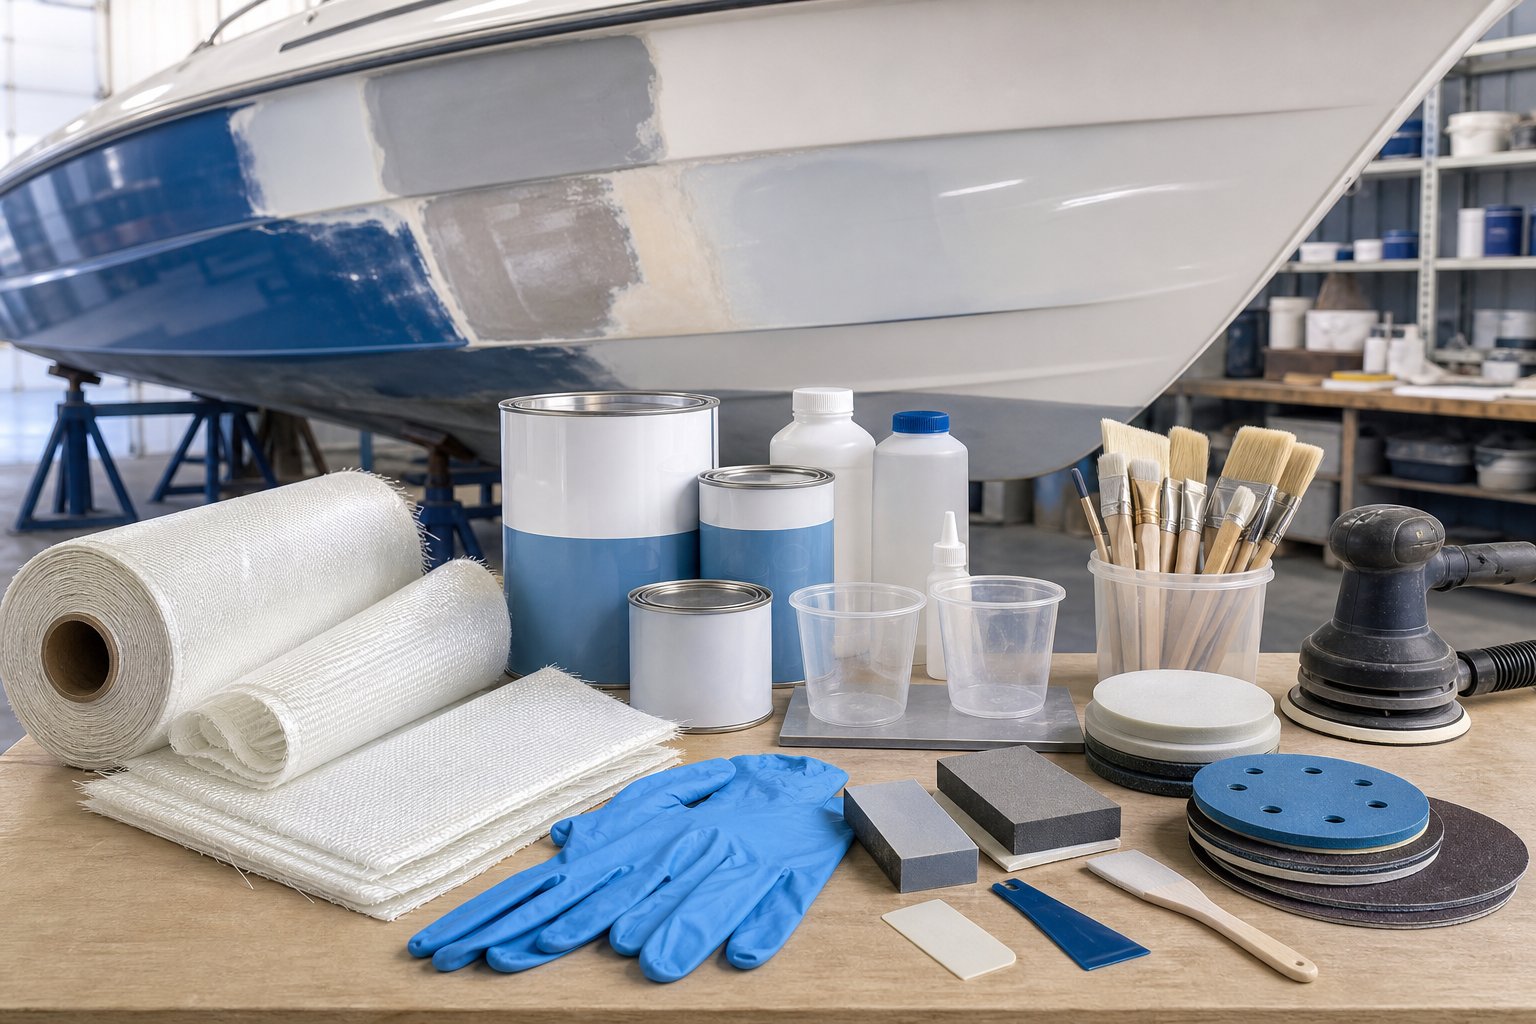
Whether you’re patching a small crack or tackling a full hull restoration, having the right fiberglass boat repair supplies on hand makes all the difference between a job that lasts and one that fails after a single season.
You’ll need basic materials like resin, hardener, fiberglass cloth, and gelcoat, along with supporting supplies such as fillers, putties, and safety equipment to complete most boat repairs. These products work together to restore cracks, holes, and surface damage on hulls and decks.
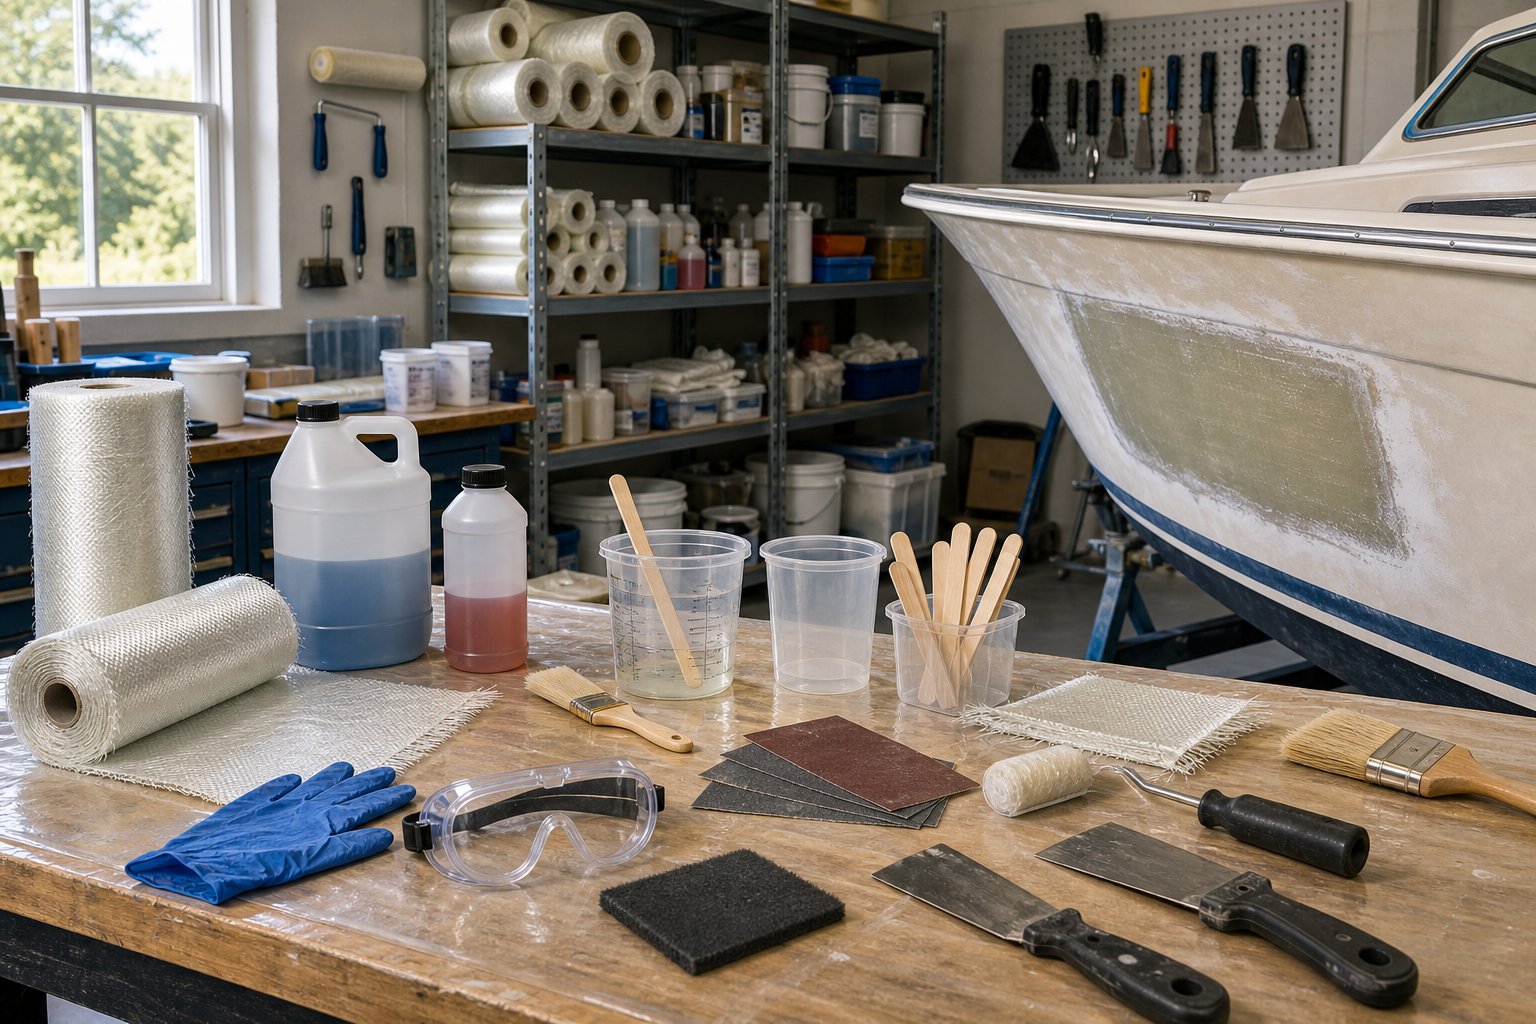
Whether you’re dealing with a small crack or more extensive structural damage, understanding what supplies you need helps you choose the right products for your project. Marine fiberglass repair kits often include the basic materials you need to get started, while individual components give you more control over larger repairs. You can also find specialized composite materials for different types of marine restoration work.
This guide covers everything from core repair materials to finishing products that help you protect your boat for years to come. You’ll learn about different types of resins and reinforcements, how to select the right repair kit for your needs, and the best practices that make your repairs strong and waterproof.
- Fiberglass Boat Repair Supplies
- Popular Fiberglass Repair Kits and Their Applications
- Supporting Supplies: Fillers, Putties, and Additives
- Finishing and Gelcoat Repair
- Structural and Advanced Marine Repairs
- Best Practices for Safety and Project Success
- Marine Restoration and Long-Term Care
- Frequently Asked Questions
- What materials and tools are essential for a durable fiberglass hull repair?
- How do I choose between epoxy and polyester resin for a fiberglass boat repair?
- Which fiberglass cloth weight is best for patching cracks versus reinforcing large areas?
- What surface preparation steps ensure resin and fiberglass bond properly to a boat hull?
- How do I match gelcoat color and achieve a smooth, factory-like finish after a repair?
- Where can I source reliable repair materials locally, and what should I look for when buying them?
Fiberglass Boat Repair Supplies
Repairing fiberglass boats requires selecting the right combination of resins, reinforcement materials, and core materials to create durable repairs that match the strength of your boat’s original construction. Understanding the differences between epoxy and polyester systems, along with choosing appropriate fiberglass reinforcements, determines whether your repair lasts for years or fails in harsh marine conditions.
Understanding Fiberglass and Resin Systems
Fiberglass boat repairs rely on composite materials that combine two key components: resin and reinforcement. The resin acts as a bonding agent and protective coating, while the reinforcement provides structural strength.
When you work with fiberglass, you’re creating a composite material by saturating reinforcement fabrics with liquid resin. The resin hardens through a chemical reaction, locking the fibers in place and forming a rigid structure. This process, called laminating, builds up layers that restore your boat’s strength.
Resins bond to fiberglass, wood, and many metals, making them versatile for different repair scenarios. The two main resin types used in marine applications are epoxy resin and polyester resin. Each has distinct properties that affect your repair’s durability and cost.
Core materials like balsa, foam, or plywood are often sandwiched between layers of fiberglass in boat decks and hulls. These cores add stiffness without the weight of solid fiberglass. When water penetrates through cracks or unsealed hardware, these core materials can rot and require replacement along with the surrounding fiberglass layers.
Epoxy vs. Polyester Resins in Marine Projects
Epoxy resin offers superior bonding strength and better moisture resistance compared to polyester resins. It adheres well to previously cured fiberglass, wood, and metal surfaces without needing extensive surface preparation. Epoxy also shrinks less during curing, which reduces the chance of cracks forming around your repair.
Polyester resin costs less than epoxy and cures faster in most conditions. However, it doesn’t bond as well to existing fiberglass unless you sand the surface thoroughly. Polyester resins also absorb more water over time, which can lead to blistering in marine environments.
For structural repairs below the waterline, epoxy resin provides better long-term protection. Polyester resin works fine for cosmetic repairs above the waterline or quick fixes where cost matters more than maximum durability.
Key Differences:
- Adhesion: Epoxy bonds to more surfaces without primers
- Moisture Resistance: Epoxy absorbs less water than polyester
- Cost: Polyester costs 30-50% less than epoxy
- Cure Time: Polyester hardens faster in warm conditions
- Strength: Epoxy creates stronger bonds for structural work
Choosing Fiberglass Cloth, Mat, and Reinforcements
Fiberglass cloth, mat, and fabric serve as reinforcement materials that give your repair its structural strength. Each type of reinforcement has specific uses based on the repair you’re making.
Fiberglass mat uses randomly oriented short fibers held together with a binder. It’s the easiest material for beginners to work with and builds thickness quickly. Mat works well for filling large damaged areas and creating smooth surfaces, but it provides less strength than woven materials.
Fiberglass cloth features woven fibers in a regular pattern, creating a stronger reinforcement than mat. Cloth drapes well over curved surfaces and produces thinner, lighter layers. You’ll find it ideal for cosmetic repairs and situations where you need flexibility.
Woven roving combines heavy, coarse fibers in a loose weave pattern. This reinforcement adds maximum strength with fewer layers, making it perfect for structural repairs on hulls and transoms. It requires more resin to wet out completely compared to cloth or mat.
Reinforcement Selection Guide:
| Material Type | Best Uses | Strength Level |
|---|---|---|
| Fiberglass Mat | Quick buildup, general repairs | Low to Medium |
| Fiberglass Cloth | Curved surfaces, cosmetic work | Medium |
| Woven Roving | Structural repairs, hull work | High |
| Carbon Fiber | Performance upgrades, weight reduction | Very High |
Carbon fiber reinforcement weighs less than fiberglass while providing greater stiffness and strength. However, it costs significantly more and requires careful mixing with epoxy resin for proper adhesion. Most boat owners reserve carbon fiber for performance-critical areas or weight-sensitive applications.
Popular Fiberglass Repair Kits and Their Applications
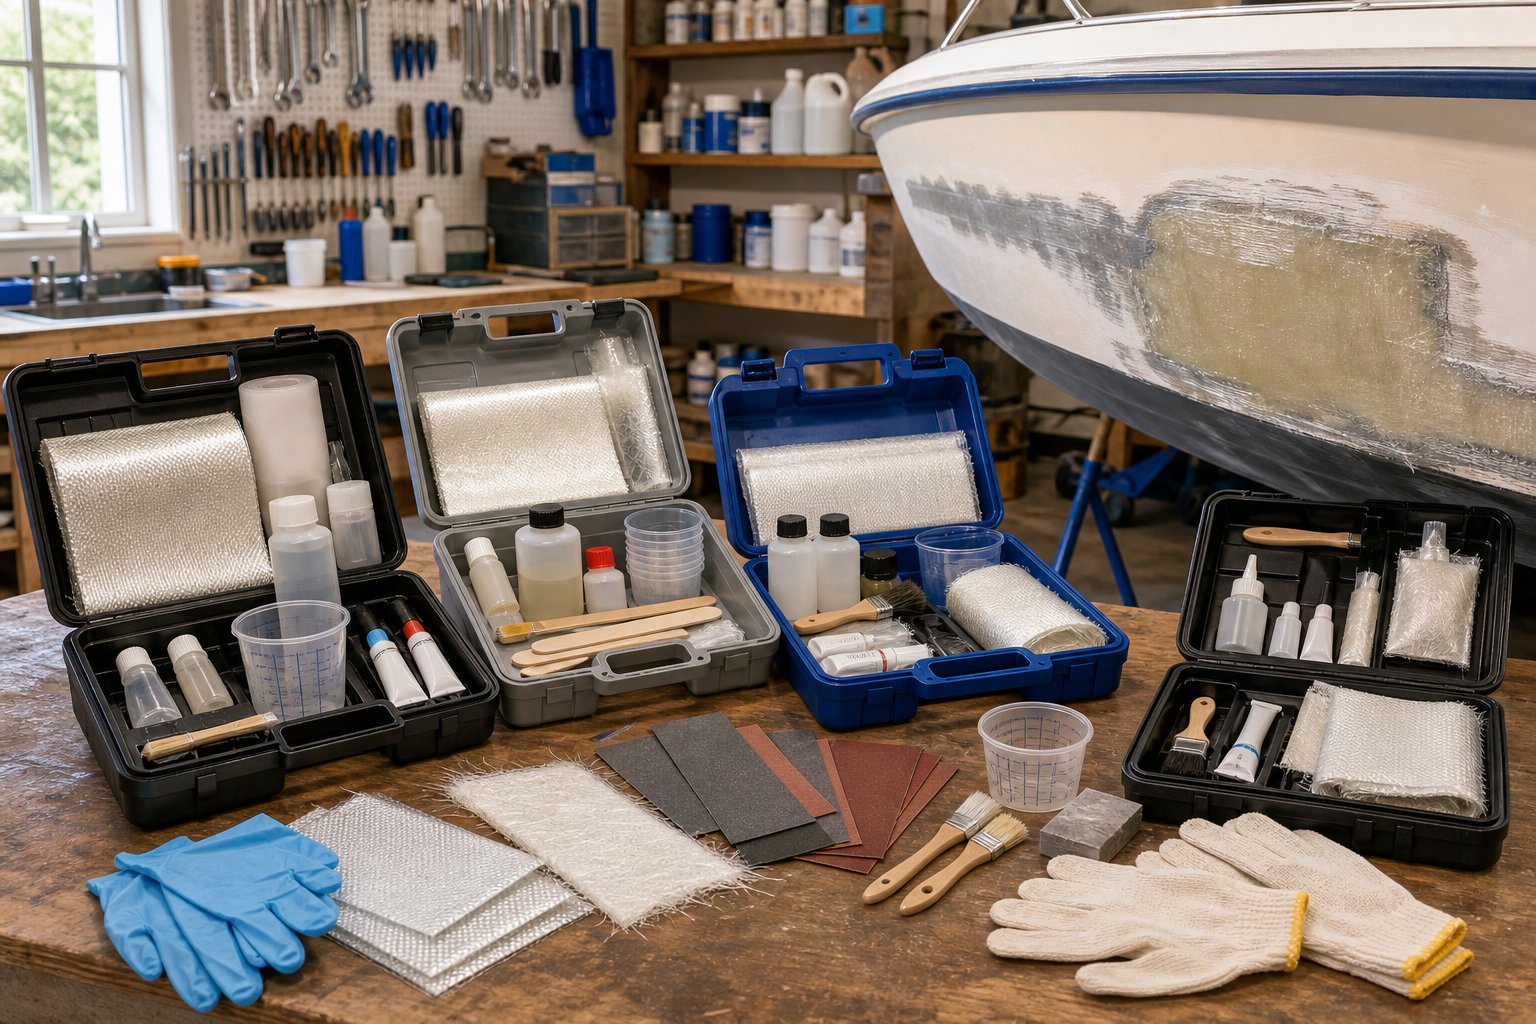
Fiberglass repair kits bundle the essential materials you need for boat fiberglass repair in one package, making them convenient for quick fixes and standard projects. These kits range from basic gelcoat touch-up sets to comprehensive marine fiberglass repair packages with resin, cloth, and finishing supplies.
What to Expect in a Standard Repair Kit
Most fiberglass repair kits include the core materials needed for common repairs. You’ll typically find resin and hardener as the foundation, along with mixing cups, stir sticks, and application tools. Many kits also include fiberglass cloth or mat for reinforcement.
The Evercoat Fiberglass Repair Kit is a good example of what to expect. It includes filler, hardener, and mixing supplies designed for repairing cracks and holes in fiberglass and wood. Some kits focus specifically on surface repairs and include gelcoat repair materials instead of structural components.
Basic kits work well for small cosmetic damage. Larger kits meant for marine-specific fiberglass and gelcoat repairs often add more cloth, additional resin, and sanding materials. Check what’s included before you buy to make sure it matches your repair needs.
Marine-Specific Kits for Hulls, Decks, and Transoms
Marine fiberglass repair kits are formulated to handle the harsh conditions boats face. These kits use water-resistant resins and compounds that bond properly in marine environments. They’re designed for hull damage, deck wear, and transom repairs where strength and moisture resistance matter.
Products like West System 105 Epoxy Resin paired with compatible hardeners create strong, waterproof bonds suitable for structural boat repair. Marine-specific kits often include ISO NPG gel coat that resists water penetration better than general-purpose options.
For hull and deck work, look for kits with fiberglass cloth in different weights. Lighter cloth works for surface repairs, while heavier roving adds strength to larger damaged areas. Transom repairs typically need epoxy-based systems rather than polyester resin because they handle moisture and flexing better.
When to Choose a Kit vs. Individual Supplies
A fiberglass repair kit makes sense when you’re handling a straightforward repair and need convenience. Kits save you time figuring out which materials work together and often cost less than buying everything separately. They’re ideal for occasional repairs or first-time projects.
Individual supplies give you more control for larger or specialized work. If you’re repairing multiple areas or doing extensive fiberglass boat repair, buying resin by the quart or gallon is more economical. You can also choose specific materials for your exact situation.
Consider buying individual supplies when:
- You need more material than a standard kit provides
- Your repair requires specific resin types or cloth weights
- You already have some materials and just need to restock certain items
- You’re working on a custom repair that doesn’t fit typical kit applications
For complete fiberglass repair kits in different sizes, you can find options ranging from small patch jobs to gallon-sized kits for bigger projects.
Top Brands and Featured Products
Marine-Tex epoxy putty repair kits are trusted for structural repairs on fiberglass, aluminum, and wood. The putty bonds strongly and prevents galvanic corrosion, making it suitable for hardware mounting and hull repairs. It’s available in white and gray to match different surfaces.
Evercoat produces several popular products including their gelcoat repair kit for permanent fixes on scratches, nicks, and gouges. Their Gel-Kote One Step Finish provides a high-gloss surface that matches original finishes. The Sea-Glass fiberglass cloth from Evercoat works with all marine resins.
West System offers professional-grade epoxy systems. Their 105 Epoxy Resin combined with 205 Fast Hardener creates strong bonds even in cooler temperatures. These products are widely used for serious structural work.
Sea Hawk Hawk Epoxy R1 Resin is a low-odor, low-blush option for general fiberglass repair and construction. Pettit EZ-Fair epoxy fairing compound helps fill and smooth surface imperfections above and below the waterline without shrinking after it cures.
Supporting Supplies: Fillers, Putties, and Additives
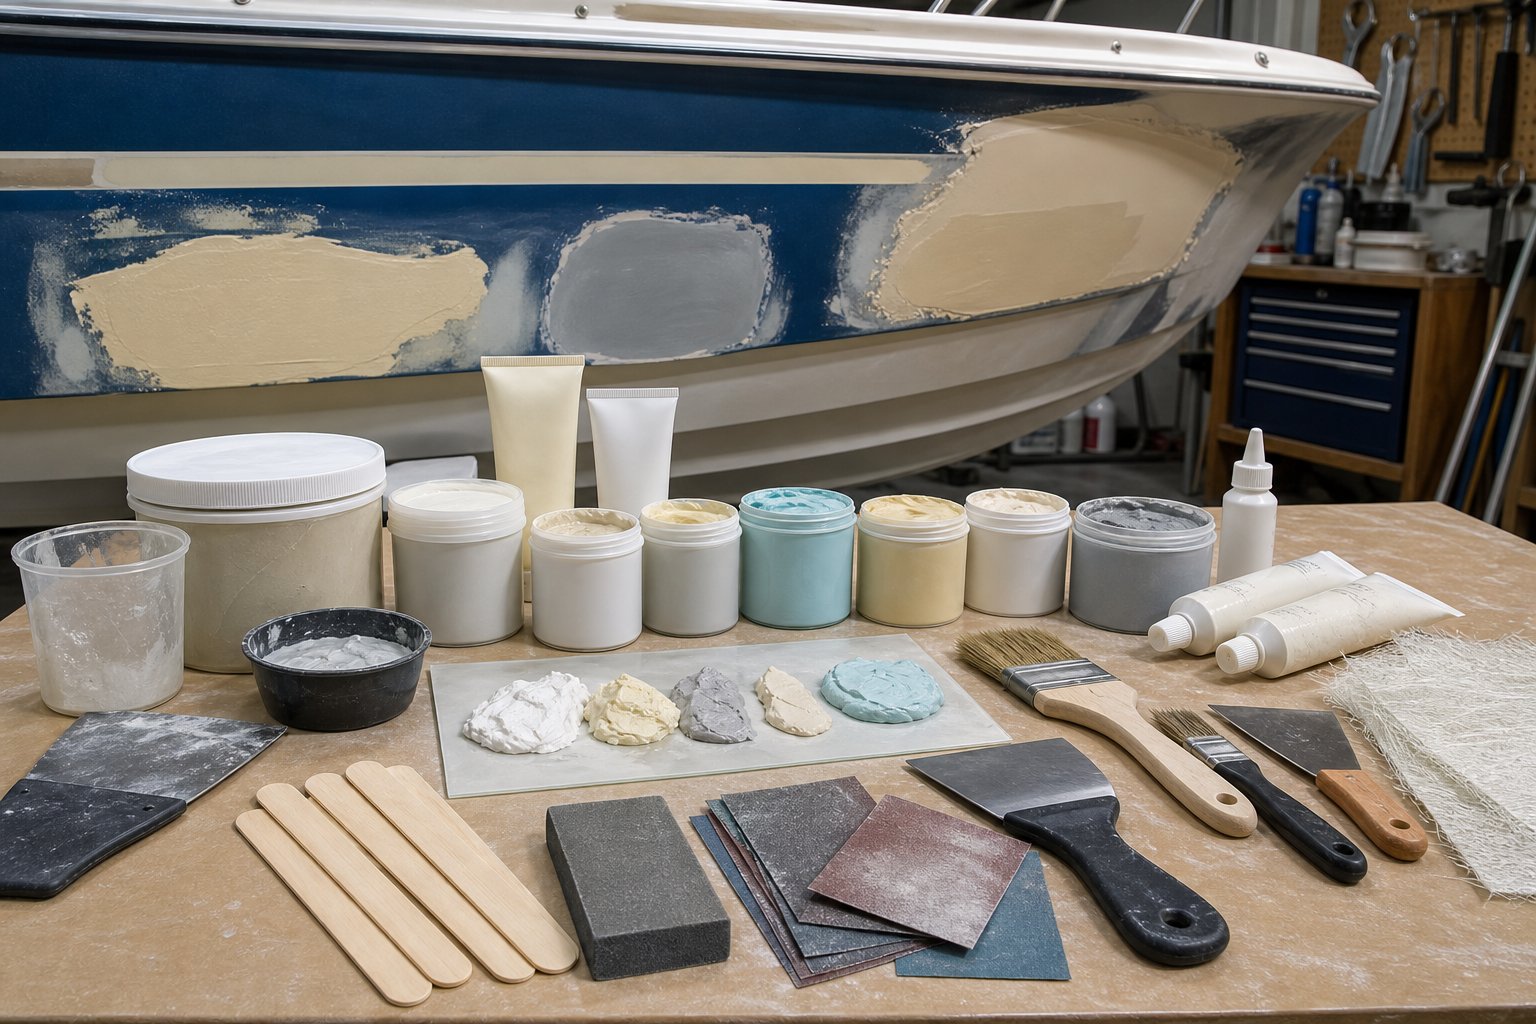
Successful fiberglass repairs require more than just resin and cloth. Fillers and putties help you create smooth surfaces and fill voids, while hardeners and curing agents control how your repair materials set up.
Fillers and Putties for Smoothing and Fairing
You’ll add fillers to resin to create putty that fills gaps and builds up damaged areas. Microballoon fillers make lightweight fairing compounds that sand easily for smooth finishes above the waterline. Colloidal silica creates thicker putties that won’t sag when you apply them to vertical surfaces.
For structural repairs, you need high-strength fillers with short strand fiberglass that add reinforcement. These work well for semi-structural fixes on hulls and decks. Milled glass fibers give you strong bonds without adding much weight.
Marine-grade fairing compounds come pre-mixed and ready to apply. These products cure quickly and sand smoothly for cosmetic repairs. You can use them to fair hull surfaces, fill scratches, or rebuild damaged gelcoat areas.
Hardeners, MEK, and Curing Agents
Polyester resins require MEKP (methyl ethyl ketone peroxide) hardener to cure properly. You’ll typically add 1-2% hardener by volume, adjusting the amount based on temperature. More hardener speeds up cure time, while less gives you more working time.
Epoxy systems use different hardeners that come matched to specific resins. Fast hardeners cure in hours, while slow hardeners give you extended work time for large projects. Temperature affects cure time significantly—cold weather slows the process while heat speeds it up.
MEK solvent cleans uncured resin from tools and brushes. You need it for prep work and cleanup, but use it in well-ventilated areas. Store all hardeners and solvents in sealed containers away from heat sources.
Application Tools and Mixing Essentials
You need proper brushes for applying resin and gelcoat. Disposable chip brushes work for most repairs, while foam brushes help avoid bubbles. Keep several sizes on hand for different jobs.
Mixing cups with measurement markings help you get resin-to-hardener ratios correct. Wooden stir sticks or plastic mixing paddles blend components thoroughly. You’ll also need:
- Squeegees for spreading resin and removing air bubbles
- Plastic spreaders for applying putty and fairing compounds
- Mixing boards or disposable surfaces for preparing materials
- Protective tape to mask off repair areas and protect surrounding surfaces
Acetone and MEK keep your tools clean between applications. Have plenty of paper towels and rags ready for cleanup work.
Finishing and Gelcoat Repair
Gelcoat serves as the protective outer layer on your fiberglass boat and requires specific products and techniques to repair properly. Matching colors accurately and restoring the original finish helps maintain both appearance and water resistance.
Restoring Gelcoat Appearance and Protection
Gelcoat damage shows up as scratches, chips, gouges, and fading on your boat’s hull and deck. You need gelcoat repair kits that include the gel paste, hardener, and application tools to fix these issues.
Small scratches and chips can be repaired with patch compounds that fill and seal the damaged area. Deeper gouges require you to sand the damaged area, apply filler if needed, then layer gelcoat to build up the surface. The gelcoat needs to cure fully before you sand it smooth.
Some gelcoat products cure with a tacky finish that requires additional steps or a mold release agent to achieve a hard surface. Others cure to a hard finish on their own. One-step finish gel coat products eliminate extra steps and cure to a high-gloss finish without additional topcoats.
After curing, you sand the repaired area with progressively finer grit sandpaper. Final polishing with rubbing compound and marine polish brings the repair to match the surrounding gloss level.
Color Matching and Blending Techniques
Color matching presents the biggest challenge in gelcoat repair work. Your boat’s gelcoat has likely faded over time, making new gelcoat appear too bright or off-color compared to the surrounding area.
Coloring agents for polyester and epoxy let you tint white or neutral gelcoat to match your boat’s existing color. You add small amounts of pigment to the gelcoat before mixing in the hardener. Test your color match on a hidden area or scrap piece before applying it to the visible repair.
For the best blend, feather the edges of your repair by sanding the surrounding area. This creates a gradual transition rather than a hard line. Apply the gelcoat slightly proud of the surface so you have material to sand down flush.
White and off-white boats are easier to match than colored gelcoats. If you cannot achieve an acceptable match with tinted gelcoat, you may need to repaint the entire panel or section for a uniform appearance.
Structural and Advanced Marine Repairs
Serious hull damage requires specialized materials and techniques that go beyond basic patching. Transom failures, compromised structural members, and performance upgrades demand proper layup procedures, marine-grade reinforcement materials, and knowledge of how different composites work together.
Layups and Laminating for Structural Reinforcement
Structural layups involve building up multiple layers of fiberglass cloth saturated with epoxy resin to restore strength to damaged areas. You need to understand the difference between cloth weights and weave patterns for different applications.
Common Fiberglass Cloth Types:
- 6 oz cloth: Good for cosmetic repairs and light structural work
- 10 oz cloth: Standard choice for general hull reinforcement
- Biaxial and triaxial fabrics: Provide strength in multiple directions for high-stress areas
You should alternate between layers of different weights to create a proper bond. Each layer must fully wet out with resin before adding the next one. Air bubbles and dry spots compromise the entire repair.
Structural fiberglass and hull repair work requires proper materials and proven methods to rebuild damaged sections. You need to feather the edges of the repair area at a 12:1 ratio for maximum strength. This means tapering back 12 inches for every inch of material thickness.
Transom Repair Essentials
Transom failures rank among the most serious structural problems you can face. Water intrusion causes the wood core to rot, leading to soft spots and potential engine mount failure.
You must remove all compromised material before starting the repair. This often means cutting out the entire transom core and replacing it with marine-grade plywood or composite materials. The new core needs proper sealing with epoxy to prevent future water damage.
Critical Transom Repair Steps:
- Remove outer fiberglass skin and damaged core
- Dry out cavity completely before proceeding
- Cut replacement core to exact dimensions
- Seal all edges with epoxy resin
- Bond new core with thickened epoxy adhesive
- Apply new fiberglass layers to both sides
Your transom must handle significant loads from the outboard motor and rough water impacts. Proper fiberglass repair materials include structural epoxy resins and appropriate hardeners for marine conditions.
Composite and Carbon Fiber Upgrades
Carbon fiber offers a strength-to-weight ratio that exceeds traditional fiberglass by several times. You can use it to reinforce high-stress areas or reduce weight in performance applications.
Carbon fiber cloth costs significantly more than fiberglass but requires less material thickness for equivalent strength. You need epoxy resin specifically formulated for carbon fiber since polyester resin won’t achieve proper bonding.
Mixing carbon fiber with fiberglass creates hybrid layups that balance performance and cost. Place carbon fiber layers on the outer surfaces where they provide maximum stiffness. Interior fiberglass layers add impact resistance and reduce overall material costs.
You should avoid using carbon fiber in areas with metal hardware unless you add an isolation barrier. Direct contact between carbon fiber and aluminum creates galvanic corrosion that destroys both materials.
Best Practices for Safety and Project Success
Working with fiberglass repair materials requires proper protection and careful technique to achieve lasting results. The right safety gear prevents exposure to harmful fumes and particles, while thorough surface prep and smart material choices determine whether your repair holds up over time.
Personal Protective Equipment and Ventilation
You need a quality respirator with organic vapor cartridges when working with resin and hardeners. Standard dust masks won’t protect you from chemical fumes. Wear nitrile gloves instead of latex because polyester and epoxy resins break down latex quickly.
Safety glasses or goggles protect your eyes from splashes and airborne fiberglass particles. Long sleeves and pants prevent skin contact with resins that can cause irritation or allergic reactions. A complete resin safety setup includes proper workspace ventilation to move fumes away from your breathing zone.
Work outdoors whenever possible or set up fans to create cross-ventilation in your workspace. Never work in enclosed spaces without adequate airflow. Keep a bucket of water and paper towels nearby to clean up spills immediately.
Surface Preparation and Application Tips
Sand the damaged area until you reach solid fiberglass with no soft or delaminated material remaining. Use 80-grit sandpaper to create a rough surface that helps the new resin bond properly. Clean the area with acetone to remove all dust, oil, and contaminants before applying any repair materials.
Rushing surface preparation is one of the most damaging mistakes in fiberglass repair. Feather the edges of the repair area at least two inches beyond the damage. This gradual transition prevents visible ridges and creates a stronger bond.
Mix resin and hardener in the exact ratios specified by the manufacturer. Too much or too little hardener prevents proper curing. Apply thin layers and allow each to cure fully before adding the next layer.
Selecting and Storing Materials Responsibly
Choose repair supplies that match your boat’s original construction materials. Epoxy resin works for most repairs and offers superior strength and moisture resistance. Polyester resin costs less but requires more ventilation and has a stronger odor.
Buy only what you need for your current project because most resins have limited shelf lives. Store unmixed resin and hardener in cool, dry locations away from direct sunlight. Keep containers tightly sealed to prevent moisture contamination.
Check expiration dates on all repair supplies before use. Old or contaminated materials won’t cure properly and can ruin your repair. Keep your tools clean and dedicated to fiberglass work to avoid cross-contamination with other substances.
Marine Restoration and Long-Term Care
Restoring and maintaining your boat’s fiberglass requires products that address oxidation and surface damage while establishing a regular care routine that prevents future deterioration.
Ongoing Fiberglass Restoration
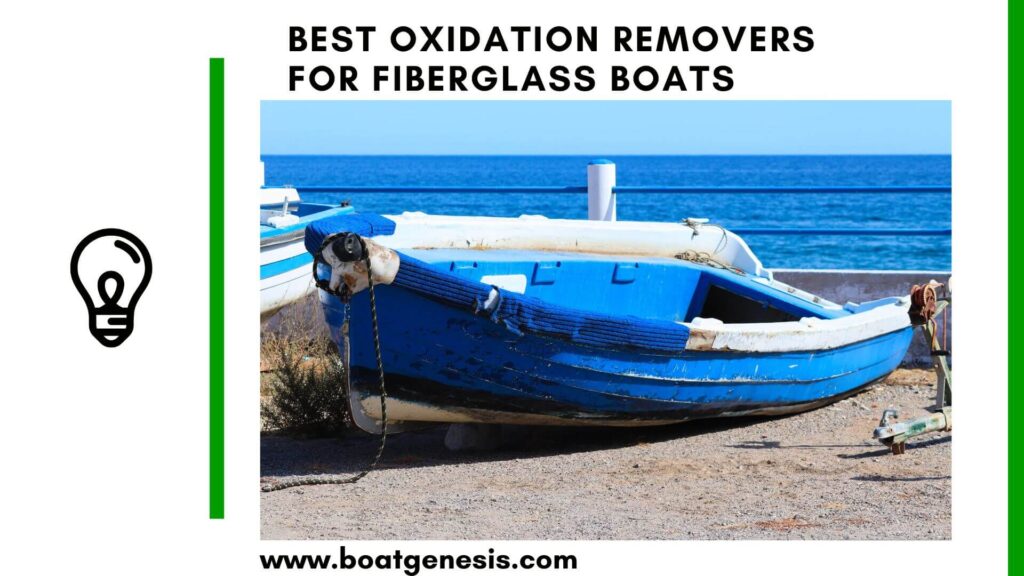
When your boat’s gel coat shows signs of oxidation, staining, or loss of shine, you need a comprehensive restoration approach. Fiberglass restoration systems typically include three key components: an oxidation remover, polish, and protective wax that work together to revive weathered surfaces.
The oxidation remover strips away chalky residue and stubborn stains that accumulate from sun exposure and marine environments. After removing oxidation, you apply a high-gloss polish that smooths the surface and brings back the original luster. The final wax layer seals the restored finish and provides UV protection.
For boat fiberglass repair involving structural damage, you’ll need specialized putties and resins in addition to surface restoration products. Fiber-reinforced fillers bond to damaged areas and cure to match the surrounding gel coat strength.
Routine Maintenance for Lasting Results
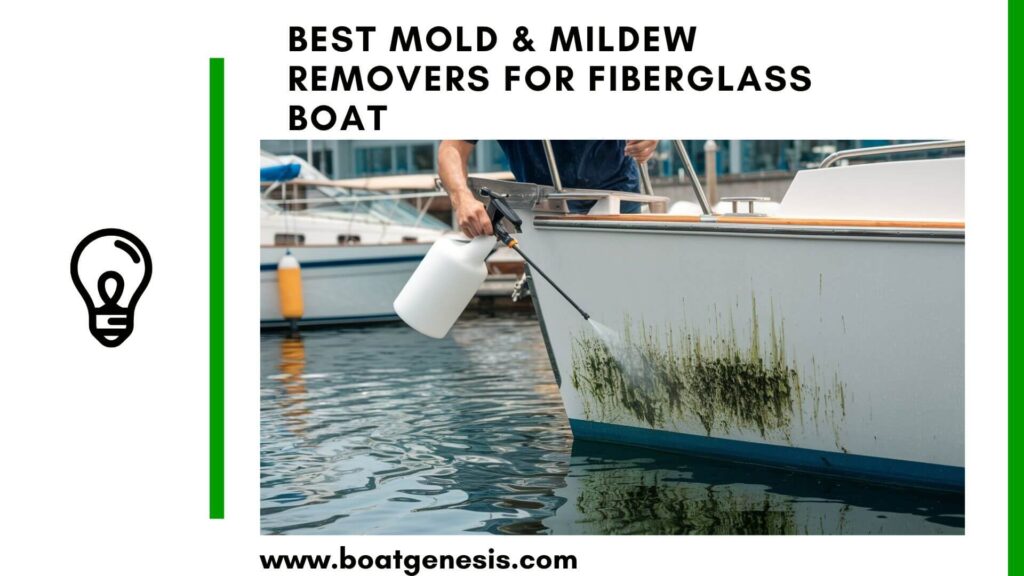
Regular cleaning prevents the buildup that leads to oxidation and gel coat damage. You should use pH-balanced boat washes that remove dirt and scum without stripping protective wax layers.
Gel-based cleaners work best on vertical hull surfaces because they cling longer and penetrate tough stains like rust streaks and scum lines. Apply these cleaners every few weeks during boating season to maintain surface integrity.
Between full restoration cycles, apply marine wax every three to four months to shield your gel coat from UV rays. This protective barrier reduces oxidation rates and keeps your fiberglass looking newer for longer periods. Store cleaning supplies in a dry location and check expiration dates on resin-based products before use.
Frequently Asked Questions
Boat owners often have specific questions about selecting the right supplies and techniques for fiberglass repairs. Understanding which materials work best for different damage types and how to prepare surfaces properly makes the difference between a lasting repair and one that fails.
What materials and tools are essential for a durable fiberglass hull repair?
You need fiberglass cloth or mat, resin, hardener, sandpaper, and a grinder for most hull repairs. The cloth provides structural reinforcement while the resin bonds everything together.
Protective gear including a respirator mask, gloves, and a Tyvek suit protects you from fiberglass particles and harmful fumes. You also need mixing containers, sticks, and acetone for cleaning the work area.
A filler material helps you bridge gaps in deeper damage. Gelcoat or marine paint finishes the repair and protects it from water and UV damage.
How do I choose between epoxy and polyester resin for a fiberglass boat repair?
Epoxy resin creates stronger bonds and works better in humid conditions or when repairing older boats. It costs more but offers superior waterproofing and adhesion to most surfaces.
Polyester resin works well for minor repairs and costs less than epoxy. It cures faster but requires dry conditions and doesn’t bond as strongly to some surfaces.
Choose epoxy for structural repairs below the waterline or when maximum strength matters. Use polyester for small cosmetic fixes above the waterline where budget concerns outweigh the need for ultimate strength.
Which fiberglass cloth weight is best for patching cracks versus reinforcing large areas?
Light cloth weights between 4 and 6 ounces work best for small cracks and surface repairs. These weights conform easily to curved surfaces and create smooth finishes that require less sanding.
Medium weights from 8 to 10 ounces suit larger damaged areas that need more structural support. Heavy weights above 10 ounces reinforce major damage or build up thickness in areas that take heavy stress.
You can layer multiple pieces of lighter cloth instead of using one heavy piece. This approach gives you better control over the repair thickness and eliminates air bubbles more easily.
What surface preparation steps ensure resin and fiberglass bond properly to a boat hull?
Sand the repair area with coarse-grit sandpaper or a grinder to remove all damaged material and create a rough surface. The rough texture gives the resin something to grip onto.
Clean the area thoroughly with acetone or a specialized solvent to remove oils, waxes, and dirt. Any contamination prevents proper bonding and causes the repair to fail.
Feather the edges of the damaged area by sanding outward in a gradual taper. This creates a smooth transition between the repair and existing fiberglass rather than a hard edge that can crack.
How do I match gelcoat color and achieve a smooth, factory-like finish after a repair?
Take a sample of your boat’s gelcoat to a marine supply store where they can mix a custom color match. Many stores offer color-matching services using your boat’s manufacturer codes or physical samples.
Apply gelcoat in thin layers rather than one thick coat to avoid sagging and runs. Sand between coats with progressively finer grits starting at 220 and working up to 600 or higher.
Wet sand the final coat with 1000-grit or finer sandpaper, then buff with rubbing compound. Follow up with marine polish to bring out the shine and blend the repair with the surrounding gelcoat.
Where can I source reliable repair materials locally, and what should I look for when buying them?
Marine supply stores and boatyards stock quality fiberglass repair supplies specifically designed for boat repairs. These products meet marine-grade standards and resist saltwater and UV exposure.
Check expiration dates on resins and hardeners because they lose effectiveness over time. Look for products that include clear mixing ratios and instructions specific to marine applications.
Buy more materials than you think you need since running out mid-repair causes problems. Most unopened resins and hardeners store well if kept in cool, dry conditions away from direct sunlight.

Warren is the founder of BoatGenesis and brings practical experience in fiberglass boat repair, marine equipment testing, and powerboat building. He has worked on a range of repair and restoration projects and now focuses on creating clear, research-based guides to help boat owners avoid costly mistakes and make smarter maintenance decisions. Learn more about Warren.