If your boat feels soft underfoot, makes strange creaking sounds, or you’ve spotted cracked fiberglass below deck, you’re probably looking at a stringer problem — and fiberglass boat stringer repair is likely what you need.
Stringers are the backbone of your hull. They run lengthwise along the bottom and keep everything stiff and strong. When they start to fail, the problem doesn’t fix itself.
The good news is that a lot of stringer damage can be fixed without ripping everything out. You just need to know what you’re dealing with, catch it early enough, and follow the right steps.
This guide covers both main types of stringers found in fiberglass boats — wooden core stringers and composite stringers (gel coat, fiberglass, and wood combined). We’ll walk through how to tell if yours can still be saved, how to fix them properly, and how to protect the repair for the long haul.
Key Takeaways
- Stringers with less than 25% cross-section rot, surface-only damage, or early moisture issues can often be repaired rather than fully replaced.
- Always dry the area completely before applying any epoxy — moisture trapped behind the repair is the number one reason repairs fail.
- Penetrating epoxy is your most important tool for wooden core stringers — it soaks into damaged wood and binds it back together from the inside.
- Composite stringers need both gel coat and structural repairs done in the right order: outside in.
- Fibreglass cloth encapsulation seals the repair and prevents water from reentering.
- Ventilation matters just as much as the repair itself — a damp bilge will rot your stringers again if you don’t improve airflow.
- When in doubt, press a sharp awl into the stringer. Solid wood pushes back. Rotten wood doesn’t.
- Key Takeaways
- Fiberglass Boat Stringer Repair:
- Repair or Replace? How to Decide
- What Type of Stringers Does Your Boat Have?
- How to Repair Wooden Core Stringers
- How to Repair Composite Stringers (Gel Coat, Fiberglass, and Wood)
- How Much does Stringer Repair Cost?
- What You'll Need
- How to Protect Your Repair and Keep Stringers Healthy
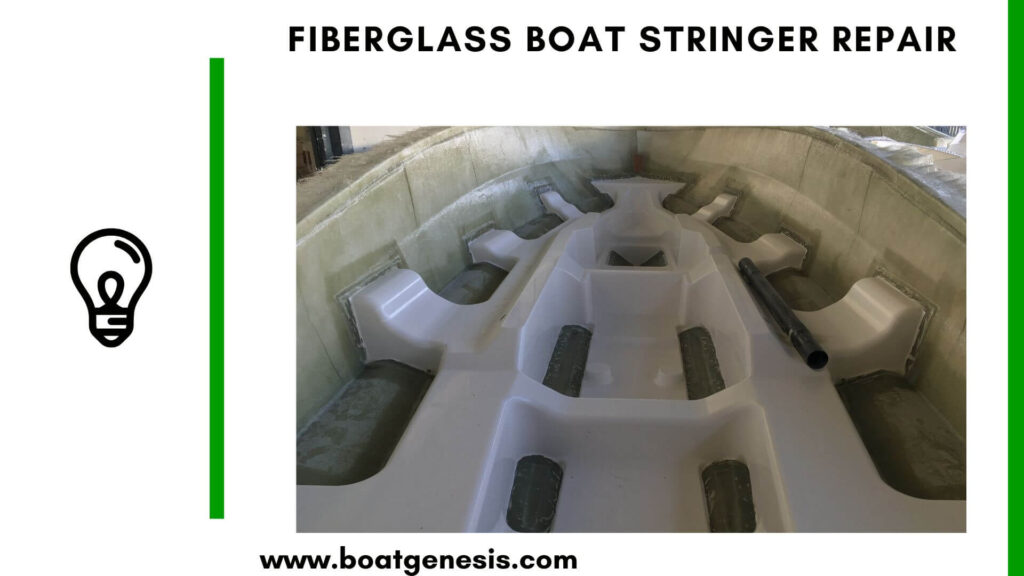
- Understanding Stringer Anatomy: What You're Actually Fixing
- Frequently Asked Questions
- How do I know if my stringers are actually rotten?
- Can I repair stringers without removing the floor?
- Is epoxy or polyester resin better for stringer repair?
- How long does a stringer repair last?
- What's the difference between stringer repair and stringer replacement?
- Can I use the boat while waiting to do the repair?
- What type of fiberglass cloth should I use?
- How much does professional stringer repair cost?
Fiberglass Boat Stringer Repair:
Early Warning Signs Your Stringers Need Attention
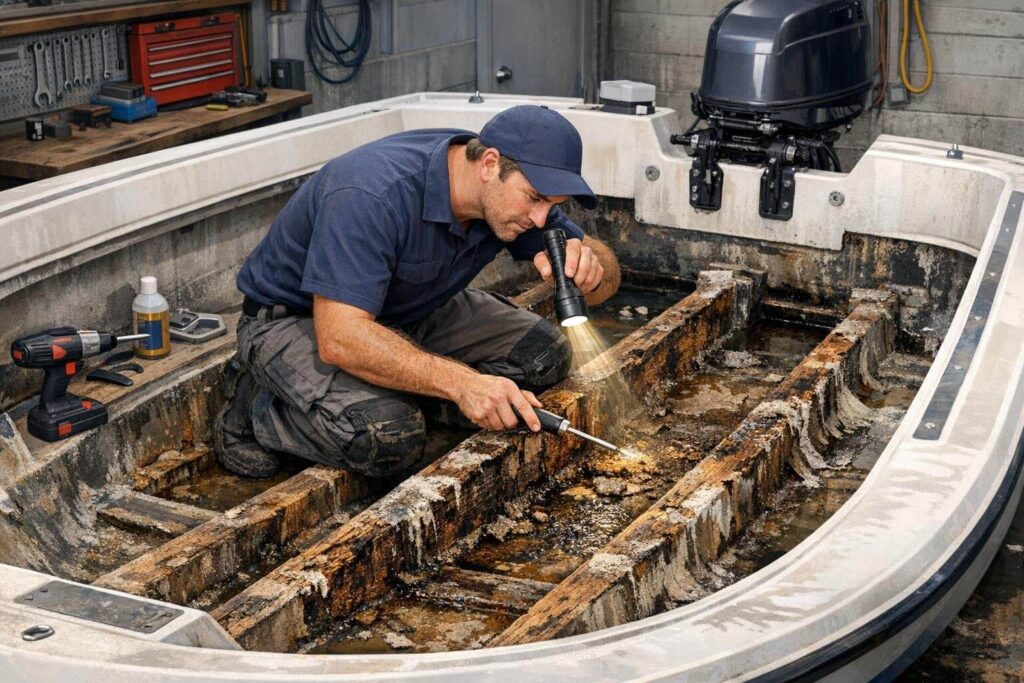
Most stringer problems don’t show up all at once — they build slowly. Catching damage early is the difference between a weekend repair and a full stringer replacement. Here are the signs to watch for.
Soft or spongy floor. If the deck flexes or gives when you walk on it, the stringers below may have lost their stiffness. This is one of the clearest signs something is wrong underneath.
Unusual creaking or popping sounds. If the boat makes noises when it flexes underway, the bond between the hull and the stringer may be breaking down. Healthy boats don’t creak like that.
Standing water in the bilge. Chronic moisture in the bilge is slow death for wooden stringer cores. If water pools there regularly and stays, your stringers are at risk.
Loose hardware. Seat pedestals, cleats, or floor panels that feel wobbly can mean the underlying stringer has gone soft and is no longer holding fasteners properly.
Visible cracks or bubbling in the fiberglass. Hairline cracks or raised areas in the fiberglass skin over the stringers usually mean water has already gotten inside.
Dark staining along the stringer edges. Brown or black discoloration is a reliable sign that moisture damage or rot has already started.
Quick field test: Press a sharp awl or screwdriver firmly into the stringer at several points. A healthy stringer resists firmly. If the tool sinks in easily or the wood crumbles, rot is present.
Repair or Replace? How to Decide
| Condition | Severity | Action |
|---|---|---|
| Surface rot, less than 25% of cross-section | Mild | Repair |
| Localized crack or fracture, no full snap | Mild | Repair |
| Early moisture weeping, no structural softness | Early | Repair |
| Gel coat damage only, fiberglass and wood intact | Cosmetic | Repair |
| Rot covering 25–50% of cross-section | Moderate | Repair with caution — partial replacement may be needed |
| Rot over 50% of cross-section | Severe | Replace |
| Complete snap failure or structural collapse | Severe | Replace |
| Full-length delamination from hull | Severe | Replace |
Not every damaged stringer needs to come out. That’s a big, expensive, disruptive job — and often unnecessary if the damage is caught in time. Before deciding, assess what you’re actually dealing with.
Want to avoid costly fiberglass boat repair mistakes?
Learn how to inspect damage properly, decide when to DIY, and prevent expensive fiberglass problems before they start.
Repair is the right call when:
- Surface rot covers less than 25% of the stringer’s cross-sectional area
- There are localized cracks or fractures, but no complete snapping or collapse
- You’re seeing early moisture weeping with no major structural softness yet
- The damage is limited to the gel coat layer with fiberglass and wood still intact
Replacement is the right call when:
- Rot covers more than 50% of the cross-section
- The stringer has snapped, collapsed, or separated from the hull
- Delamination runs the full length of the stringer
- Multiple stringers are severely damaged at the same time
When you’re unsure, use a moisture meter. A reading above 20% in the wood means active rot is almost certainly present, even if things look okay from the surface.
You can read my full guide about fiberglass boat stringer replacement here.
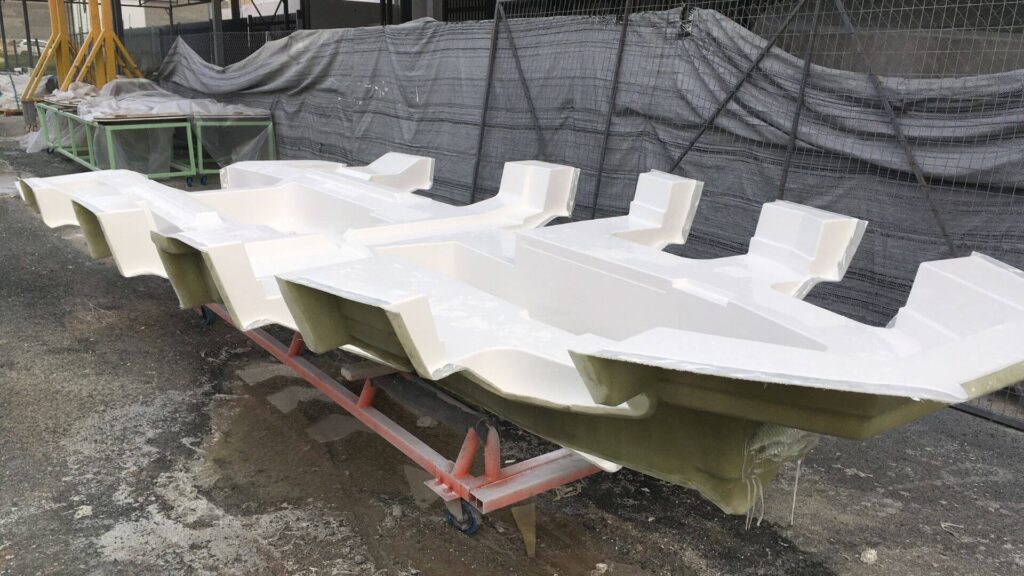
What Type of Stringers Does Your Boat Have?
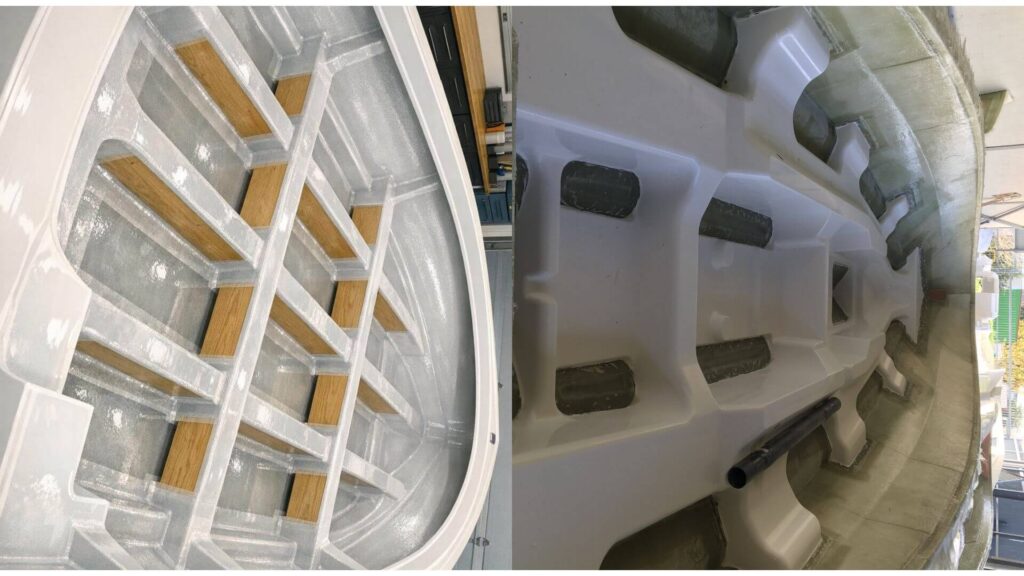
Before you start, you need to know what you’re working with. There are two main types of stringers in fiberglass boats, and the repair process is different for each.
Wooden core stringers are common in older boats, especially anything built before the mid-1990s. The stringer is essentially a piece of lumber wrapped in fiberglass. When the fiberglass cracks and water reaches the wood, rot sets in.
Composite stringers are found in newer and higher-end boats. These combine a gel coat outer layer, a fiberglass skin, and a wood or foam core. They hold up better to moisture but still fail when cracks in the outer layers allow water to reach the core.
The repair process below is split into sections for each type. Read the one that applies to your boat.
How to Repair Wooden Core Stringers
Step 1: Dry Out the Stringer Completely
This is the most important step, and it’s the one people rush. Point portable fans and heaters directly at the damaged area. Aim for 100–120°F and keep things running for at least 1–2 full days. Place desiccant packs around the stringer to pull moisture out of the wood.
Before you move on, check with a moisture meter. You want the reading below 15%. Applying epoxy over damp wood is the number one reason stringer repairs fail — the epoxy won’t bond properly and moisture gets trapped inside where it keeps doing damage.
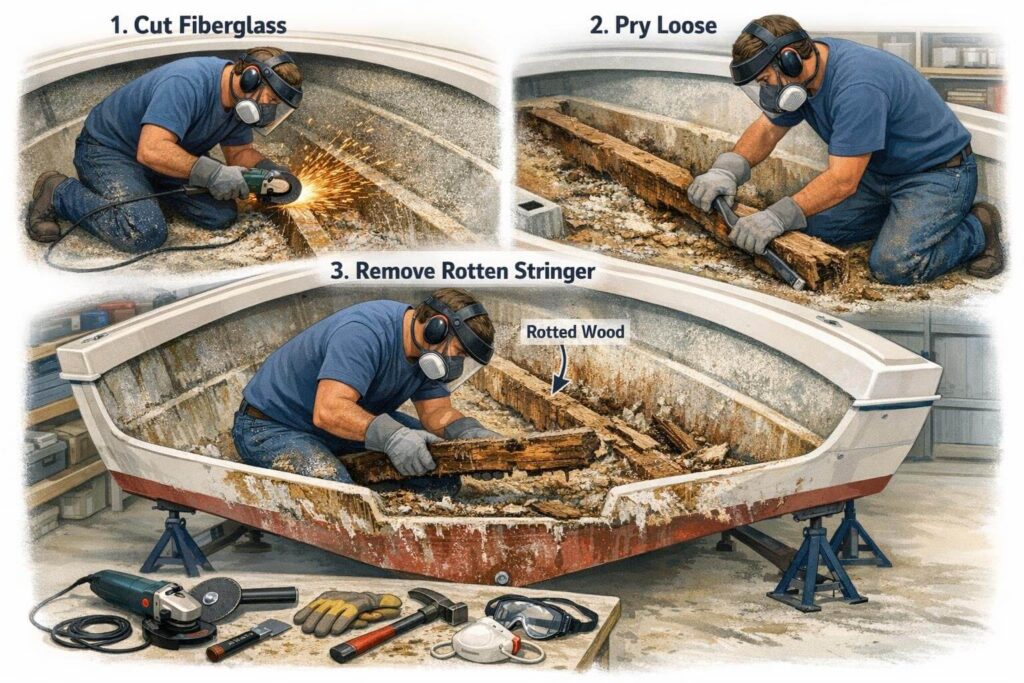
Step 2: Grind Away the Damaged Wood
Use a rotary grinder or sander to remove all the soft wood, crumbling, splintered, or clearly has no structural strength left. Wear eye protection, ear protection, and a proper dust mask — fiberglass and wood dust are both harmful to breathe.
Keep grinding until you reach solid, stiff material underneath. You need a clean, sound base for the repair to hold to. Don’t skip over soft spots hoping they’ll be okay.
Step 3: Apply Penetrating Epoxy to the Remaining Wood
Penetrating epoxy is thin enough to soak deep into the wood fibers. Brush it on generously, paying special attention to end grain — those exposed cross-cuts are where water enters fastest. The epoxy binds the partially damaged but still-salvageable wood back together from the inside out.
Let it cure fully for 24 hours before moving on. Don’t rush this.
Step 4: Fill Voids and Cracks with Thickened Epoxy
Mix epoxy resin per the manufacturer’s instructions, then slowly stir in wood flour or micro balloons until you reach a thick, peanut-butter-like consistency. Trowel this into every crack, void, and rotted-out section until you have a solid, uniform surface.
Let it harden completely, then sand smooth before moving on to the next step.
Step 5: Encapsulate with Fiberglass Cloth and Resin
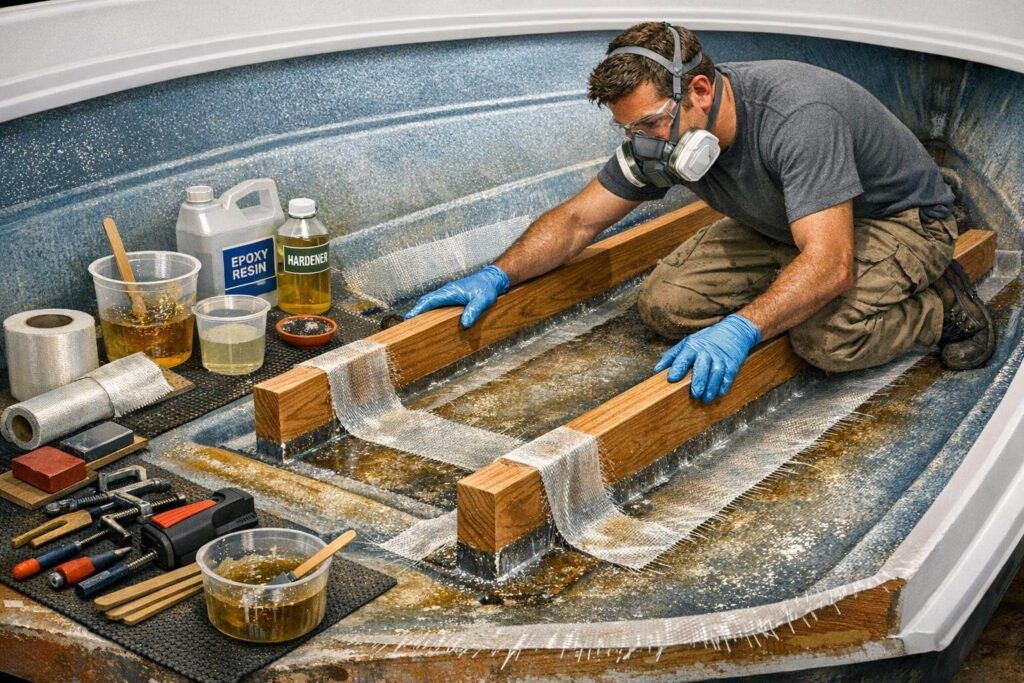
Apply 5–6 layers of woven fiberglass cloth over the entire repaired area. Saturate each layer thoroughly with properly catalyzed polyester or epoxy resin — no dry spots. This fiberglass shell is what seals the wood from future water intrusion and restores the structural strength of the stringer.
Let it cure fully before reassembling anything on top of it.

This guide helps boat owners understand fiberglass damage clearly — what matters, what doesn’t, and when repairs are truly necessary, so small issues don’t turn into expensive mistakes.
See What Every Boat Owner Should Know →How to Repair Composite Stringers (Gel Coat, Fiberglass, and Wood)
Composite stringers need to be repaired from the outside in. Start with the gel coat surface, then work through the fiberglass layers, and finally address the wood core.
Step 1: Inspect the Gel Coat Surface
Look closely for chips, cracks, or crazing in the outer gel coat. Even small cracks are water entry points. If the gel coat looks intact but you still suspect internal damage, tap along the stringer with a coin. A hollow thud instead of a crisp tap means the fiberglass has delaminated underneath.
Step 2: Repair Gel Coat Damage
Clean the damaged area thoroughly to remove dirt and debris. Use a color-matched gel coat repair kit — these include a filler and a hardener. Apply the filler smoothly, let it cure according to the kit instructions, then wet-sand the area until it blends seamlessly with the surrounding surface.
Step 3: Address Fiberglass Cracks or Delamination
If the fiberglass skin is cracked or delaminated, grind back the damaged sections until you reach solid laminate. At this stage, inspect the wood core underneath. If you can see or smell rot, it needs to be addressed before you close anything back up.
Step 4: Treat the Wood Core
Cut out any sections of rotted wood, removing only the damaged material and leaving sound wood in place. Apply penetrating epoxy to all exposed wood surfaces — especially end grain. Let it cure fully. This seals the remaining wood against future moisture before you start rebuilding.
Step 5: Fill, Reinforce, and Finish
Fill any voids where wood was removed using thickened epoxy. Once cured, lay fiberglass cloth over the repaired area and saturate with resin. Let it cure, then sand smooth. If the surface needs it, apply a final layer of color-matched gel coat and sand to blend. Allow everything to cure completely before the boat goes back in the water.
How Much does Stringer Repair Cost?
| Repair Scenario | DIY Cost | Professional Cost |
|---|---|---|
| Minor surface repair, single stringer | $100–$200 | $400–$800 |
| Moderate repair, one full section | $200–$400 | $800–$1,500 |
| Extensive repair, multiple sections | $300–$600 | $1,500–$2,500 |
| Full stringer replacement, per stringer | $400–$800 in materials | $2,000–$5,000+ |
| Full replacement, multiple stringers | Not recommended without experience | $4,000–$8,000+ |
What You’ll Need
For wooden core stringer repairs:
- Portable fans and heaters
- Desiccant packs
- Rotary grinder or sander
- Eye protection, ear protection, dust mask
- Penetrating epoxy
- Epoxy resin plus wood flour or micro balloons for filling
- Woven fiberglass cloth
- Mixing containers and putty knives
- Gloves and respirator
For composite stringer repairs:
- Color-matched gel coat repair kit
- Grinder or sanding tool
- Portable fans and heaters
- Desiccant packs
- Eye protection, ear protection, dust mask
- Penetrating epoxy
- Thickened epoxy for filling voids
- Woven fiberglass cloth
- Polyester or epoxy resin
- Gloves and respirator
How to Protect Your Repair and Keep Stringers Healthy
The fiberglass boat stringer repair itself is only half the job. If you don’t deal with the moisture problem that caused the damage in the first place, you’ll be back doing this again in a few years.
Keep the bilge dry. Check your bilge pump regularly and make sure it’s working. Chronic standing water in the bilge is slow death for any stringer with a wood core.
Re-seal deck hardware every few years. Cleats, seat pedestals, and rod holders are all potential water entry points if their sealant cracks. Use marine-grade sealant and check them annually.
Improve bilge ventilation. If your boat sits with the hatches closed for long periods, add bilge vents or a ventilation blower. Airflow keeps humidity down and slows the rot process significantly.
Do a tap test every season. Spend ten minutes tapping a coin along your stringers before you launch each year. Catching soft spots early, when repair is still simple, saves a lot of money and effort.
Don’t ignore hairline cracks. They feel harmless but they let water seep into the laminate and wood for months or years before you notice the damage inside.
Store the boat with the drain plug out. When trailered, water needs somewhere to escape rather than sitting in the bilge all season.
After any repair, apply bilge paint. It seals the surface and makes future inspections easier — staining and soft spots show up clearly against a painted surface.
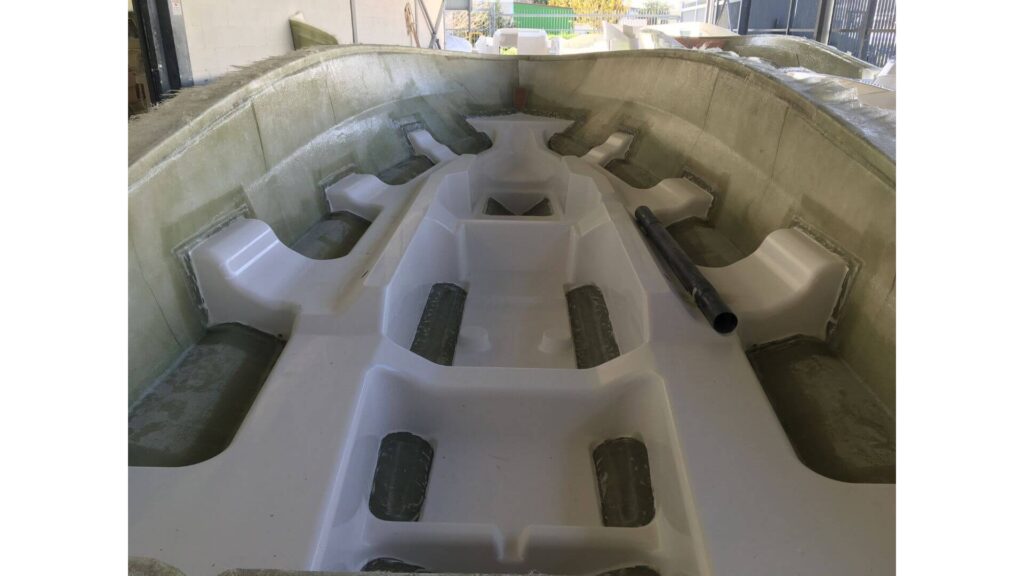
Understanding Stringer Anatomy: What You’re Actually Fixing
If you’ve never had a fiberglass boat stringer repair before, it helps to understand exactly what’s going on inside your boat before you start cutting and grinding.
Stringers run lengthwise along the inside of the hull, typically in pairs. In most fiberglass boats, each stringer is a piece of wood (or foam in newer designs) wrapped in fiberglass and bonded directly to the hull with fiberglass tabbing. The tabbing — strips of fiberglass tape laid along the base of each stringer — is what holds them to the hull.
The fiberglass skin does the structural work, and the wood gives the stringer its shape and height. When a crack forms in the fiberglass skin and water reaches the wood, the wood swells, softens, and rots. As the rot progresses, the stringer loses its stiffness and the hull starts to flex in ways it wasn’t designed to.
This is why the fiberglass encapsulation step at the end of every repair matters so much. You’re not just covering the repair — you’re rebuilding the waterproof shell that was supposed to keep the wood dry in the first place.
When you’re in there for a repair, also check the tabbing where the stringer meets the hull. If the tabbing has lifted or cracked, it’s a common water entry point and worth re-glassing while you have everything open.
Frequently Asked Questions
Here are the most common questions and answers about Fiberglass boat stringer repair.
How do I know if my stringers are actually rotten?
The most reliable method is the sharp probe test — press an awl or screwdriver firmly into the stringer. Solid wood resists; rotten wood lets the tool sink in easily or crumbles. A moisture meter reading above 20% in the wood is also a reliable sign of active rot. Tapping with a coin and listening for a hollow sound instead of a solid tap is another useful check.
Can I repair stringers without removing the floor?
Sometimes, yes. If the damage is localized and accessible through inspection ports or a removable floor section, you may be able to reach the stringer without a full floor removal. For extensive damage that runs the length of the stringer, you’ll likely need to cut out floor sections for proper access. Trying to work blind in a tight space usually leads to incomplete repairs that fail faster.
Is epoxy or polyester resin better for stringer repair?
Epoxy is the better choice for structural repairs. It bonds more strongly, resists moisture better, and adheres well to both old fiberglass and wood. Polyester is cheaper and works fine for the outer laminate layers, but for penetrating treatment and void filling, epoxy is worth the extra cost. Never apply epoxy over uncured polyester — always let polyester fully cure first.
How long does a stringer repair last?
A properly done repair — wood dried completely, penetrating epoxy applied, voids filled solid, and full fiberglass encapsulation on top — can last 10 to 20 years or more. The key is eliminating moisture completely and maintaining good bilge ventilation afterward. A repair done over damp wood or without proper encapsulation may fail within a few seasons.
What’s the difference between stringer repair and stringer replacement?
Repair means stabilizing and reinforcing the existing stringer — grinding back damaged areas, treating the wood with epoxy, filling voids, and re-glassing over the top. Replacement means removing the stringer entirely and installing a new one, which is a far bigger and more disruptive job. Repair works when the stringer still has enough sound material to build on. Replacement is needed when the damage is too extensive for repair to be structurally reliable.
Can I use the boat while waiting to do the repair?
It depends on the severity. If there is floor flex, structural cracking, or the stringer has separated from the hull, the boat should not be used until repaired — this is a safety issue. For minor surface damage with no structural compromise, limited gentle use may be okay in the short term, but don’t put the repair off. Every trip adds stress to already-weakened material and makes the eventual repair bigger and more expensive.
What type of fiberglass cloth should I use?
Woven roving or biaxial cloth (also called 1708) is the best choice for structural stringer repairs because it handles loads from multiple directions. Chopped strand mat is fine as a secondary layer or for filling irregular surfaces, but it’s weaker than woven cloth and shouldn’t be your only reinforcement on a structural repair.
How much does professional stringer repair cost?
Minor localized repair by a professional typically runs $400 to $800. A more extensive repair covering significant sections can run $1,200 to $2,400 or more. Full stringer replacement can reach $3,000 to $8,000 or higher depending on the boat’s size and how many stringers need to come out. DIY repair of a contained area can be done for $100 to $500 in materials.

Warren is the founder of BoatGenesis and brings practical experience in fiberglass boat repair, marine equipment testing, and powerboat building. He has worked on a range of repair and restoration projects and now focuses on creating clear, research-based guides to help boat owners avoid costly mistakes and make smarter maintenance decisions. Learn more about Warren.