If you’ve been putting off fiberglass boat deck replacement, you’re not alone — it’s one of the more involved projects a boat owner can tackle. But when your deck is cracked, soft, or just plain worn out, replacement isn’t optional; it’s necessary to keep your vessel safe and seaworthy.
The good news? With the right preparation, materials, and a clear step-by-step plan, fiberglass boat deck replacement is absolutely achievable — whether you’re a seasoned DIYer or taking on a major boat project for the first time.
This guide covers everything: how to assess your deck, source materials, install new fiberglass, and answer the most common questions boat owners have about the process.
Key Takeaways
- Always assess the full extent of deck damage before starting — hidden soft spots and moisture intrusion can significantly expand the scope of the project.
- A solid game plan saves time and money. Map out every phase before picking up a tool.
- You have two main options: source your own fiberglass sheets and fabricate custom sections, or order a pre-fabricated replacement deck for your specific boat model.
- Reinstalling hardware correctly — with proper sealant — is just as important as the deck installation itself.
- Depending on scope, this project may require more than one person, especially if structural work is also involved.
- Key Takeaways
- Fiberglass Boat Deck Replacement
- Labor & Scope Considerations
- Bottom Line
- Frequently Asked Questions
- 1. How do I know if my fiberglass boat deck needs replacing rather than just repairing?
- 2. How long does a fiberglass boat deck replacement take?
- 3. Can I do fiberglass boat deck replacement myself, or do I need a professional?
- 4. What materials do I need for a fiberglass deck replacement?
- 5. How much does fiberglass boat deck replacement cost?
- 6. How do I prevent the new deck from getting damaged again?
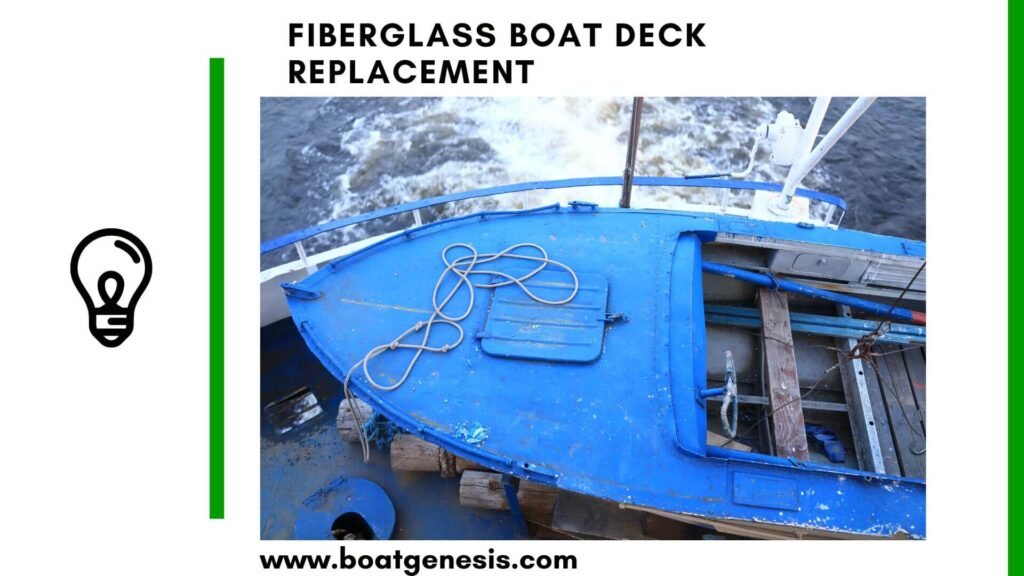
Fiberglass Boat Deck Replacement
Here are my recommended steps to replace your fiberglass boat deck.
Step 1: Assess the Existing Deck
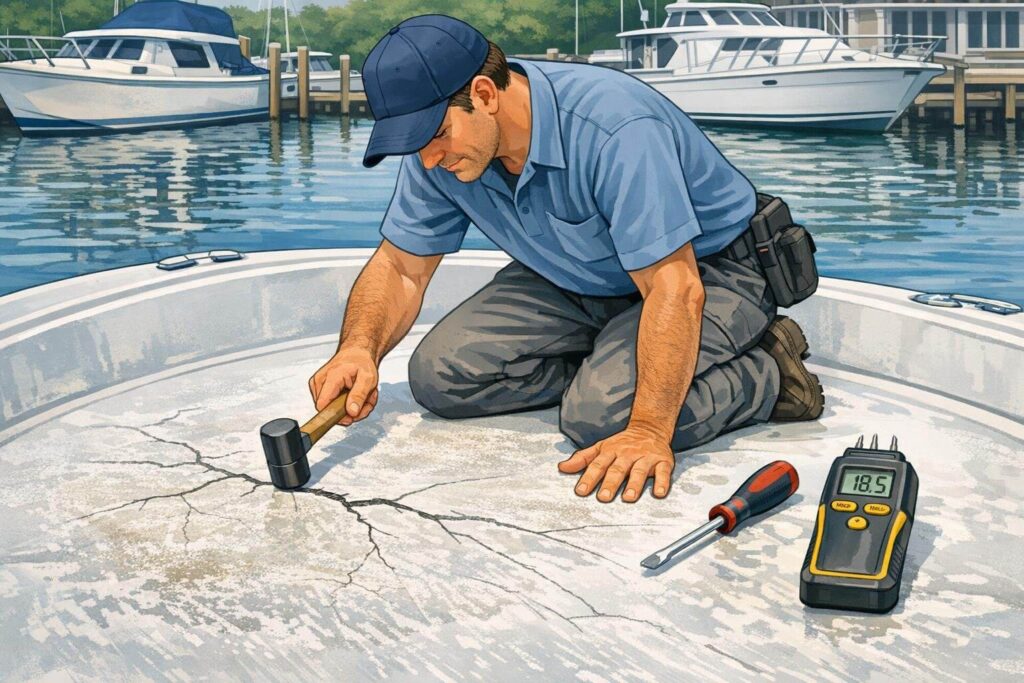
Start by thoroughly inspecting your current deck. Walk the entire surface and press down to feel for soft spots, which typically indicate water-damaged core material beneath the fiberglass skin.
Look closely for visible cracking, delamination, or gelcoat deterioration. Don’t forget to check hardware mounting points — cleats, rails, and rod holders should have secure backing plates with no signs of movement or rot.
If the underside of the deck is accessible, inspect it directly for cracks, moisture staining, or compromised gelcoat. Document everything you find, as this will shape your game plan.
Step 2: Create a Game Plan
Once you’ve confirmed the deck needs replacing, resist the urge to just dive in. A clear plan is what separates a smooth project from a costly, drawn-out one.
Map out every phase: removing hardware, cutting out old decking, prepping the substructure, installing new fiberglass, applying gelcoat, and reinstalling everything. Make sure you understand the safety protocols for power tools and chemical compounds like resins and gelcoat.
Gather all materials and tools before you begin so you’re not stopping mid-project.
Want to avoid costly fiberglass boat repair mistakes?
Learn how to inspect damage properly, decide when to DIY, and prevent expensive fiberglass problems before they start.
Step 3: Remove the Old Deck
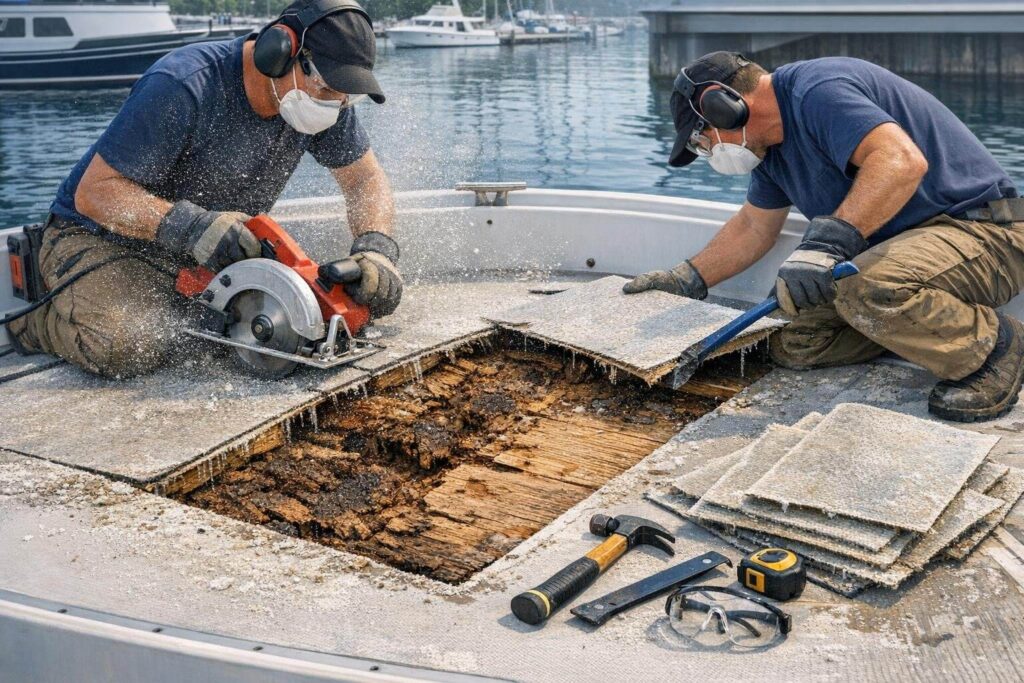
Start by removing all deck-mounted hardware — cleats, rails, fishing rod holders, electronics, and anything else fastened to the surface. Label every piece clearly so reinstallation is straightforward.
Next, carefully cut and peel up the old decking. Where possible, remove gelcoat and fiberglass in whole sections rather than small fragments — it makes cleanup easier and gives you better reference templates for the new deck.
Once the old deck is fully removed, inspect and prepare the underlying support structure. Address any damaged stringers, frames, or core material before moving forward.
Step 4: Install New Fiberglass Decking
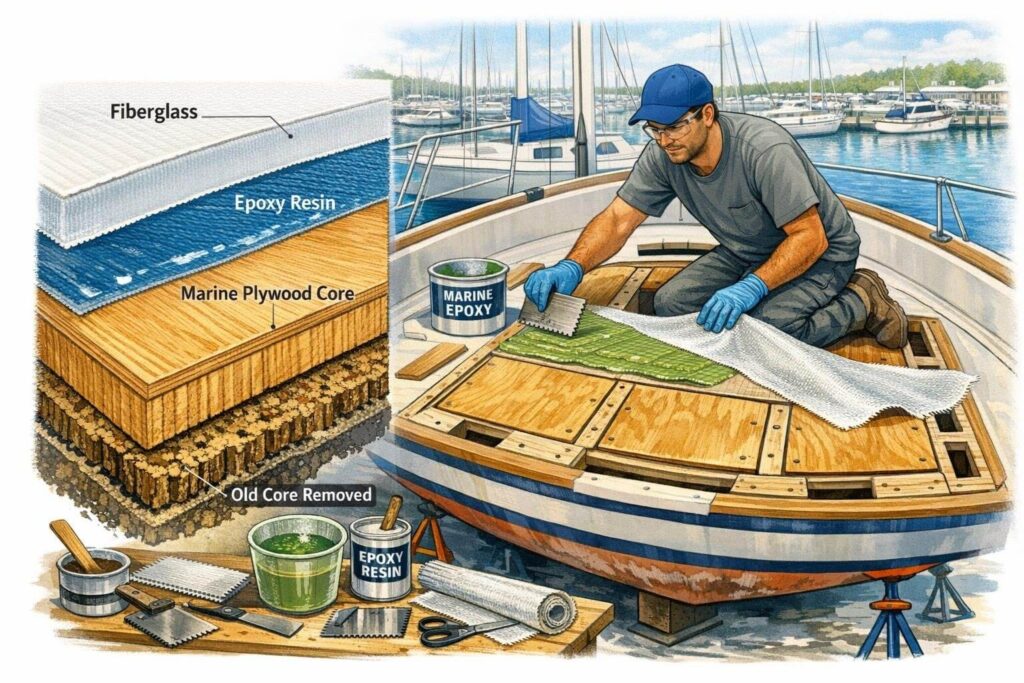
With the substructure solid, you’re ready to install the new fiberglass. Measure and cut sections of fiberglass mat and cloth to match the areas being covered.
Apply resin to adhere each layer, following recommended cure times between applications. Don’t rush this — proper cure time between layers is critical to structural integrity. Use thickened resin to fill any pits, voids, or surface imperfections as you go.
Note: This process is most relevant when replacing smaller sections of the deck. For a full deck replacement, see Steps 5 and 6 below.
Choosing the Right Core Material for Your New Deck
The fiberglass skins on your deck are only part of the story. What sits between them — the core material — determines how strong, light, and rot-resistant your new deck will be. This is a decision most guides gloss over, but it’s one of the most important choices you’ll make in this project.
There are three main options, each with real trade-offs:
Marine-grade plywood is the traditional choice and still widely used. It’s strong, easy to work with, and relatively affordable. The downside is that it’s vulnerable to moisture if your fiberglass seals ever fail — and over time, they often do. If you go this route, use only BS1088-rated marine ply and seal every edge thoroughly before laminating.
Foam core (PVC or cross-linked polyethylene) has become the go-to for modern builds. It doesn’t absorb water at all, which means a failed seal won’t lead to rot years down the line. It’s also lighter than plywood. The trade-off is that it’s less rigid under point loads — things like cleats and heavy hardware need proper backing plates to prevent compression or cracking around fasteners.
Balsa core offers an excellent stiffness-to-weight ratio and is used in many production boats. However, it shares plywood’s weakness: if water gets in, it deteriorates quickly. End-grain balsa is more resistant than flat-cut, but it still requires meticulous sealing.
A simple way to decide: if your boat originally had a plywood core and it rotted out, switching to closed-cell foam is worth the extra cost. You’re solving the root problem rather than repeating it.
Whatever material you choose, thickness matters too. Match the original core thickness as closely as possible — going thinner to save money will result in a noticeably flexier deck that can stress the fiberglass laminate over time.

This guide helps boat owners understand fiberglass damage clearly — what matters, what doesn’t, and when repairs are truly necessary, so small issues don’t turn into expensive mistakes.
See What Every Boat Owner Should Know →Step 5: Source Your Replacement Deck Material
There are a few ways to source the actual decking material, and the right choice depends on your budget and how custom the job needs to be.
Marine salvage yards are worth checking first — you can often find old boat decks that can be trimmed and adapted to fit. New fiberglass sheets or panels can also be purchased in various hatch patterns and non-skid textures to match your boat’s original look.
If you have the space and transport capability, having panels custom-cut before delivery saves significant on-site work.
Step 6: Consider a Complete Pre-Fabricated Deck (Optional)
If sourcing and fabricating materials sounds like more work than you want to take on, ordering a finished replacement deck is a solid alternative.
Many marine component manufacturers offer pre-made decks cut precisely for specific boat models — sometimes with hardware already pre-installed.
The convenience is significant: everything arrives ready to fit, with a cohesive appearance and no guesswork on dimensions. Just be prepared to pay a premium compared to piecing together your own materials.
The right choice depends on your budget, skill level, and level of involvement you want in the project.
Step 7: Reinstall Hardware
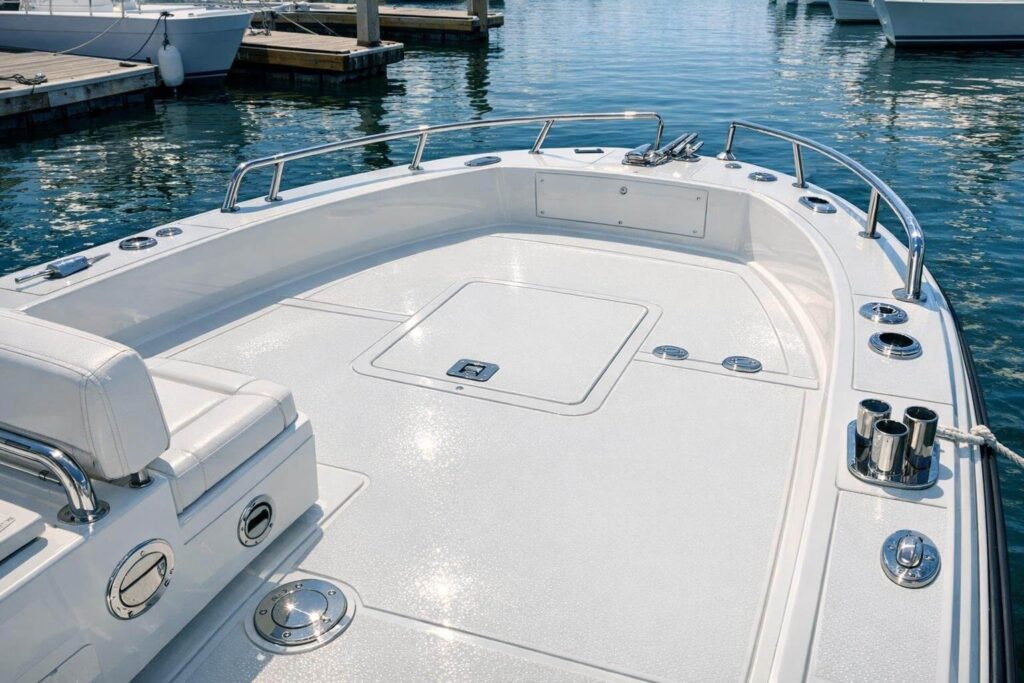
With the new deck in place, it’s time to reinstall everything that was removed. Drill through the new decking at marked locations and remount cleats, rails, rod holders, and other hardware.
Use marine-grade sealant around every fastener penetration to create a watertight seal — this is a step many people rush, and it leads to the same moisture problems that damaged the original deck.
Once all hardware is secure, reinstall electronics, seating, and any other deck items.
==>> You might also be interested in reading my fiberglass boat gunnel replacement tips here.
Labor & Scope Considerations
The deck replacement is a natural opportunity to address structural issues or upgrade other boat systems at the same time.
A simple panel swap might be a one-person job, but if you’re also repairing stringers, upgrading electrical systems, or adding plumbing, you’ll likely need an extra set of hands.
Think through the full scope honestly before you start — it’s much easier to plan for help upfront than to realize mid-project that you’re stuck.
Bottom Line
Fiberglass boat deck replacement is a significant project, but a very achievable one with the right preparation. Assess the damage thoroughly, plan every phase before you start, and don’t cut corners on material curing or hardware sealing.
Done right, a new deck doesn’t just look great — it adds years of life to your boat and gives you total confidence out on the water.
Frequently Asked Questions
1. How do I know if my fiberglass boat deck needs replacing rather than just repairing?
If damage is limited to surface cracks or small soft spots, repair is usually sufficient. Replacement becomes necessary when soft spots are widespread, the core material is extensively water-damaged or rotted, or structural integrity is compromised across a large area.
2. How long does a fiberglass boat deck replacement take?
It varies widely based on boat size and project scope. A smaller boat with a straightforward deck swap might take a weekend, while a full replacement with structural repairs could take several weeks, especially accounting for resin cure times.
3. Can I do fiberglass boat deck replacement myself, or do I need a professional?
Experienced DIYers with some fiberglass working knowledge can absolutely tackle this project. However, if the damage is extensive, involves the hull structure, or if you’re unfamiliar with resins and laminates, hiring a professional marine repair shop is the smarter — and often more cost-effective — long-term choice.
4. What materials do I need for a fiberglass deck replacement?
You’ll typically need fiberglass mat and woven cloth, polyester or epoxy resin, thickened resin or filler, gelcoat for the finished surface, a grinder, sanders, rollers, and marine-grade sealant for hardware reinstallation.
5. How much does fiberglass boat deck replacement cost?
DIY costs vary based on boat size and material choices, but budget roughly $500–$2,000+ for materials on a mid-sized boat. A full professional replacement can run $3,000–$10,000 or more depending on complexity and region.
6. How do I prevent the new deck from getting damaged again?
Use quality non-skid gelcoat or deck paint to reduce wear. Ensure all hardware penetrations are properly sealed. Inspect the deck annually for cracks or soft spots, and address minor issues early before water infiltration takes hold.

Warren is the founder of BoatGenesis and brings practical experience in fiberglass boat repair, marine equipment testing, and powerboat building. He has worked on a range of repair and restoration projects and now focuses on creating clear, research-based guides to help boat owners avoid costly mistakes and make smarter maintenance decisions. Learn more about Warren.